


For those who may not be well versed in the ways of photo enhancement, photo correction, or digital correction tools like Photoshop and Adobe Lightroom, may feel as if getting professional photos is out of reach. We are here to tell you that’s not the case, as you don’t need amazing photography editing skills to restore your images’ quality. With PhotoWorks software, you can remove blurs, adjust colors, and apply effects to create stunning photos. Learn how to enhance a photo below!

Why Would You Want to Enhance Photos in the First Place?
Generally, you would want to enhance images to make them look better, be clearer, and use it to decrease or increase the contrast of the photograph. Other reasons include the following,
You want to add on filters to change its overall look (sepia, black & white),
You want to remove blemishes from selfies,
You want to fix up noise reduction or compensate for overexposure,
You want to produce enhanced images for advertisements/social media pictures,
You want to enhance images to make them look more stunning/beautiful/eye-catching.
While you can manually edit your photographs, this takes a lot of time and knowledge. Instead, we are going to show you how to enhance an image in PhotoWorks, an automatic editing software tool for beginner and professional photographers alike.
Here is How to Enhance Photos in PhotoWorks
1 Remove Unwanted Objects from the Frame.
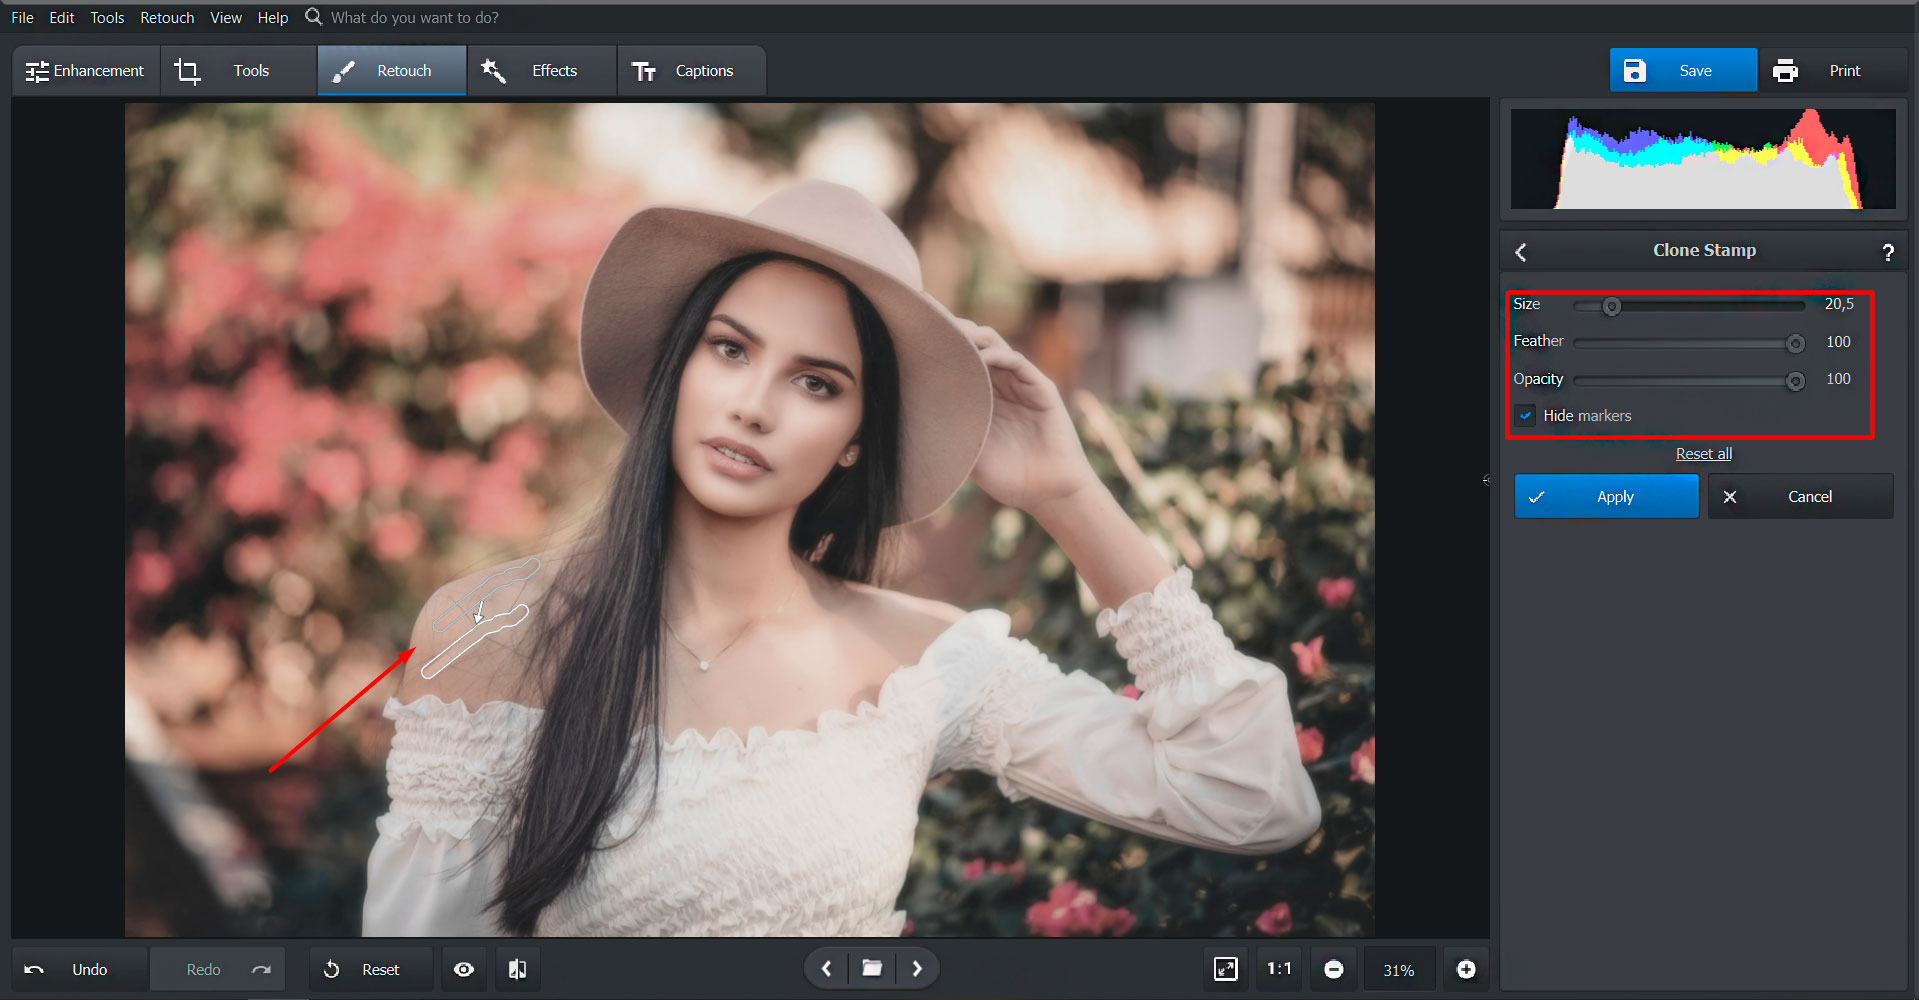
One of the biggest annoyances when snapping photographs is having unwanted objects in the frame. Sometimes, you don’t see them and take the shot and sometimes you get unlucky as soon as the shutter flies. You can remove unwanted images like photo-bombers by using the clone stamp tool. Here is how to digitally enhance a photo using the clone stamp.
Open up PhotoWorks and load in your image. Move to the Tools tab in the top of the program and click on the Clone Stamp tool from the list.
Take a minute to choose the appropriate brush size. Generally, it is a good idea to start off with the brush that is a little bit bigger than the grass blade. Use it by moving the tool along the unwanted object.
Finally, grab some pixels from a nearby area and copy – paste them to the affected area. The chosen area will be filled in and look like nothing was there to begin with.
2 Apply a Vignette Effect to Highlight the Center.
One way of guiding your viewer’s eye into the center of the image is by using a vignette. This essentially darkens or lightens in a circular fashion around the outside of the photo, making the center more focused. To apply a vignette to your photograph in PhotoWorks, do the following.
Open up your image in PhotoWorks and click on the Tools tab at the top of the program. Find Vignette and click on it.
Then use the slider to darken the edges of your image.
You can also change the size and form of the vignette by using the roundness and feather settings. These will change how apparent the roundness of the vignette is and it will soften or harden the vignette’s appearance.

3 Sharpen Blurry Photos.
One way of dealing with blurry photographs is to sharpen them so that the elements are seen better.
Open up your photograph in PhotoWorks and zoom in until you can see the smaller elements.
In the Colors tab, you will find the sharpness tab. Use the slider in the Sharpen section to find the amount that works best for your image.
To keep the image looking and feeling natural, use the radius and threshold settings to customize the feel.

4 Fix Poor Lighting & Exposure Levels.
Poor lighting can completely ruin a photograph if it conceals important details or causes the picture to come out in low quality. In order to fix this, you will need to correct the exposure levels.
Using Highlights and Shadows, you can lighten or darken specific areas in your photo. Just simply drag the sliders.
When you have bad lighting, the white within the image will be badly affected. To make the photograph warmer, use the Temperature slider.
Use the Exposure slider to darken or lighten the image. This is found under the tone section of PhotoWorks.
You can also try using the automatic enhancement button, as PhotoWorks uses smart image editing algorithms to do the work for you.

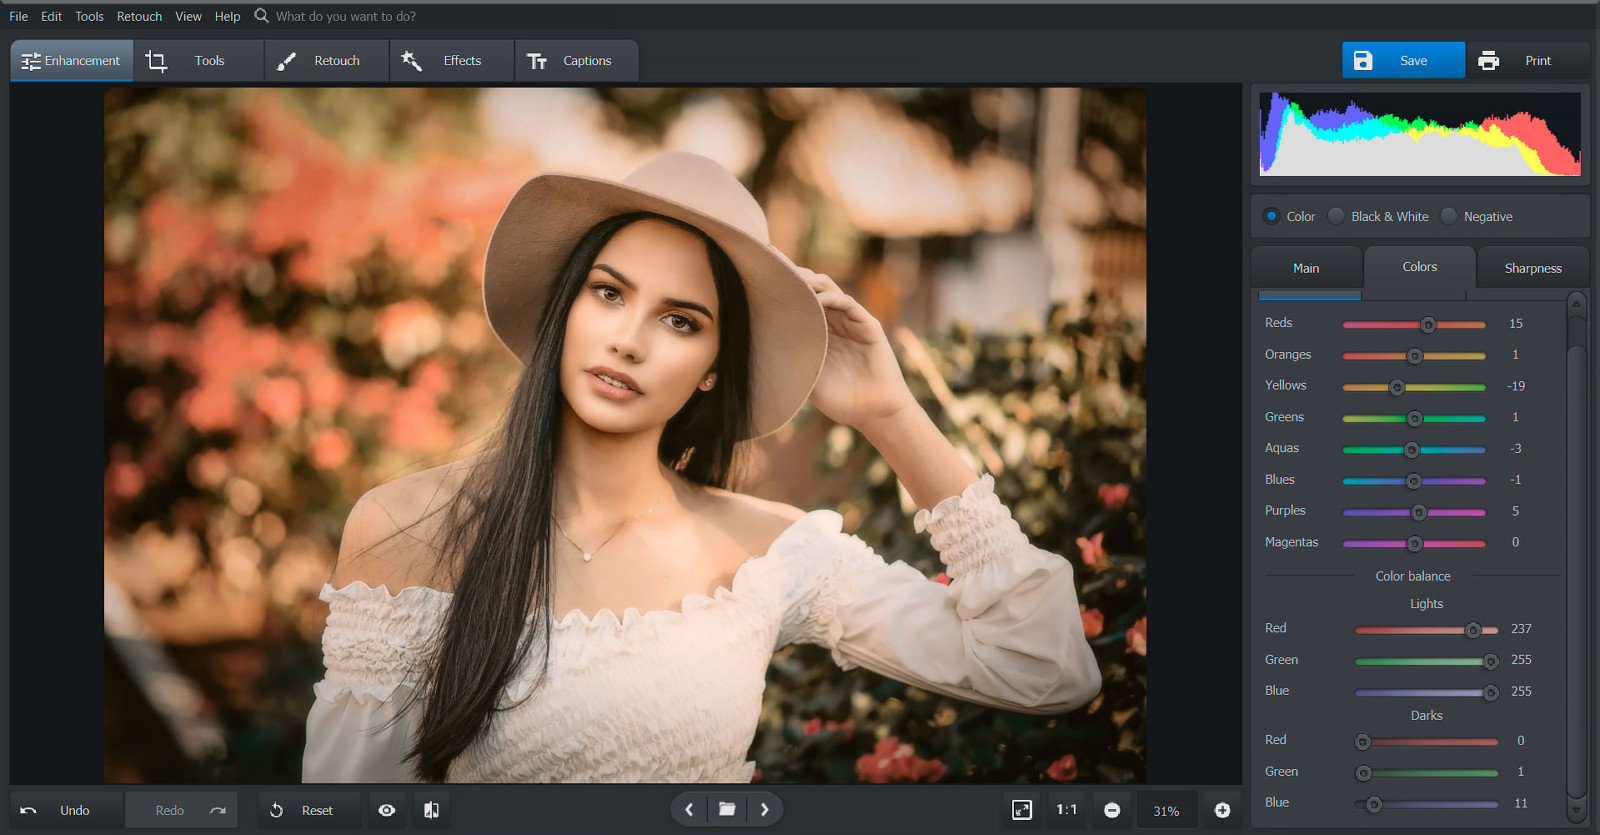
5 Color Correct to Make it Pop.
Changing the overall color tones is a fantastic way to enhance images because it takes average shots and truly makes them pop.
Find the Color tab and use the sliders to change which colors are being represented in your photos (hues), change the saturation of your photos (reducing/increasing greys), and change the luminance to increase or decrease the ratio of white and black in your photo.
Change up the colors of specific areas in your photos by clicking on the Saturation tab and moving the slider of the color you want to change. You can make your hues more or less prominent.
If you want to adjust the overall Color balance and increase the lighting in the photo, use the Tone mapping tool. You can find this under Color balance.
You can also learn how to enhance a picture through the use of PhotoWorks retouching and cropping tools. The first will allow you to remove any defects such as wrinkles and skin blemishes (adjustment brush), and the second will allow you to crop out parts of your image that are not jiving with the rest of the scene (cropping tool).


