


Camera technology is advancing at a very fast pace. Sensors are able to pack more and more megapixels and overall the quality seems to improve by a lot. Even in the lower price segments, You can get Your hands on cameras that easily produce gallery quality prints that You can print very large.
Yet, there is one problem that digital cameras are still facing and that is the dynamic range and the risk of clipping highlights. Clipping highlights simply mean that parts of the image are overexposed and that there isn’t any information available anymore.
How do clipping highlights look like and what can You do to prevent them?
I will show You one technique that I am using to make a better use of the digital sensor and preserve more information.
Risks of Overexposing Images
Usually, when I am in Berlin, the weather is kind of dull and not very exciting. Sure, in the summer there might be the sun visible at times, but even then the contrast is very limited most of the time.
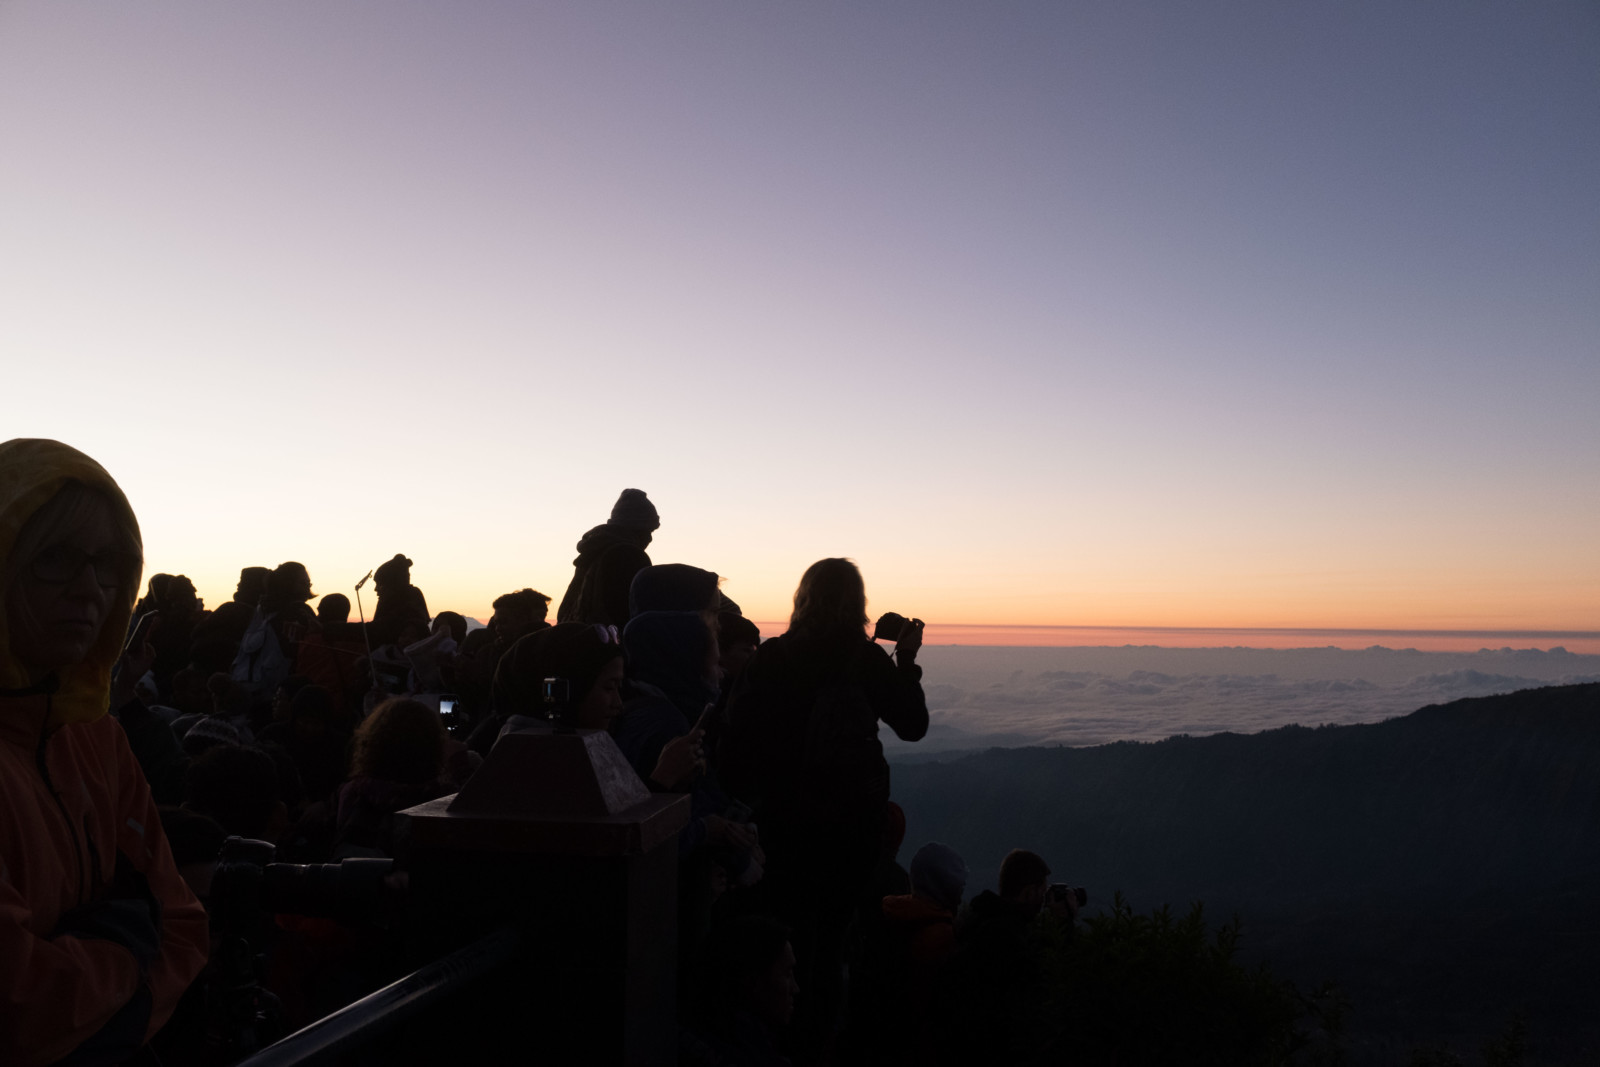
When traveling through Southeast Asia, I faced many situations where there was a much more extreme contrast. Whether I was staying in a small village near a mountain or visiting an elephant sanctuary. Those are kind of “extreme” situations for the camera and the difference of light is huge.
In the elephant sanctuary in Chiang Mai, the jungle casts a very strong shadow and the trees provide a big relieve against the sun. However, in the background, there is still the sun shining through the leaves and that will force us to choose if we either expose, so that the subject is very well visible, or that the highlights won’t be clipping.
Limitations of Dynamic Range
Whenever You are in such a situation where You pretty much want to show all of the pictures and not have any clipping areas, You have to make sacrifices. Sometimes, I am okay with having dark subjects and that is the basis for Silhouette Photography. Other times, I want to shoot against the sky or the sun and still be able to see the subject very clearly.
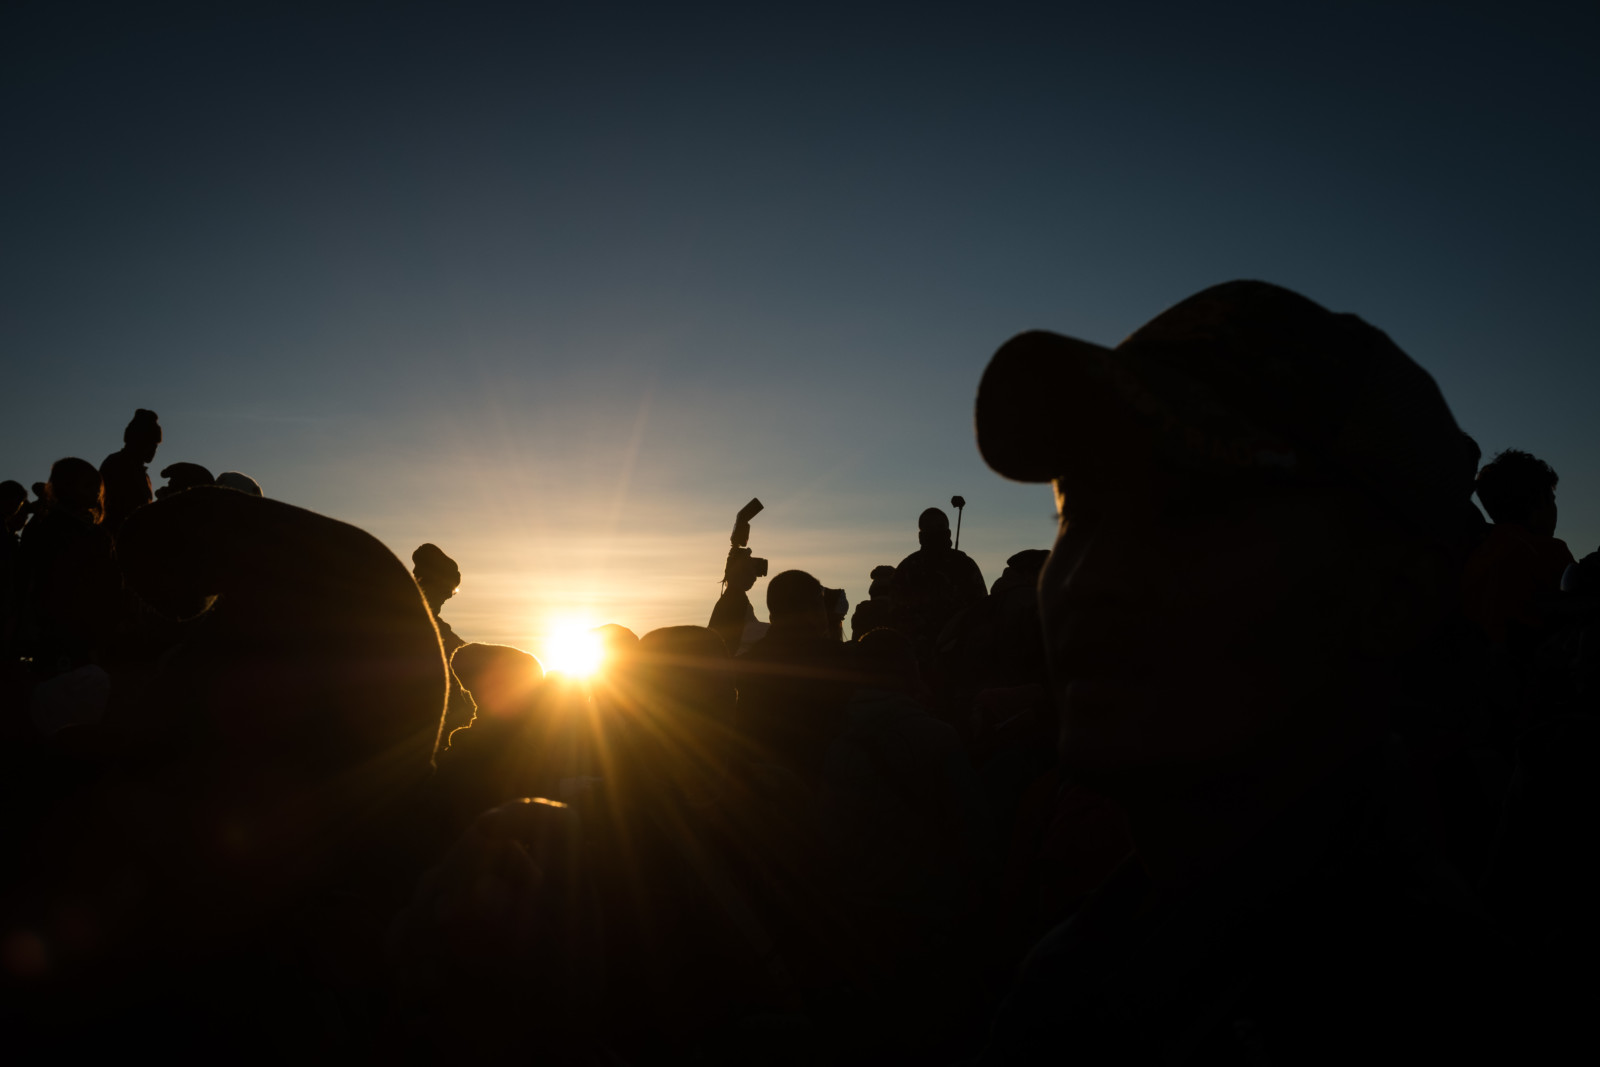
When You are exposing automatically, the camera will usually choose to expose the subject correctly. There are different ways of exposing and You can also use a spot measurement at a specific point, but in general, if You are following an automatic exposure, You will overexpose the highlights.
Digital sensors are great in many ways, but when it comes to catching too much light, they really are lackluster. Just a slight overexposure can cause a loss of information. That the exposure isn’t nailed 100% is not something that we should worry about. Since we can recover the exposure in the post-processing, a slight over or underexposure is not the end of the world.
However, when highlights are slightly overexposed and it results in clipping areas, that even post-processing will not give You that information back. These areas will forever remain without information and don’t look very pleasant in the final picture.
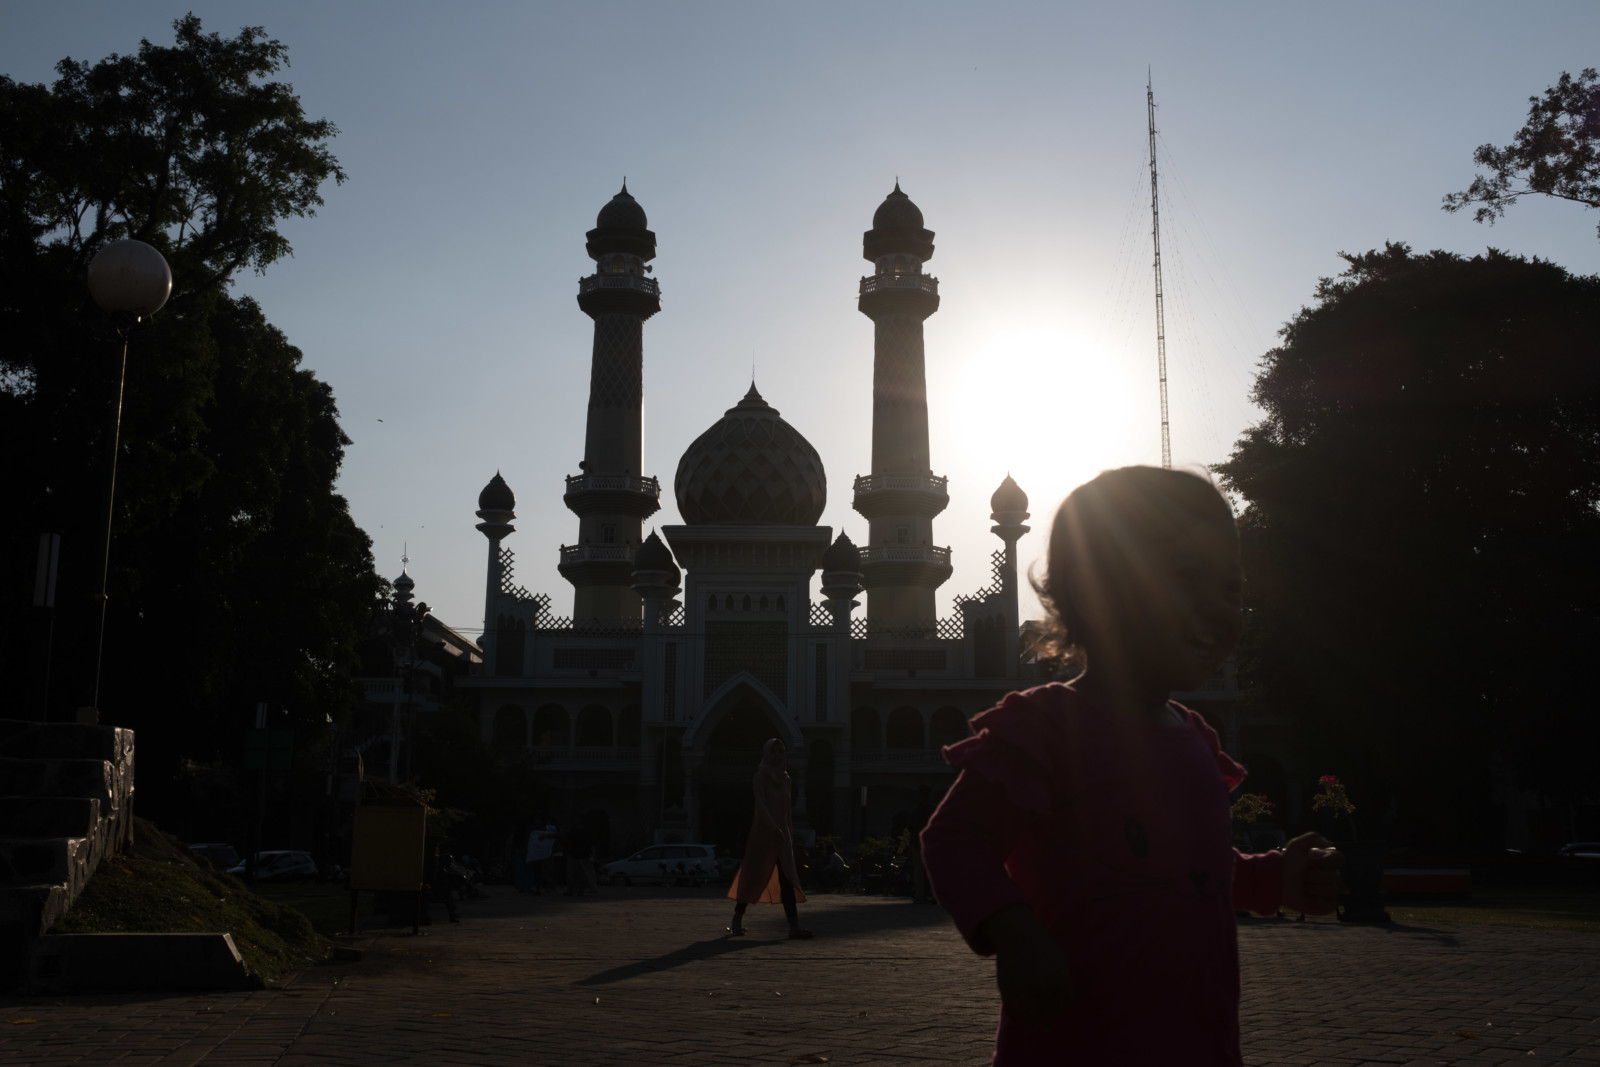

So instead of a blue sky with lots of details, You just get a very bright area where no detail is visible.
Strengths of the RAW Format
Although the RAW image format may not work very well when put to test against highlights, it is very powerful when trying to recover information from dark areas.
Whereas information in the highlights can be lost pretty easily and the images are very “fragile” in this regards, the shadows and dark area give us a lot more freedom. Even in areas that appear to be pitch-black, there will be information that You can use and post-process the image to recover this information.
In Lightroom, You can recover those pitch-black areas to appear pretty normal and the image quality doesn’t suffer very much. Of course, during the recovering process, there will be noise generated and while the image quality in the edited areas may not be perfect, You still can recover the information and get a result, where all the areas are filled with details.
Reading the Histogram
The histogram is a super useful tool, that shows You the distribution of light. To the left, You find the dark areas and going to the right are the bright areas. The histogram does help You to evaluate if there are “problematic” areas in Your picture. For example, when You see a distribution that is heavily spiking to the right-side, that is an indicator that Your picture is overexposed and that there are clipping areas.
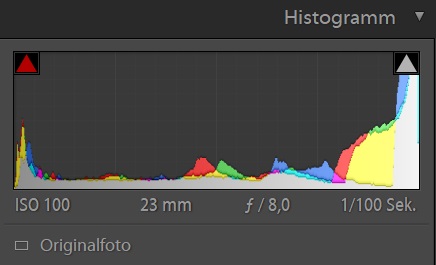
When You are editing Your pictures in Lightroom, the histogram does have a little feature, that can even show You clipping areas. There are arrows to the left and right side and upon clicking, they will mark the areas without information red.
If You are not able to click the arrow, this is a good sign because it means that no area does have clipping features.
Underexposing the Image
How can You prevent the clipping areas now that You know how to identify the problematic areas?
As You know by now, the camera has a much easier time to handle areas, that are too dark, in contrast to areas that are too bright. To use this characteristic, You can underexpose the image on purpose. Using the automatic mode can be a little difficult, but there are multiple ways of forcing the camera to underexpose the image.
The first option would be to use the spot metering and using the brightest spot in the picture for metering. Most of the time, this would mean that You are using the sun as an indicator for the correct settings. The camera will adjust the settings so that the sun or the sky won’t be too bright. At the same time, this will lead to most of the image being underexposed.
An alternative can be achieved by using a zone metering but using the exposure compensation simultaneously. Most cameras are able to compensate up to three stops. This could mean, that You are metering as You are used to and using the exposure compensation to avoid clipping in the image.
Nonetheless, the automatic mode is far from perfect. Especially when You are photographing in difficult light situations, the camera won’t handle it very intelligently. Even when metering to the sun, the sun will be clipping and other highlights may still be too bright.
Therefore, I prefer to use the manual mode as it does give me full control over the scene. With the automatic mode, there is also the problem, that You have to nail the focus and metering at the same time. In combination this can become a problem and using the manual mode to achieve the correct exposure is definitely advised on my part.
How does the underexposed image look like?
The theory can sound difficult at times and my technique becomes much easier understandable when looking at the real results.
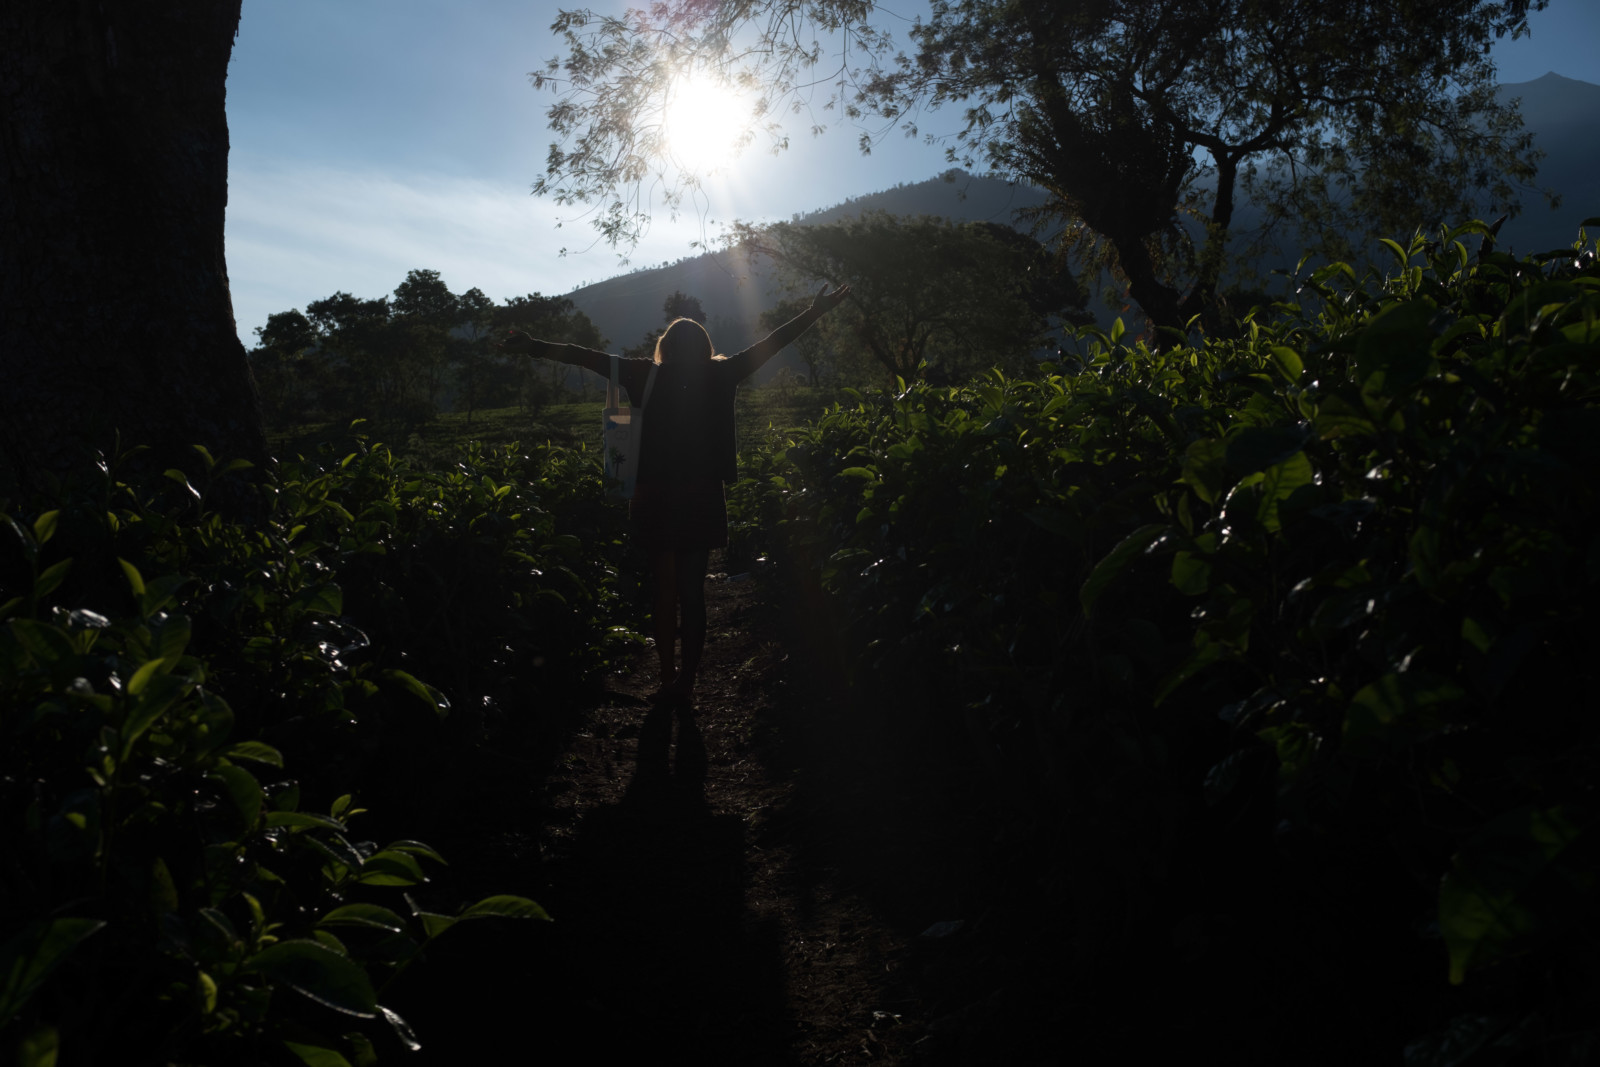
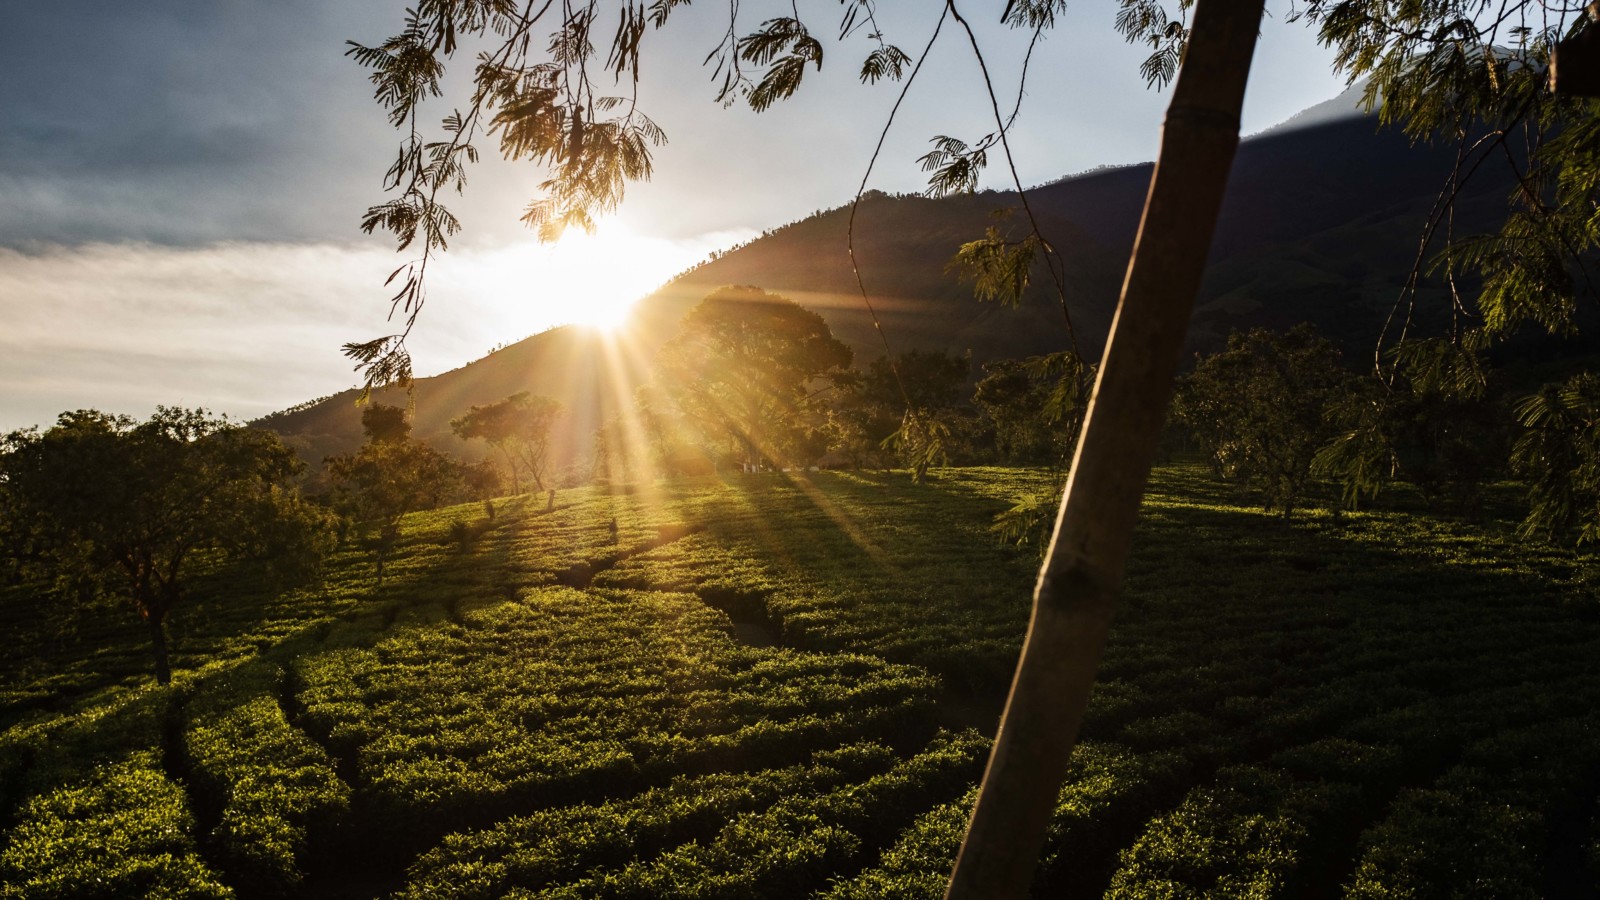
Here You can see the original image that I shot in a tea plantage in Indonesia and how much it was underexposed. At first, it may seem as if there may only be dark areas and that the image might have been a complete failure. But if You continue and apply the post-processing correctly, You are able to recover the shadows very easily.

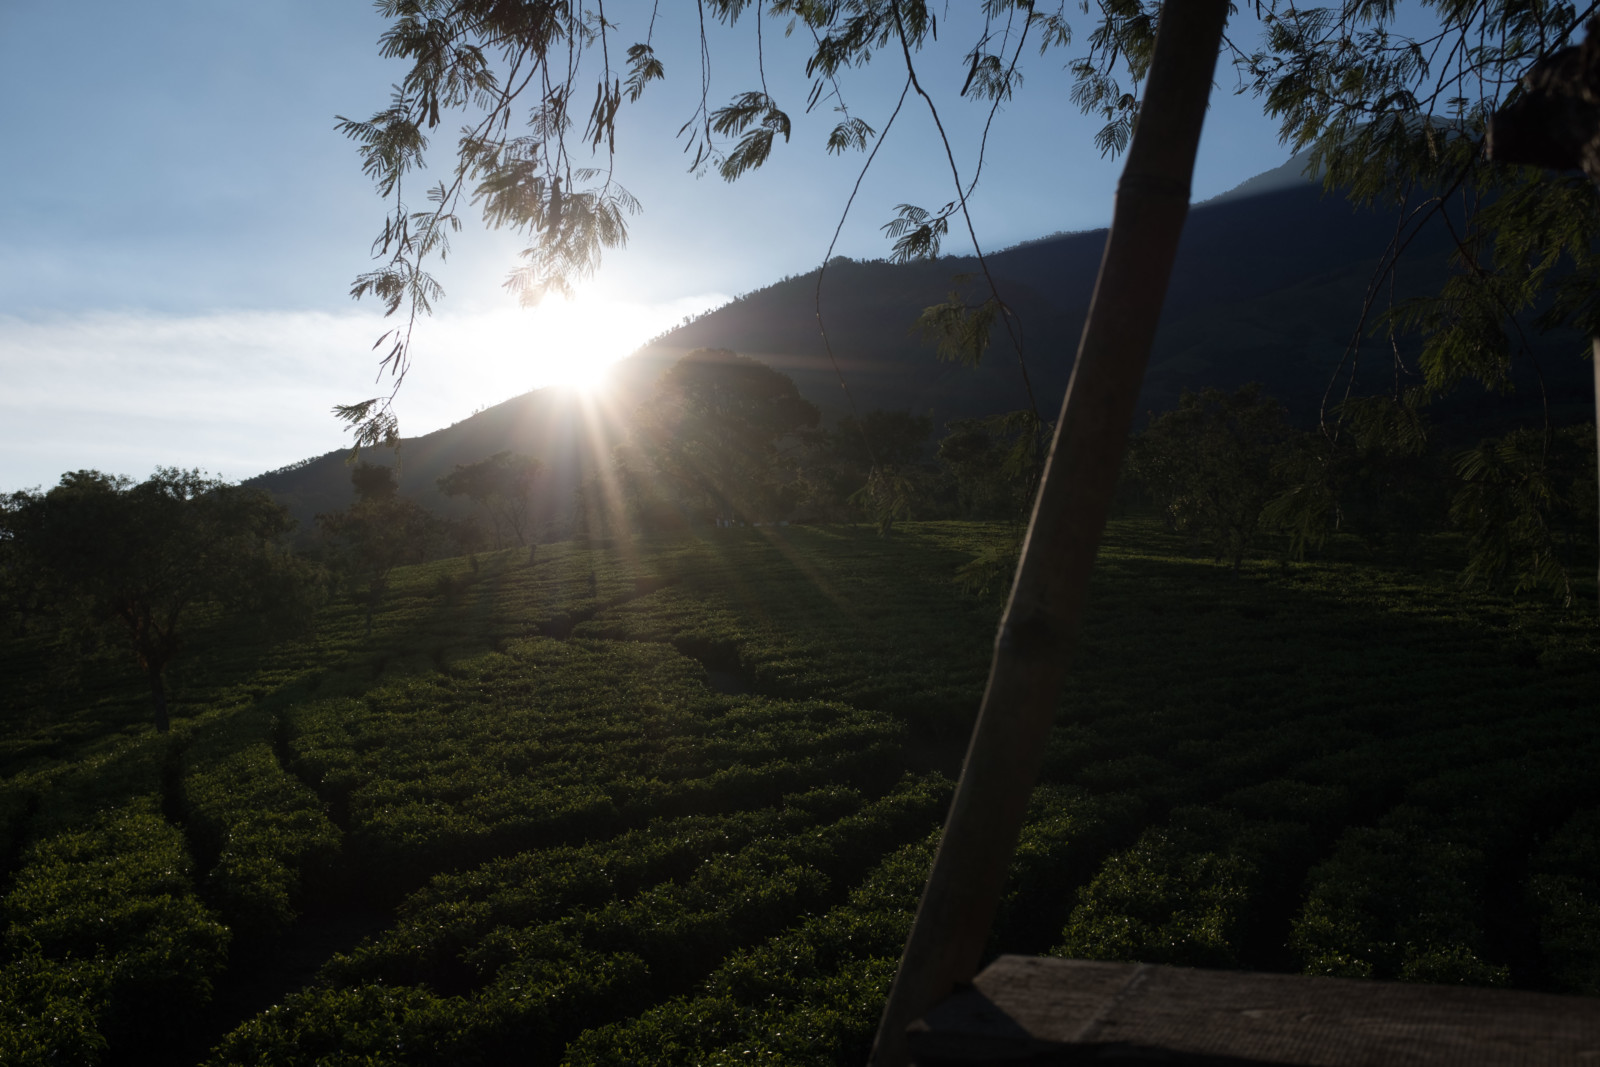
All You have to do in the next step is to raise the overall exposure until the highlights are at an optimal level. If You are not underexposing very extremely, the image could also already be well-exposed and all You have to do is now to raise the shadows.
There are many different ways of recovering the image and not only the shadows should be raised, but the blacks can also be increased. In the end, You will get a result that is near a perfectly exposed image and You won’t have any clipped areas in the picture.
Final Remarks to the Underexposing Technique
This technique is easy to do if You don’t have any other equipment available. Ideally, You could also use a flash to brighten the foreground, but in an open environment, You would need a very strong flash and often times it would look very unnaturally.
While photographing the miners on Mount Ijen I applied a flash because I felt it would bring out the devastating character of the area much more. But if Your goal is to create very natural images, then a flash might not always be applicable.
For the pictures, I used the Fuji X100F and with Your camera, You might run into different experiences. Therefore, I can only speak for the X100F where underexposing yielded great results for me. Every sensor is different and maybe Your camera has a higher dynamic range where the highlights don’t become such a problem very quickly.
Also, the image quality is not perfect and if You have the chance, You should always expose the image that it will be correct in Your eyes. Underexposing is only useful for me when I am photographing in situations with stark contrast.
Do You have different ways of handling difficult light situations? Would be interesting to hear how You are using Your gear to the maximum potential.


