


Street Photography is about authentic scenes and not artificially created art in post-processing. Nevertheless, with the right editing, You are able to emphasize the character of the Street Photograph and can also push Your personal style. The post-processing should be very simple and I am usually done within a few clicks, but in this Street Photography Editing Guide, I want to explain the steps that are behind every single image of mine. Editing a Street Photograph should be part of Your normal workflow and not be too time-consuming. You can spice up Your photographs, but You can not change the basic flavor.
Basic Editing of Street Photographs in Lightroom
Documentary Photography shouldn’t require any heavy post-processing. Compared to other genres where the retouching is often a more time-consuming activity than the shooting itself, in Street Photography, we are lucky that our photos are created on the street and not in software.
Personally, that is a lot more satisfying process for me, because the images matter more than any retouching skill.
On the other hand, a bad Street Photograph will always be bad and no amount of editing will turn it into a good one.
Street Photography also doesn’t require Photoshop or any other complicated/complex editing software. Lightroom as an easy tool is more than enough for Street Photography.
Techniques like frequency separation are not needed and would only discard the true character of the image.
Lightroom offers all the options that I need to edit all my Street Photographs in a few minutes.
The Editing Workflow in Lightroom
To sum up the following process, I use more or less the same sliders for every image that I process. This means that the workflow is very much the same. Here are the steps from RAW to final.
- Exposure
- White Balance
- Contrast
- Clarity
- Cropping
- Vignetting
- Nik-Collection Filter
For a normal process, it doesn’t need more than adjusting these sliders and adding a filter in the Nik-Collection.
Editing Street Photographs in Lightroom
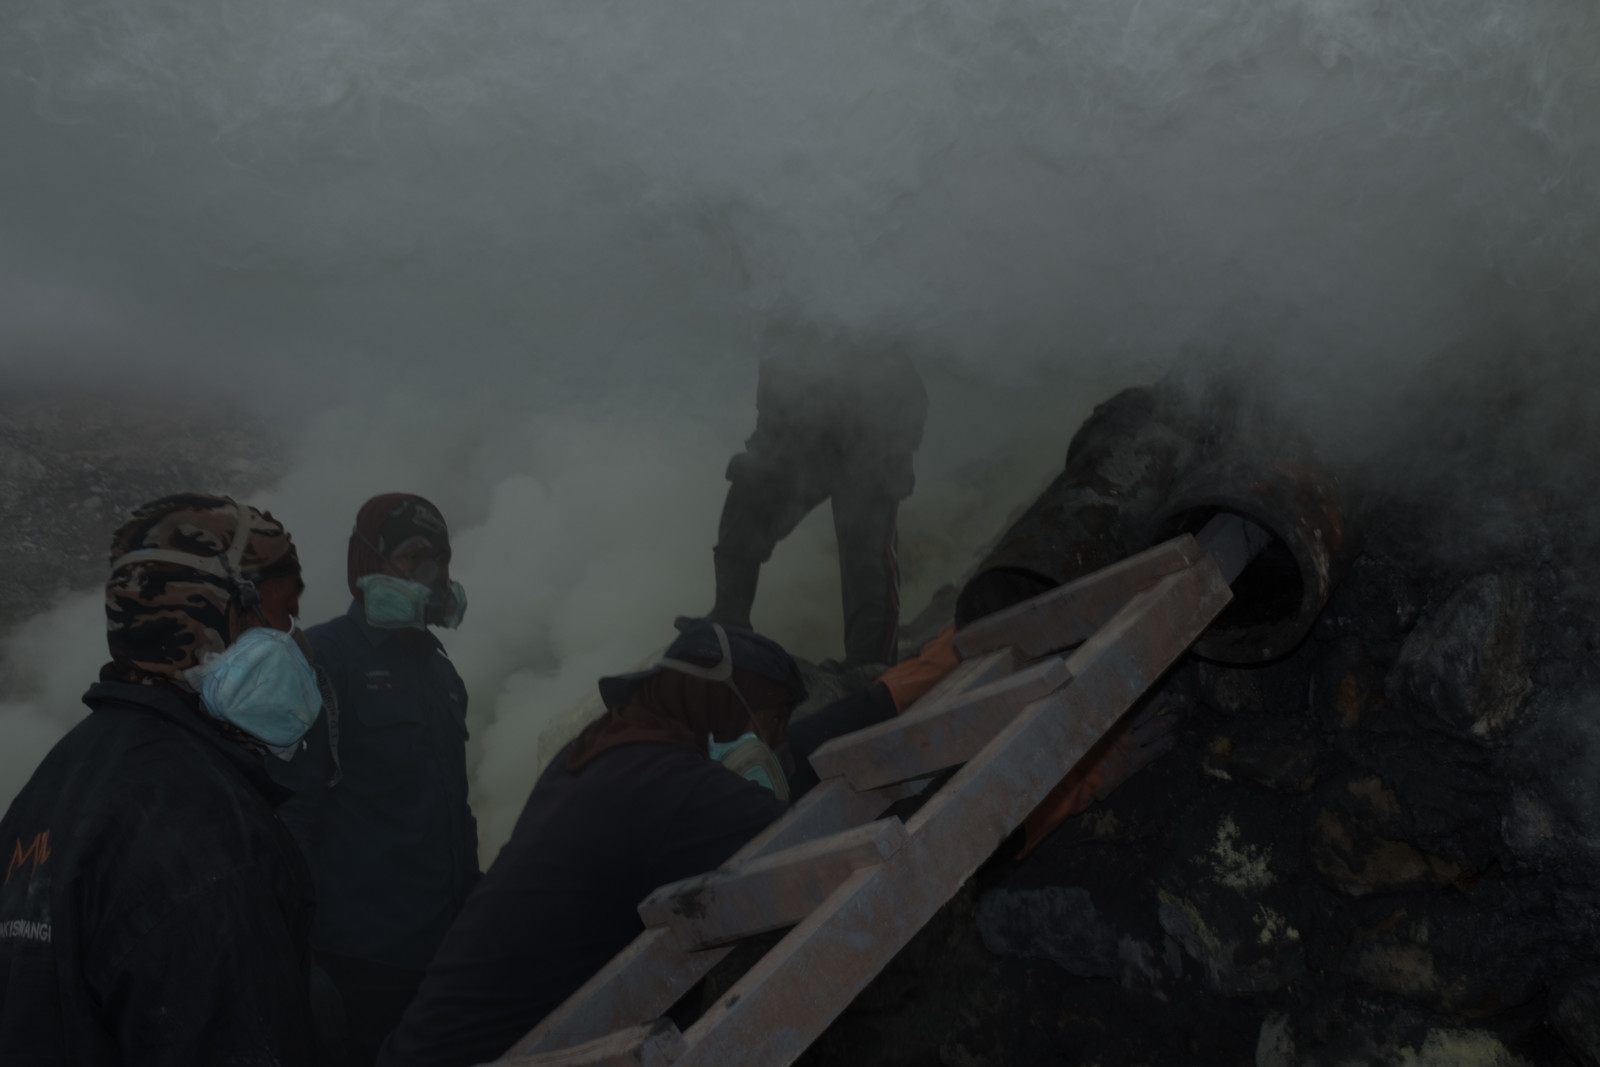
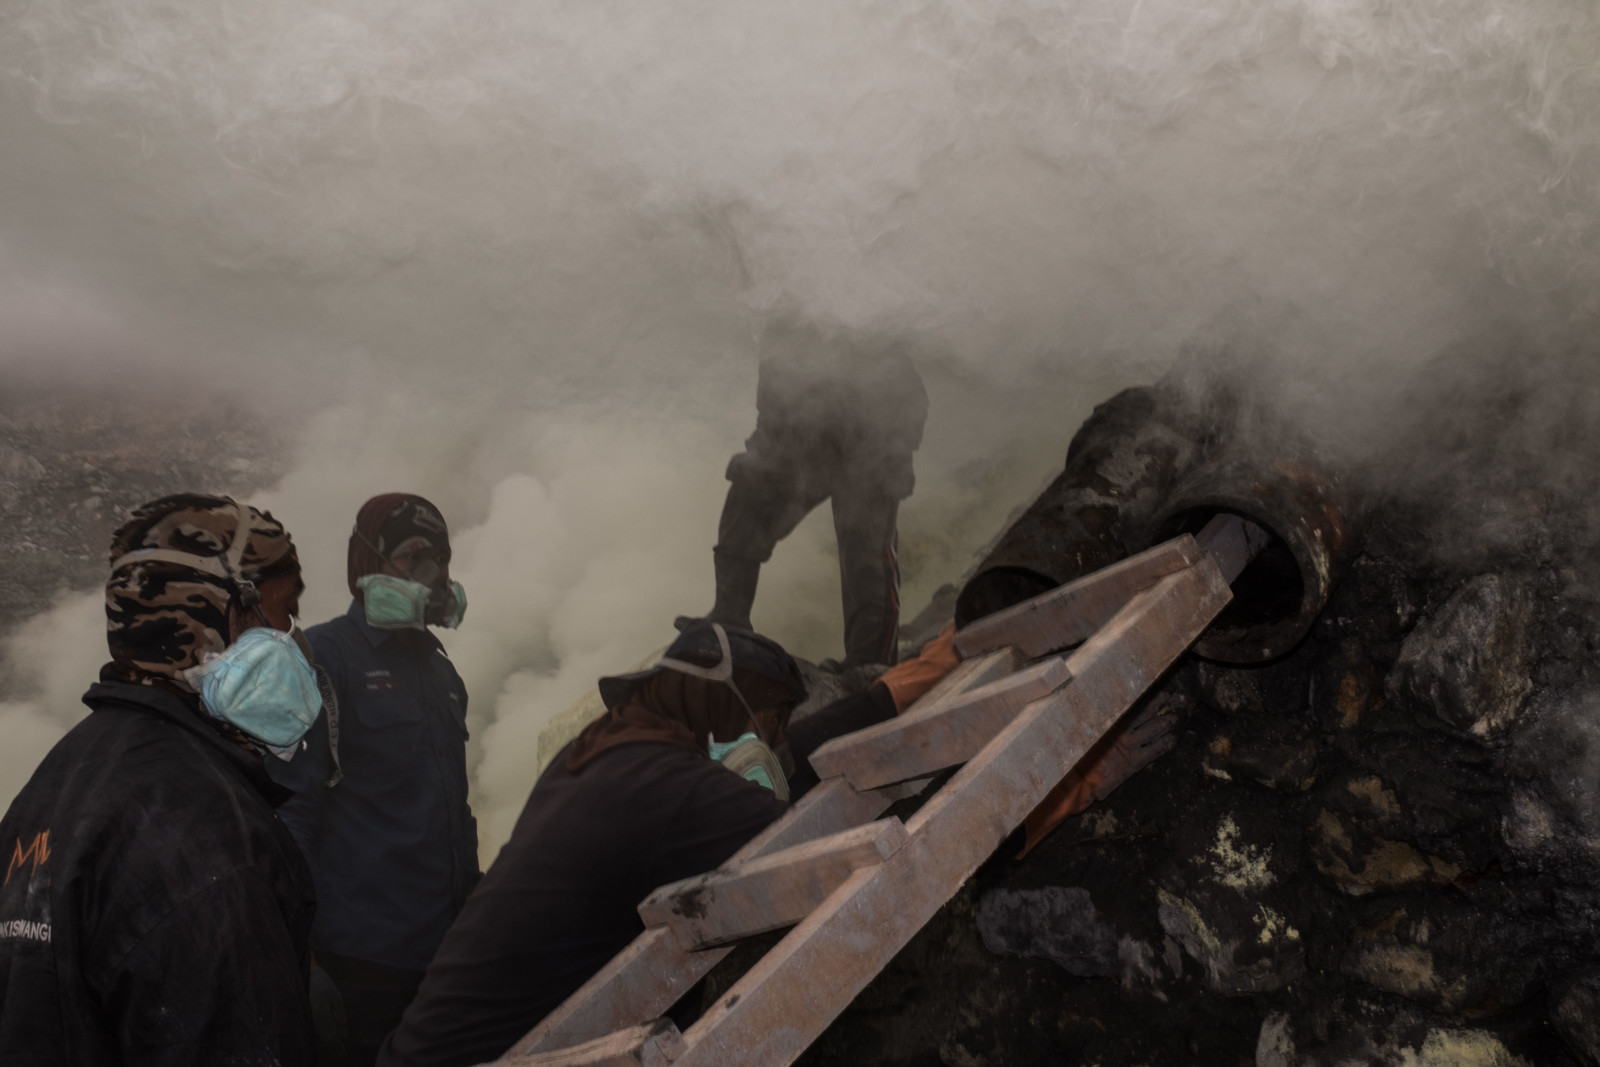
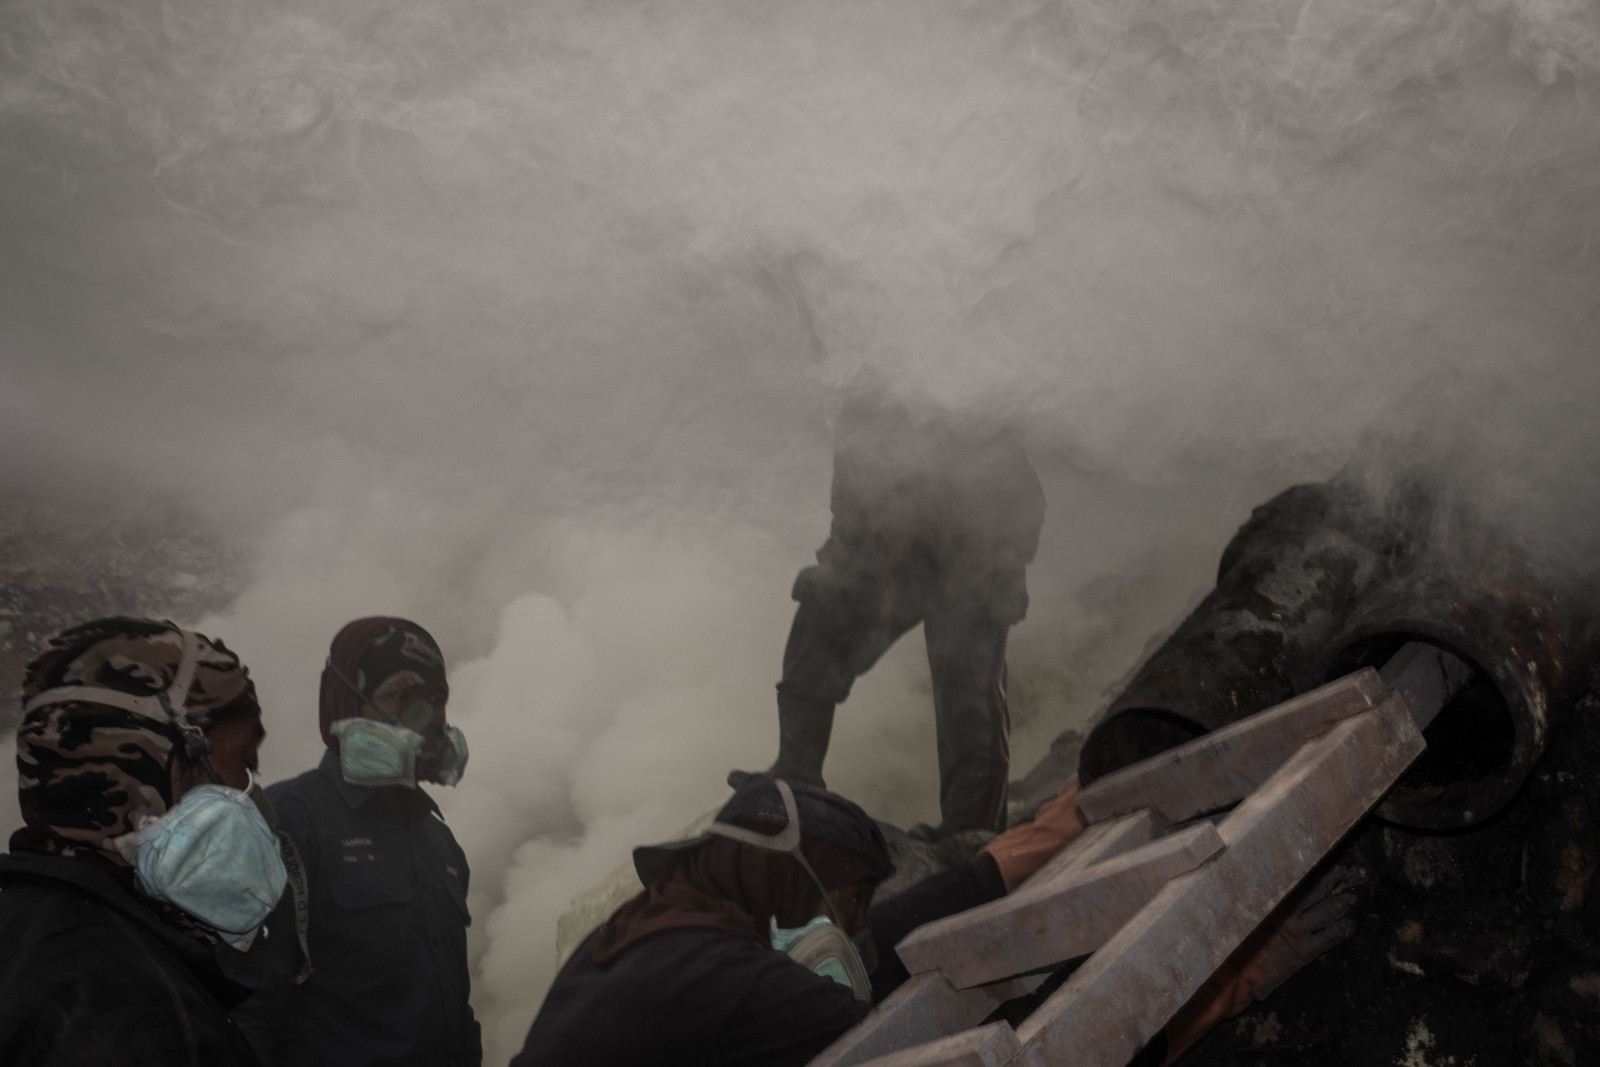
For reference, I will be using a Photograph that I have taken while photographing the sulfur miners in Mount Ijen. The environment is very harsh, the light conditions are bad and smoke limits the vision.
Exposure
First thing I do is setting is adjusting the exposure. Usually, I underexpose my photographs in-camera of around one stop. You can use the exposure triangle to underexpose Your images. Especially when using a flash, I feel safer underexposing the images, than blowing out the highlights.
Quality-wise it is also not a huge loss to increase the exposure in Lightroom. I leave my ISO at 100, so the noise increase from increasing the exposure afterward is very marginal.
In this case, I decided to increase the exposure by 1,03. The value can depend on your appeal and Street Photographs don’t need always to be bright and lit so that You can see everything in the image. Often I prefer a darker look which can be more mystical.
White Balance
Next up I decided to adjust the white balance.
Note: The white balance is irrelevant for black&white images. If You prefer shooting monochrome, You can skip this part.
For the camera settings, I use the automatic detection of my FujiX100F. Unfortunately, in those extreme situations the white balance is very off most of the time and in this situation, the scenery was displayed in a very cold blue tone, although the sulfur and smoke are very yellow.
The camera probably tried to compensate for this extreme situation but alters the photograph from my real impression too much.
As a first step using the automatic detection in Lightroom works most of the time very well. From there You can adjust the details as You like to.
The white balance becomes increasingly more important when You are shooting a series. Having a cohesive white balance is a huge step towards creating a project that looks like one common project, rather than throwing single images together.
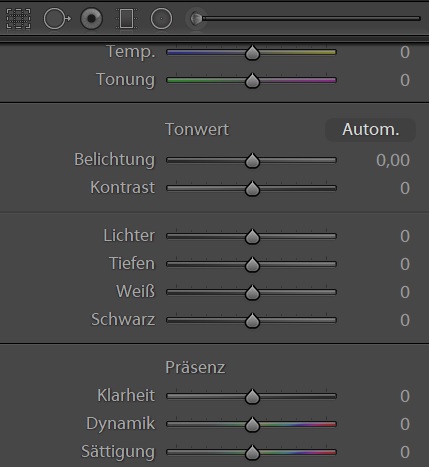
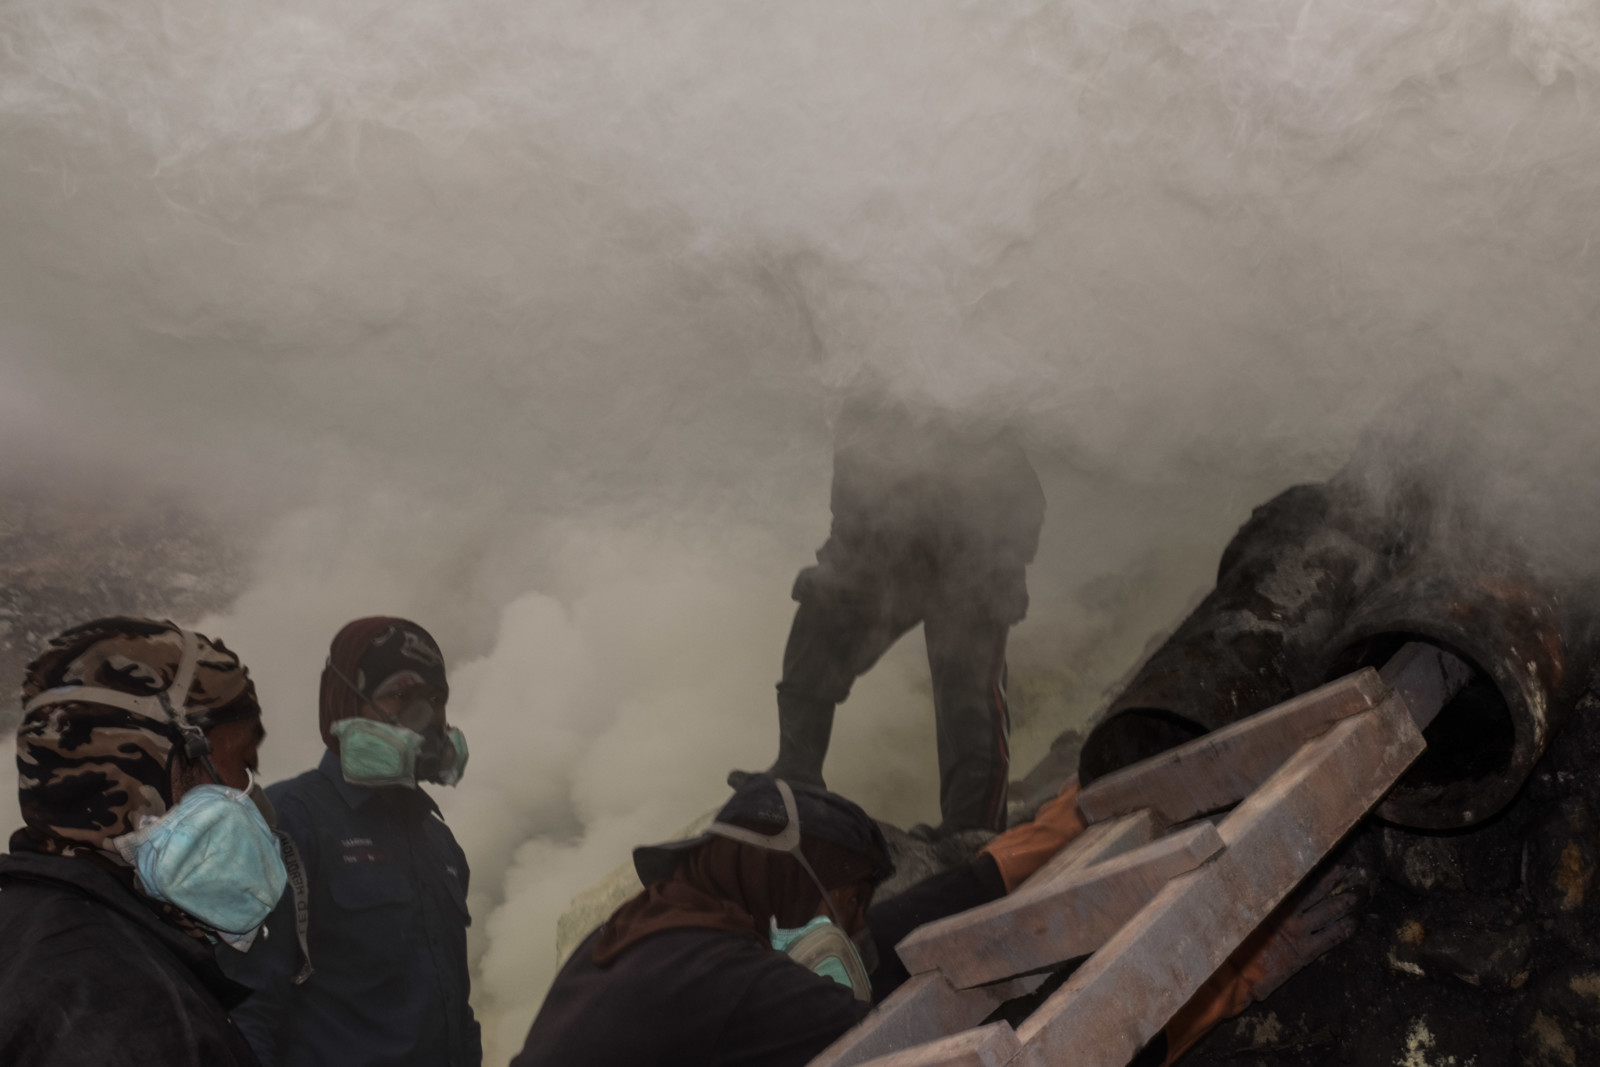
In this image, I increased the temperature from 5400 to 6450 and the tone to +17.
Now the colors match my impression that I had while being at the location.
Contrast
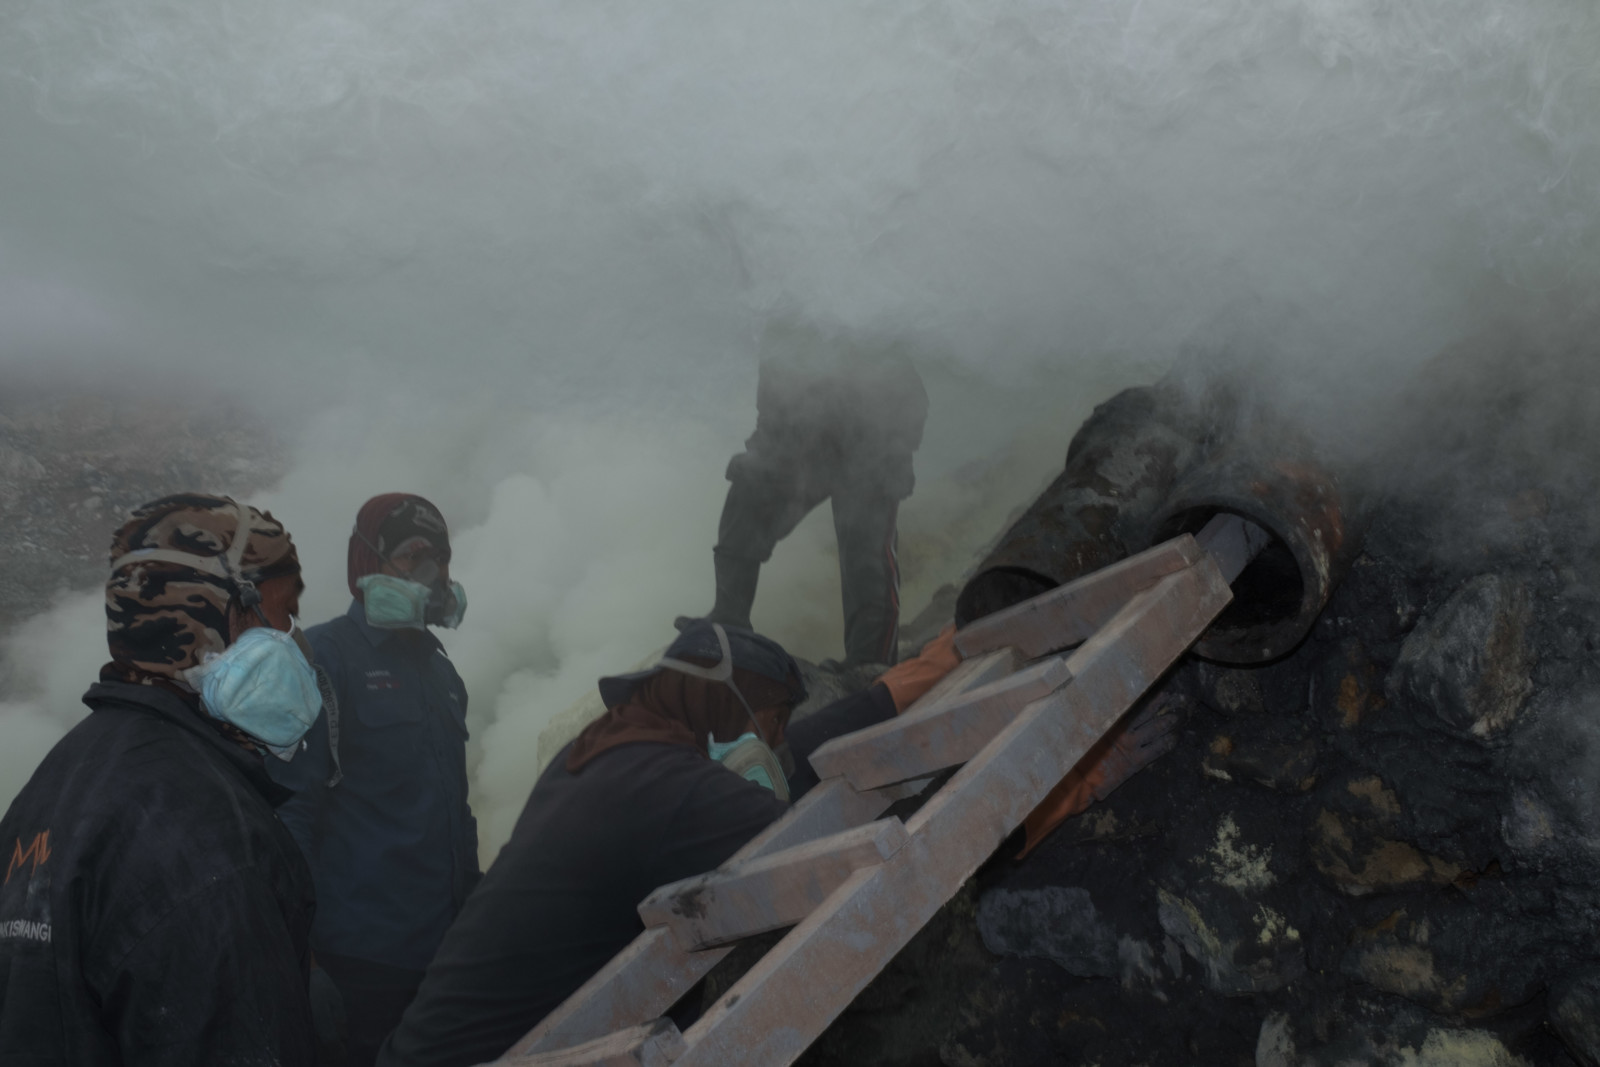
At the moment, the photograph seems a little bit flat. The sun wasn’t shining at all, the smoke doesn’t do any favor to the light as well and therefore increasing the contrast in Lightroom is a legitimate way to make the colors pop a little bit more.
The contrast button in Lightroom splits darker areas from brighter ones, to create a much more clear separation.
In Black&White photographs a deliberate use of the contrast can improve the photograph by a lot. Since monochrome focuses more on the difference between light and darkness, added contrast can even further this characteristic if You are looking for that.

The contrast was set to +40.
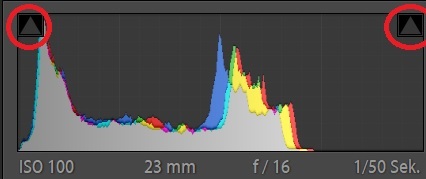
Just keep an eye on not overdoing the contrast and creating areas that are just dark, or too bright. You can check the clipping areas via the triangles in the histogram.
Clarity
Another way to increase the contrast is by using the clarity slider. Other than the contrast slider which affects the total spectrum of tones, the clarity slider is heavier on the mid-tones and increases contrast for that special area.
Therefore I use the contrast first to set the upper and lower boundaries and set the clarity afterward.
With added clarity, You shouldn’t have any problem with clipping in dark or bright areas.
On the other hand, You need to be careful not to overdo the clarity. Adding contrast in the mid-tones makes the pictures more interesting, but also can look more like shitty HDR photographs that absolutely don’t resemble any reality anymore.
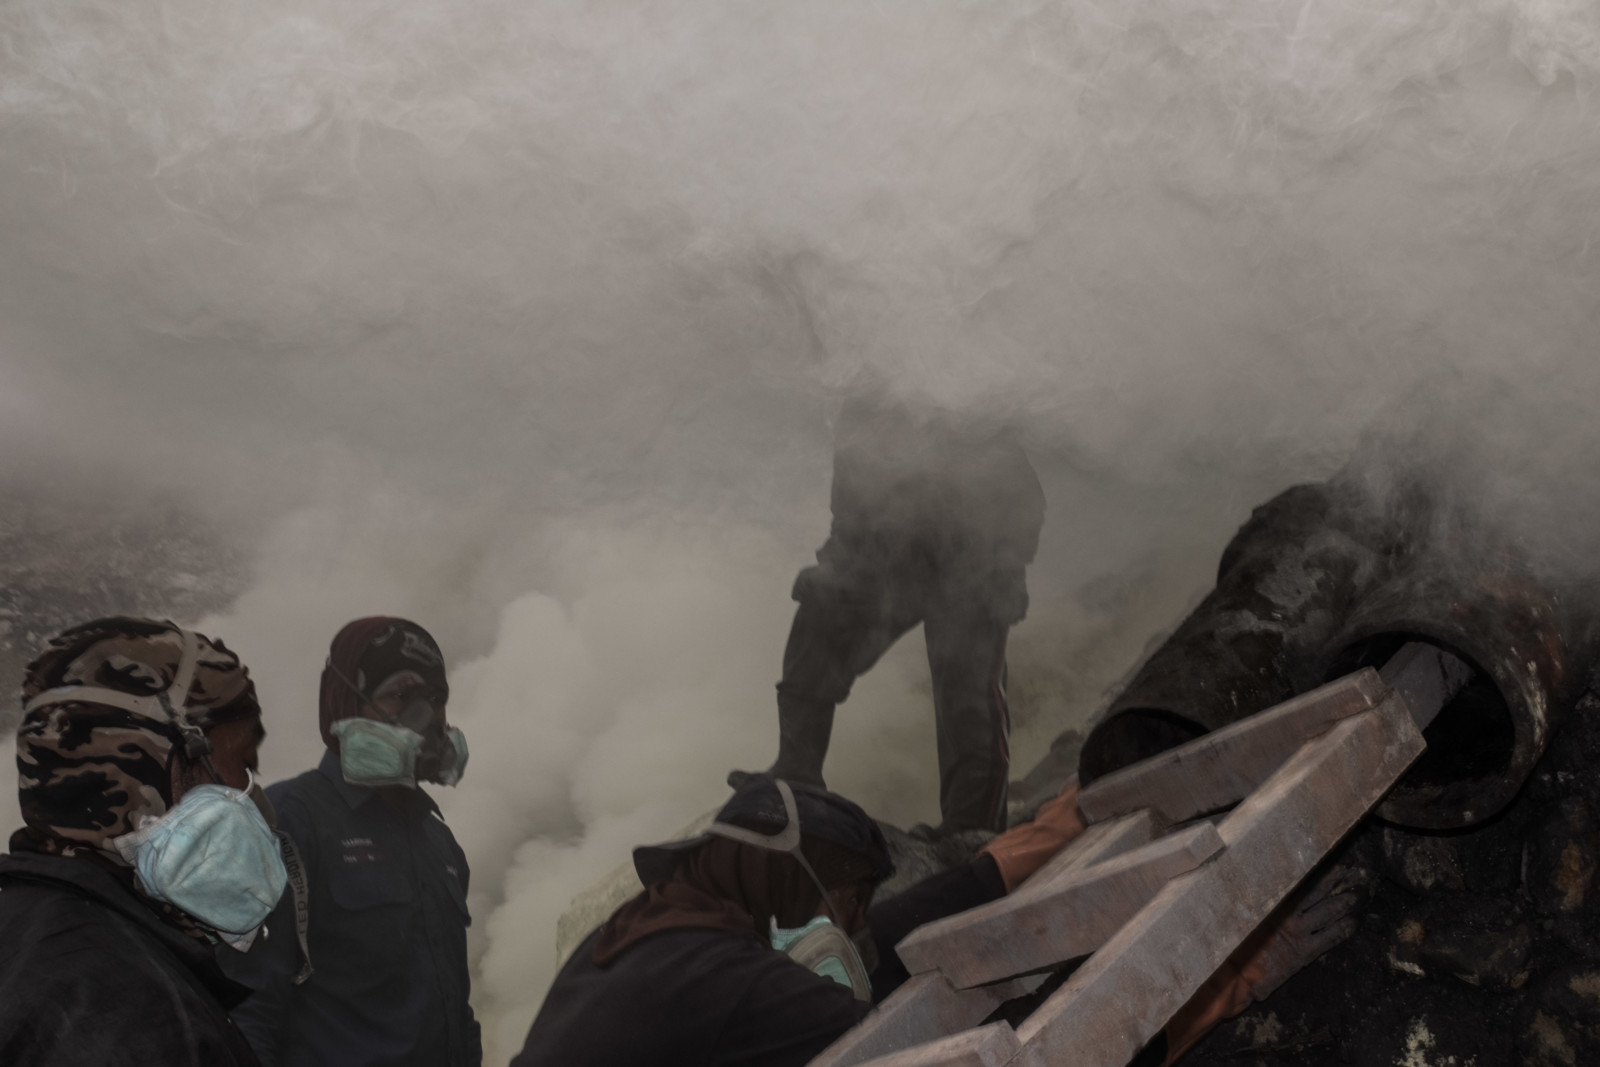
The clarity has been set to +42.
In this example this makes the ladder and the worker pop out more which is a good way to separate their bodies.
Cropping
Ideally, we want to have the right frame in the camera without the need to crop in the editing phase. Reality is different and cropping is often a part of my usual workflow. Of course, I try to keep it minimal, but in an environment like Street Photography where You have to act quickly, cropping is often inevitable.
The more megapixels Your camera has the more “liberty” You can have in cropping without losing too much image quality.
Aspect Ratio
Then there is also the question if You should keep the standard aspect ratio of 4:3 for APS-C and Full-Frame sensors or try something else.
I don’t prefer the “free-form” aspect ratios because it makes Your body of work very incohesive. It just doesn’t look good if You browse through Your collection and have lots of different aspect ratios.
Therefore I try to either keep the standard 4:3 which is probably my way to go for 90% of my images now or use a ratio of either 16:9 or 1:1.
With the ratio of 16:9 You are able to get a more cinematic look which I quite liked experimenting with.

The format of 1:1 is more special and I don’t see often a fit for it, but You should experiment with it too and see if it does improve Your Street Photographs.
Getting Closer
For the sulfur miners, the crop helped me to get closer and focus more on the important characters. With my fixed lens, it is unrealistic in such difficult environment to always get closer with your feet.
Therefore I cropped the bottom part of the photograph and a little bit of the left and right side.
Basically, the cropping helps me to reduce unnecessary objects on the edged of the frame, which don’t really add anything to the photograph.
Saturation and Color Intensity
By adding contrast and clarity, the colors appear to be more extreme in its intensity.
Saturation reduces the color intensity for every color, while the dynamic value doesn’t touch the orange and yellow tones. This can be useful to not change skin tones too much. When You have people in Your Street Photographs, I would always recommend to use the dynamic slider first and see if it satisfies You.
Normally, I don’t mess with these settings, but in the case of the sulfur miners, I felt that such intense colors don’t really represent the whole situation.
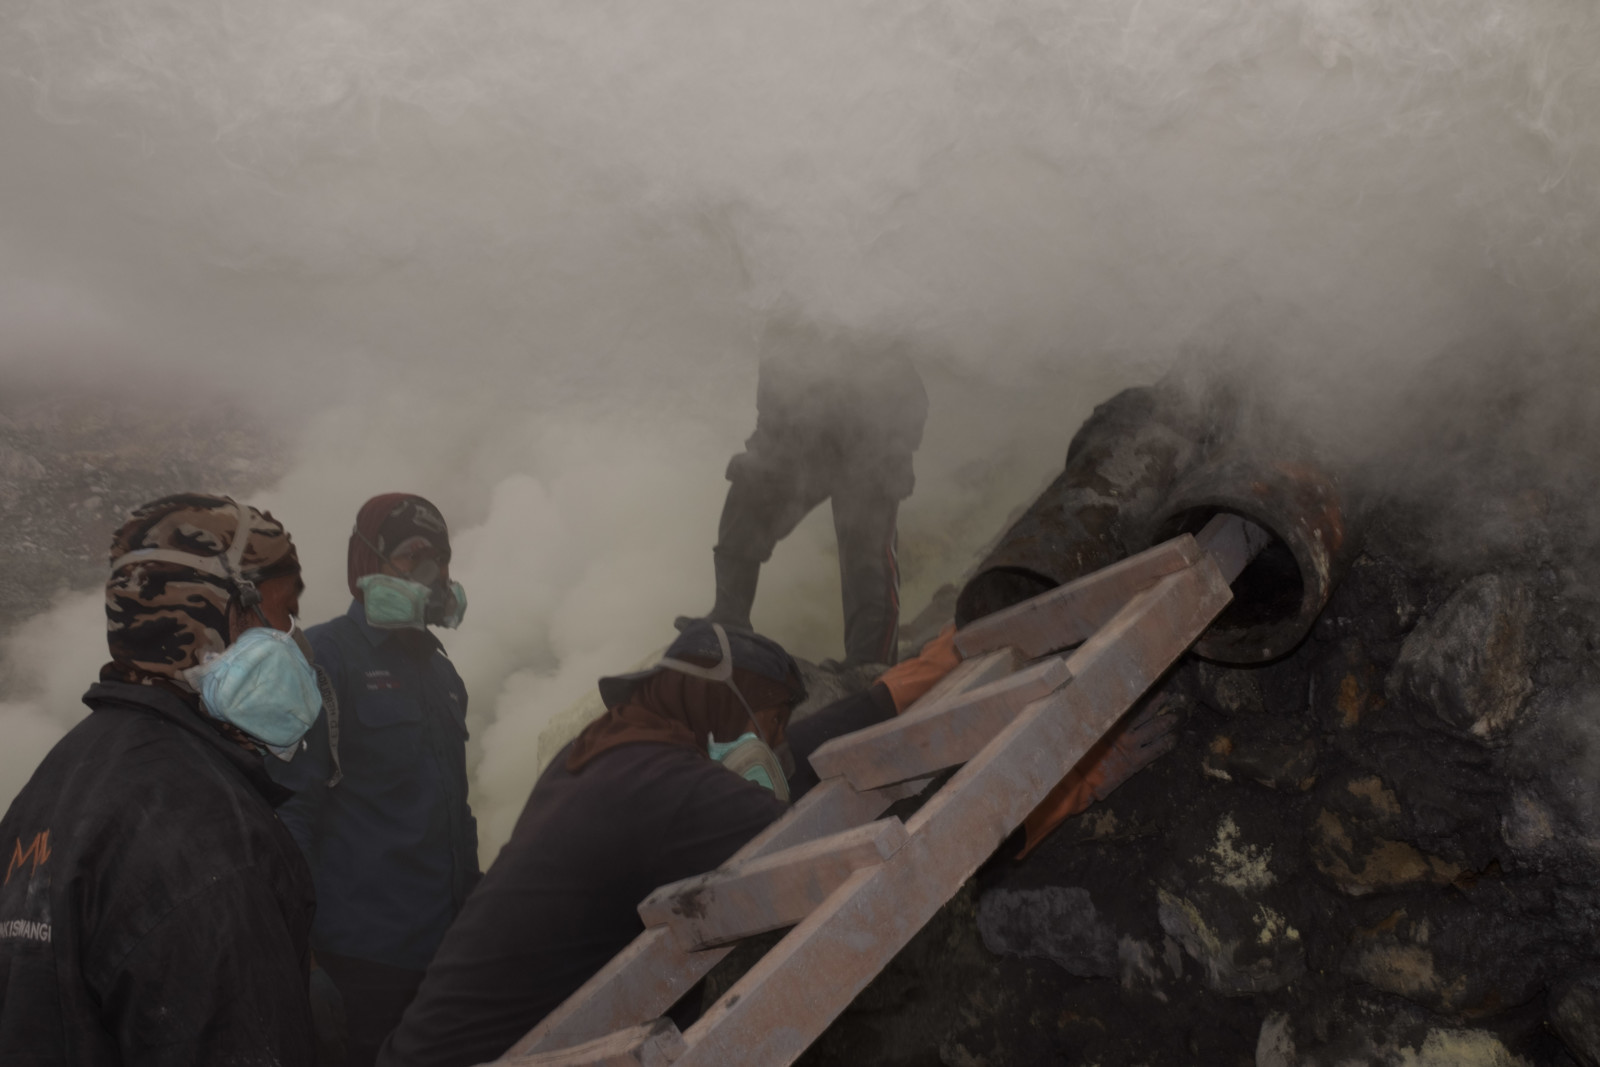
To come closer to my own visual impression I reduced the dynamic color value by 26 which desaturates most of the colors.
Warm and saturated photographs are also more associated with a positive atmosphere, which is definitely not what I wanted to underline in these images.
A desaturated look shows more of the tragic in this image and how I felt that day.
Vignetting
We can lead the viewer’s eye through composition, but that isn’t often enough to get the attention fully on the subjects.
Often a little vignetting can help to focus the attention where it is needed. It also helps to establish boundaries within the frame, so that the eye doesn’t wander outside the image.
I set the vignetting to -15 which helps to underline the “dark” atmosphere of this scene.
Incremental Changes
Now when You look at the Photographs from step-to-step, the changes are very light, almost not visible. One slight adjustment of a factor doesn’t change the whole appeal of the photograph in an extreme way.
It is when every small step comes together, that You can really spot the difference between an unedited RAW image and the post-processed photograph.
Have a look at the difference in this example.
Black & White Specifics
Post-processing Black&White Street Photographs can be a lot more “extreme” than color photographs.
You are able to play with the contrast more deliberately, add more noise or even vignetting. Those photographs could also be categorized as a “noir” style.
Example

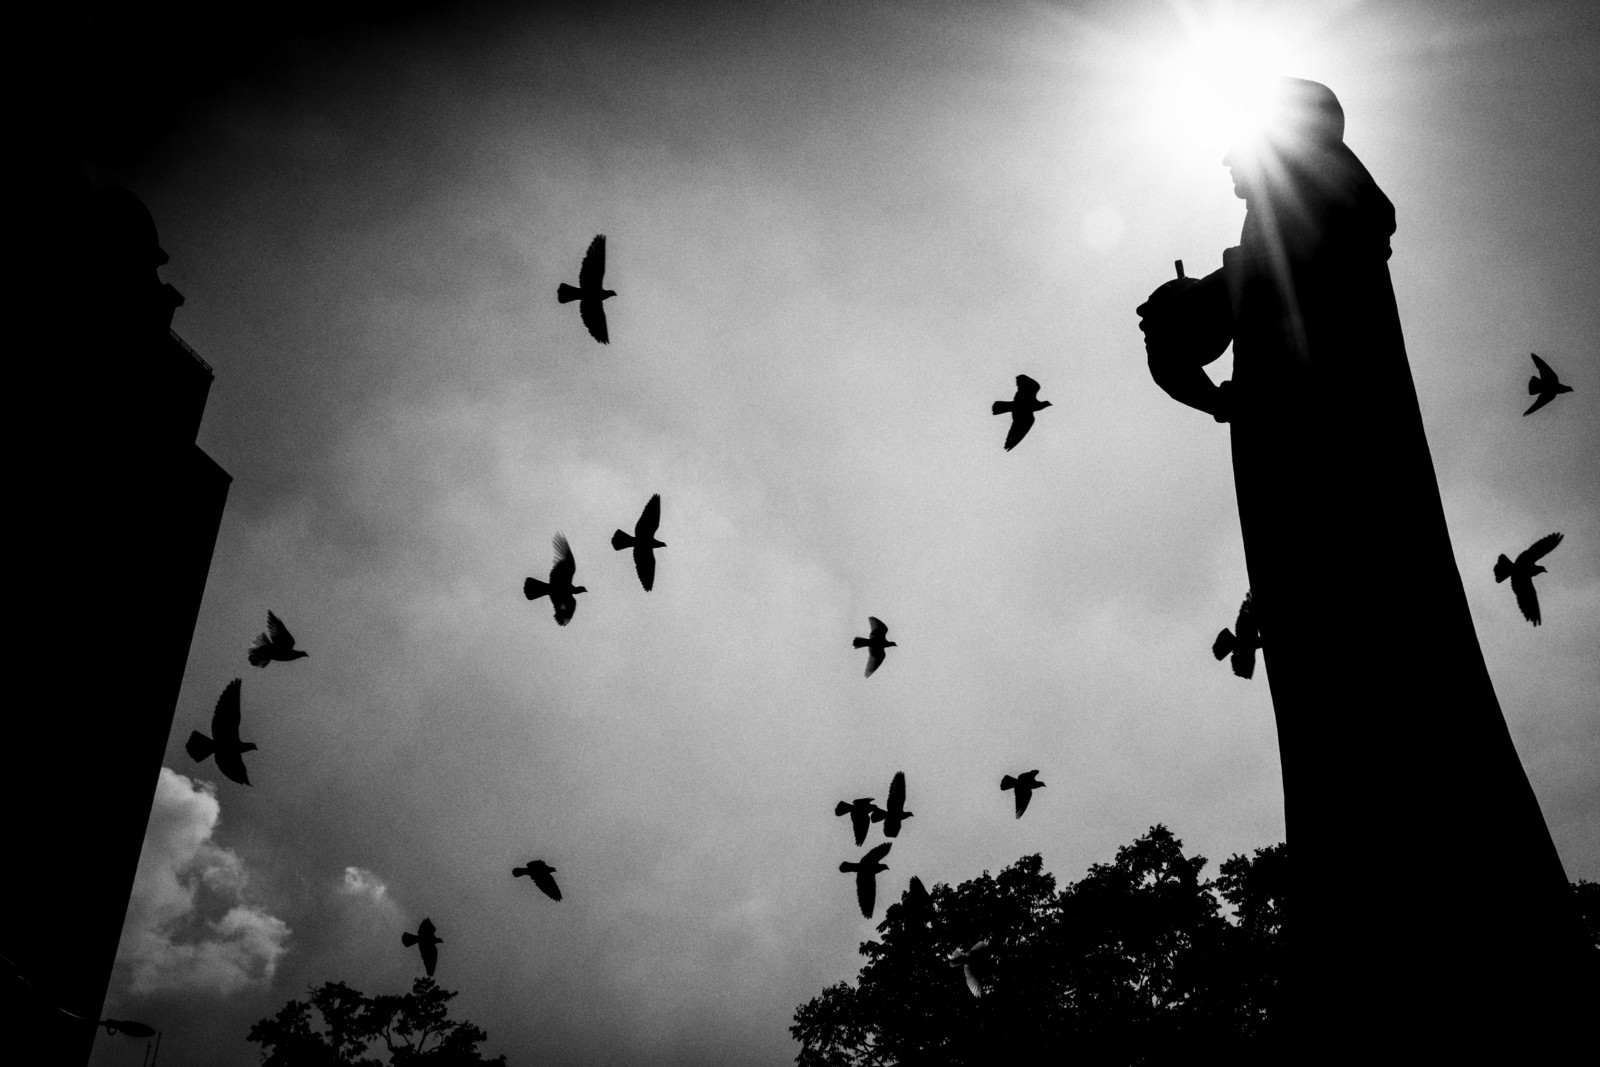
The picture was taken during my stay in Saigon and I felt the birds that were circling the statue with the sun in the background, would make a great Black & White photograph. To further my vision I wanted a more “gritty” look with added noise and a stronger vignetting than usual creating a film look.
Nik Collection
Filter sets can help You to visualize Your style more easily. VSCO is the most popular example, but they are not necessary at the price you have to invest, in my opinion.
The Nik Collection has been acquired by Google and is now available for free.
It is part of my normal workflow and every photograph has been edited with one of the films presets. Normally I don’t leave the filter at 100% but tone it down to around 40%.
So that the filter doesn’t become too dominantly, but has mostly subtle changes in appearance.
You can download the collection for free here.
There are presets for both, Color and Black&White photographs.
Final Remarks on Editing Street Photographs
Editing Street Photographs in Lightroom is no rocket science and You don’t need to watch endless Youtube tutorials on it.
Mainly You just work Your way through the main sliders and once You are familiar with Lightroom it just takes a few minutes until You have created Your final look.
Each step should only be a slight change, even though it doesn’t seem much at first, it will add up in the end.
Street Photographs should still look natural and not be edited too much. Using cloning tools to alter the scene is against my ethics as a Documentary Photographer.
If there is something in the photograph that bothers me, I might be lucky to crop it away, or I just have to leave it like that and photograph the scene better next time.
Therefore I follow the principle “Keep it stupid simple”. It doesn’t take more than 5 minutes to edit a Street Photograph and usually, it is done within a few clicks.
If I am unsure about the crop or the style of an image, I leave it for a few days, to keep a clear mind and have a look again. This is an advice that I would give You in general.
Don’t edit Your photographs right away. When You are curious to see Your photographs after being out on the street, just make a selection of Your best shots. Post-Process them the next day and then leave them. If You still like the look after giving it a few more days then You might have found the final style of the photograph.
Throughout Your Street Photography Journey, I would also recommend trying something new every now and then, keep experimenting with small details. Maybe You discover a look that is completely new and fascinates the people?
Don’t be stuck in a certain style because Your audience expects Your pictures to be like that. Follow Your own instincts and create the Street Photographs that You like.


