


I have been enjoying shooting Silhouettes in photography, ever since I discovered my passion for Street Photography. Silhouettes are a great way of learning the basics, but also some more in-depth lessons in photography. Yet, they are easy to create and are beautiful to look at, when following some basic instructions.
Are You interested in creating some mystical silhouettes, that tell a story without actually revealing any details?
Here is my easy guide for Silhouette Photography with step-by-step instructions and a bunch of tips that help You out, even if You know already the basics.
As with a lot of things in photography, Silhouettes are very easy to shoot at first, but to it takes a lot of work and experience to master them.
What is a Silhouette and why are they so engaging?
Although it may seem quite obvious, before going into further detail, I want to explain the basic concept of silhouettes and why they are so appalling to us.
Silhouettes are created by displaying a great contrast between the foreground and the background. The contrast is so great, that there aren’t any details given anymore for the subject in the foreground. Rather than seeing the face of a person that displays a certain emotion, You can only see their outline.
We are doing photography to tell a story. Telling a story is not really difficult and seeing the subjects clearly helps the viewer to understand the story that the photographer was witnessing. Not every story though is very interesting, in fact, I would claim most of them are pretty boring when we are able to see everything very clearly.
Where You scared of the dark when You were a kid, or still have this unsettling feeling when walking down a dark alley?
We are afraid of the darkness because we fear what there might be hidden. Instead of having every information directly available, there is the possibility that there is something potentially dangerous for us.
To take it a little bit further there is also the fear of swimming in water where You can not see what’s beneath You anymore called Thalassophobia. It does strike the same nerve as why silhouettes are so interesting. We don’t have every information available and we don’t know if there is something hidden.
Coming back to my original point, silhouettes are a great element to tell a story in photography. Instead of revealing the whole plot, they leave details open to the viewer’s imagination. You can not see the face of the subject, which means that You are not able the expressions and temper.
Is the person hostile, or joking, maybe laughing, or crying?
All of those emotions could be possible and that is why silhouettes are a great way to create engaging pictures for the viewer.
They incorporate the viewer, by forcing him to imagine what is missing in the silhouette. The viewer is able to create his own little story and no two viewers will have the same story.
So if You are having problems finding interesting stories around You, then changing the perspective and integrating silhouettes are an easy way of creating interesting photographs.
Now that You know what a silhouette is and why they are so intriguing, You should learn how to take them Yourself.
Just follow the basic guidelines below and You will become a master in Silhouette Photography real soon.
How to take a Silhouette
Taking a great silhouette pictures doesn’t have to be science. But there are some simple steps that You should follow to master the art of silhouette photography.
1 The Basic
Silhouettes are created by a great contrast between the subject and the background. To get a silhouette, You need to place the subject in front of a very bright light source. Here it is best to just use the sun and expose to the sun. Exposing to the sun has more than one advantage. First, the overall image will be darker and it will be easier to create a silhouette. Second, the sun won’t be overexposed and there won’t be any blown out highlights that are way too obnoxious.
With that said, there are a lot of different light sources that You can take, but the sun is the strongest and if You are lucky enough to live on a spot on this earth, where the sun does show up quite often, it should be used to explore silhouette photography.
2 Finding the Subject
Normally, we can search for hours on the street without having any success in finding an interesting subject. When taking a silhouette though, the subject itself isn’t really important. What is more important is the outline and shape of the subject. Obviously, people are good subjects and are a great starting point for most silhouettes.
But You can also experiment with other objects that have an interesting shape. Or You can also combine people and architecture, or their surroundings.
So the subject doesn’t matter that much, it is more important how You present it.
3 Expose To the Light
In the next step, You have to expose to the light. This can be either done by exposing manually, or by using an automatic mode. When using the automatic mode, You will have to dial down the exposure compensation a few stops. Depending on the intensity of the light and the contrast, somewhere between -1EV and -3EV should be a good value.
However, for silhouettes, I am quite unsatisfied with automatic exposure modes and I would recommend exposing manually. Often times, You have to go to extremes and have to use a shutter speed that is minimal and can be around 1/2000th of a second, as well as an aperture that is around f/16.
4 Compose the Image
The subject itself might not be that important when shooting silhouettes, but the composition does play a very vital part in creating a beautiful image. When shooting in high contrast, there is a greater emphasis on the geometry of the picture and the leading lines.
Try to arrange the image, that the lines are pointing to the subject and that there isn’t anything behind the subject that distracts the outline. Therefore it is easier if You try to shoot from an angle, where the subject is in front of the sky.
Also, having the composition following the the rule of thirds will also create a more pleasing picture, which You should also embrace in the image.
5 Finding the Focus
When shooting directly into the light, it can be difficult to find the focus on the silhouette. You are using an f-stop around f/16 though, You can just manually focus and benefit from a very broad depth of field. Have a look at how to zone-focus and You will understand how the f-stop will help You in getting a sharp picture.
Also, the further away from the subject You are, the easier it will be to get everything that You want in-focus. Having a wide-angle lens also helps in this particular case.
6 Take the Shot
These are five simple steps to create a silhouette.
Point Your camera to a bright light spot.
Wait for a subject to enter, or search for a subject and place it between the light and the camera.
Manually expose to the light.
Compose the image by applying leading lines and the rules of thirds.
Use Zone-Focusing.
These are the basics for creating a simple silhouette. But Your pictures shouldn’t be basic. They should be outstanding. Following these 5 steps is easy, but there are numerous little details that You should take care of.
Following are tips that will improve Your photograph from “simple” to extraordinary.
Tips for Silhouette Photography

You have already the simple steps to photograph a silhouette, but with the following tips, You are able to improve Your pictures tremendously. It may not be obvious at first, but the details really make a difference.
Take care of the background
I have already emphasized how important the background is in photography. A lot of people make the mistake to only at the subject and forget that what lies behind the subject is equally important. Blurring out the background by using a more open aperture doesn’t work in portrait photography and when photographing silhouettes it is impossible to blur out the background.
You are using a low aperture the depth of field is very broad and You won’t even be able to create a bokeh in the background. Furthermore, the outlines of the background are more important and even a background that is blurred does disturb the aesthetics of the silhouette.
So if You are shooting, take care of the background first and make sure that the subject has a distinct outline that doesn’t overlie with the background.
It is easier to shoot silhouettes outside the cities where You have a lot more room to experiment. If You are on the street, You will need to change the perspective, for example by photographing down low and looking up, so that You can shoot against the sky.
Keep also care of any electricity lines, lantern, or other objects that can be in the background of the silhouette.
Separate the Subject from the background
Very similar to the previous tip is that we should try to “maximize” the visible outlines of the subject. If Your subject is only barely visible and does mix with the background or the foreground, it will be difficult for the viewer to see any details of the subject.
Although I have written before, that it can be interesting for the viewer if details are hidden, there still need to be some hints. If the subject is barely visible, it doesn’t create any interest and the viewer will be left wondering what You even photographed.
Furthermore, it is a lot more pleasing from an aesthetical point of view if the silhouette doesn’t overlie with its environment. You may think it may not have a big impact but You can have a look at Your own silhouettes and compare those pictures where You have a near “perfect” silhouette that is completely separated from the background and those that are more mixed than isolated.
That the subjects need to be separated is also not only important for silhouettes but also for “normal” photography where the subjects are visible. It was even so important that Steve McCurry photoshoped elements in his “Documentary Work” to come closer to this ideal. This is also known as the figure to ground in photography.
So instead of using Photoshop, take the time to compose an image where the silhouettes aren’t blending in with the background but are separated.
Isolate the Subject
Another easy tip that You should follow to create a more pleasing silhouette is by isolating the subjects. Let’s say You have multiple subjects that You want to interact with each other, then it is easier if they have a little distance from each other and are displayed isolated.
Silhouettes became a trend in wedding photography and if You are interested to do a photo shooting with a couple, then it is better if the subjects take a step backward and their outline is better visible. Instead of letting them hugging each other, You can just ask them to hold hands or take another pose that makes it clear that they are interacting with each other. With a pose like hugging, there is a great risk that it just looks like an undefined blob of outlines that can be hard to identify.
Similarly, if You are doing Street Photography You shouldn’t ask the subjects to pose or give them directions. Rather than photographing a huge group of people, rather focus on just a few of them or even a single person alone.
To do so, the best tip would be to go closer and erase all the other subjects. Instead of having to frame 20 people perfectly, You are able to focus on just a single person which makes it much more easier for You, without subtracting anything from the interest of the image.
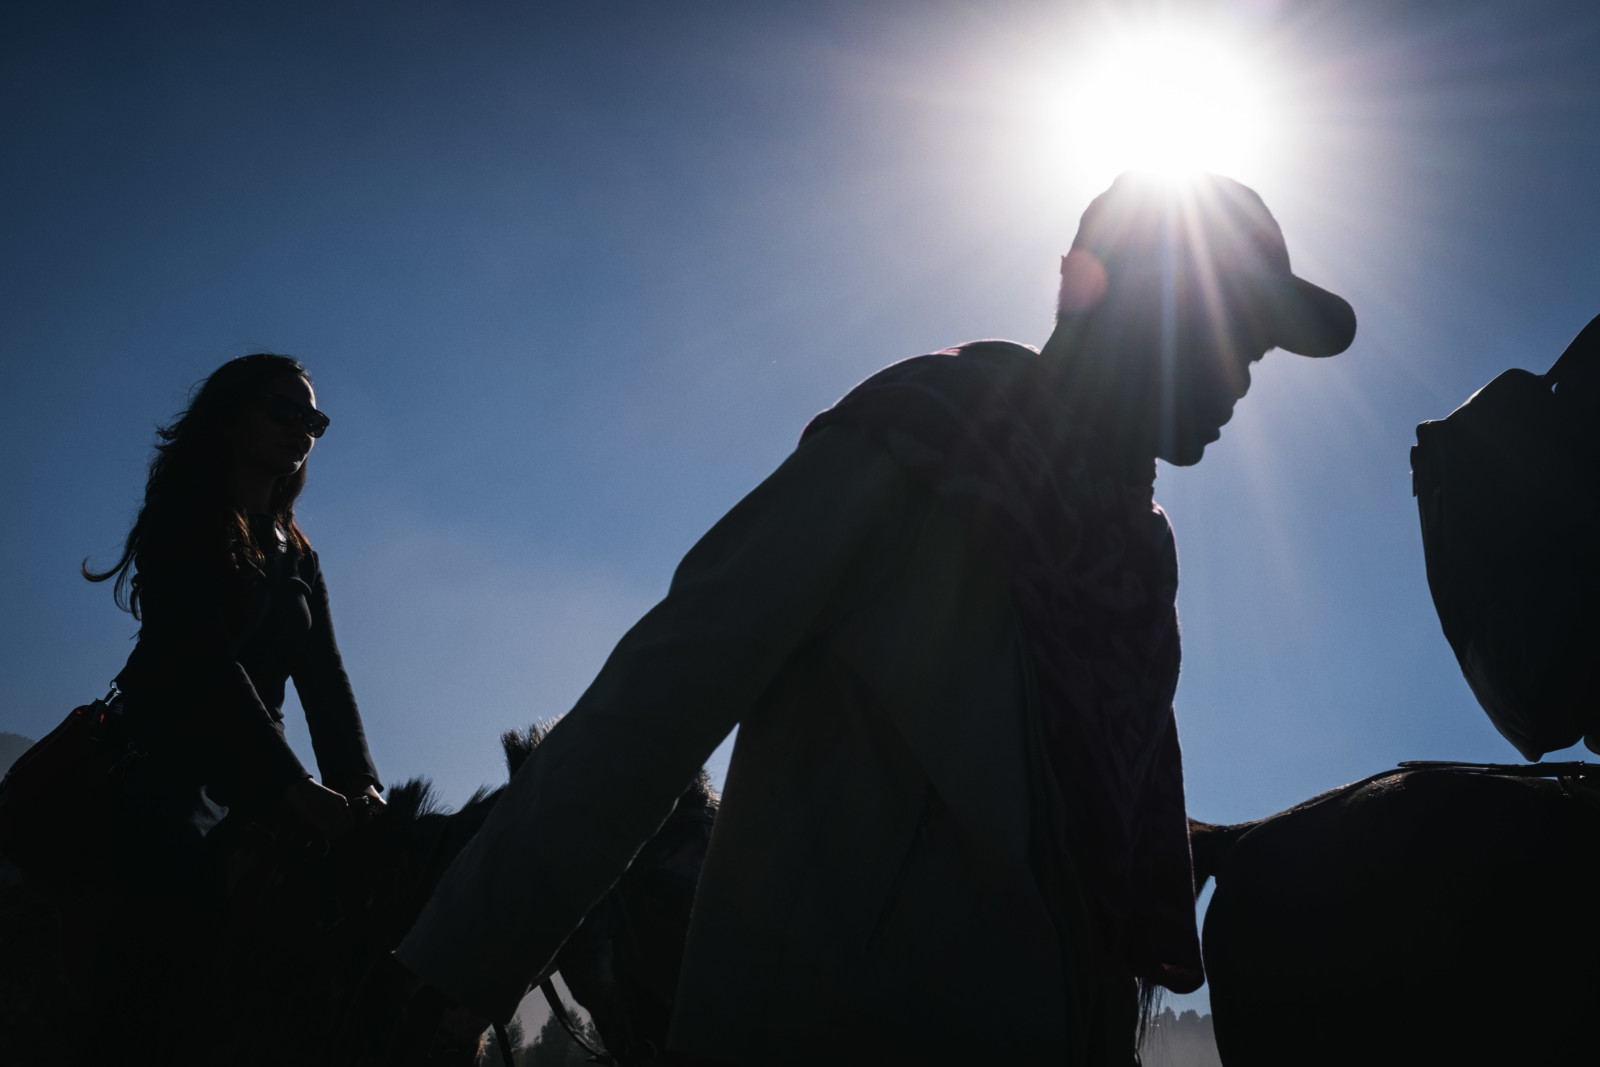
Change the perspective
When I started Street Photography and relatively found the Photography Collective Berlin1020 and met with my friend Oliver Krumes, it was quite surprising how he was able to create his signature silhouettes.
A man of almost 2m of height was getting really low and taking pictures from the “frog-perspective” shooting up in the sky, which made it possible for him to create silhouettes with a suitable background, even though we were in the middle of the city where the background can mess up a lot of the composition.
Therefore, if You want to get silhouettes one of the easiest tips would be to get really low and shoot almost from the bottom.
If You are an owner with a camera that has a tiltable screen that is definitely a plus, but not always needed. With my X100F that has a 35mm lens, I can also shoot those silhouettes from the hip without having to look at the screen. A lens that has a wider angle makes it even easier.
Don’t think about how You may look like when taking the pictures. It may cost You some effort to just crouch down on the street, but it really isn’t that difficult and it gets You really unique pictures.

Shoot in the Morning or Evening
During the day, the sun does change its angle and when the sun is high up in the air during noon, it does become harder to shoot against the sun. To get the right angle, You are forced to get down low and photograph the person from a lower angle.
In the morning and evening though, the sun gets closer to the horizon which makes it much easier to find opportunities where subjects are right in front of the sun.
Keep in mind though, that You also need some open space to get a silhouette that isn’t ruined by ugly buildings or other objects in the background.
As an additional feature, the light temperature is a lot different and does create a warmer atmosphere. Who doesn’t like a great sunset? Combine the landscape picture with the sunset and You get a great photograph without actually having to work too hard. Just be at the right time at some location where You have some open space and might find some people. Some place at the lake, for example, can be ideal for that kind of pictures.
Focus manually
Especially when shooting from a very low point, it is better to just focus manually. To get the silhouette there, I am usually looking for the right light at first and then just wait for the person to enter the frame.
By relying on the auto-focus, You risk that the camera might actually not fire because the auto-focus was not able to find the correct position.
Instead, it is a lot easier to just focus manually to a certain distance, frame the shot and wait for the subject to enter. With a closed aperture, there is also not the risk, that You might miss the focus and have to adjust the focus ring a lot. Just set it to a certain distance and You are good to go.

Turn off the flash
That is a pretty obvious mistake that You can do, but sometimes I see people walking through the streets that are oblivious that their on-camera flash is firing.
With the aim to create a very high contrast, You have to disable the flash and its automatic function to fire in case the picture is underexposed.
There are styles where You can utilize the flash and shoot against the sun, but this is a very different field and hasn’t anything to do with the silhouettes that we try to create.
Examples of Silhouettes

Silhouettes are created by having a strong contrast between the subjects and the background. That doesn’t necessarily mean that You need the sun or any strong light source behind them. Although that is the more classical approach to silhouettes, You can also create them by shooting from the inside of the building outside. This has the advantage, that You don’t have to extremes with the exposure and You will see some details in the background. Great locations for this kind of style are train stations or other places that have great windows, that let in some additional light. As You can see in this photograph by Oliver Krumes, the light can create an overall great atmosphere.
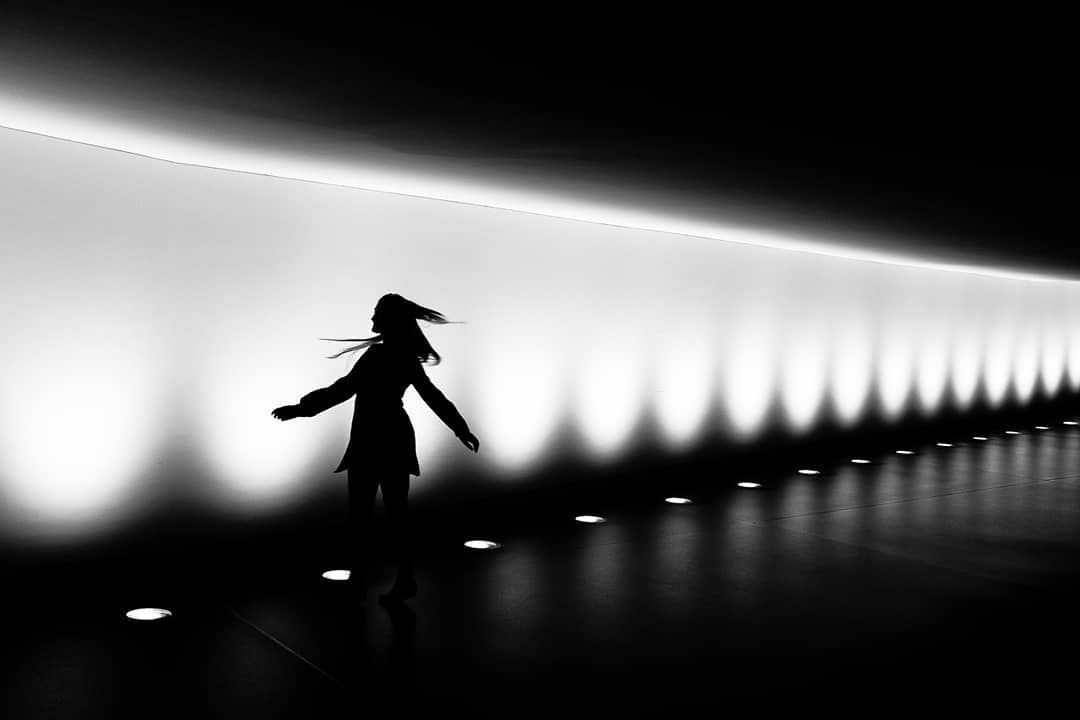
Another example of how silhouettes can be shot indoors. Do You have some light sources to play with, that is creating a huge contrast between the background and the subject?
Then this is how You can photograph the contrast perfectly. You are able to see the complete upper body of the subject and although You are not seeing her face, it does become quite clear that she is having fun and enjoying the moment.

When shooting a silhouette, You can get very creative and doesn’t have to rely on the usual components. Sometimes even an umbrella is enough to create the contrast as seen here by my friend and colleague Martin Waltz.
Thanks to the umbrella, the background also gets a little bit less distracting and the head, for example, is completely covered by the umbrella. In this piece, the color is an additional nice touch because the umbrella is a strong highlight against the dark silhouette of the woman.

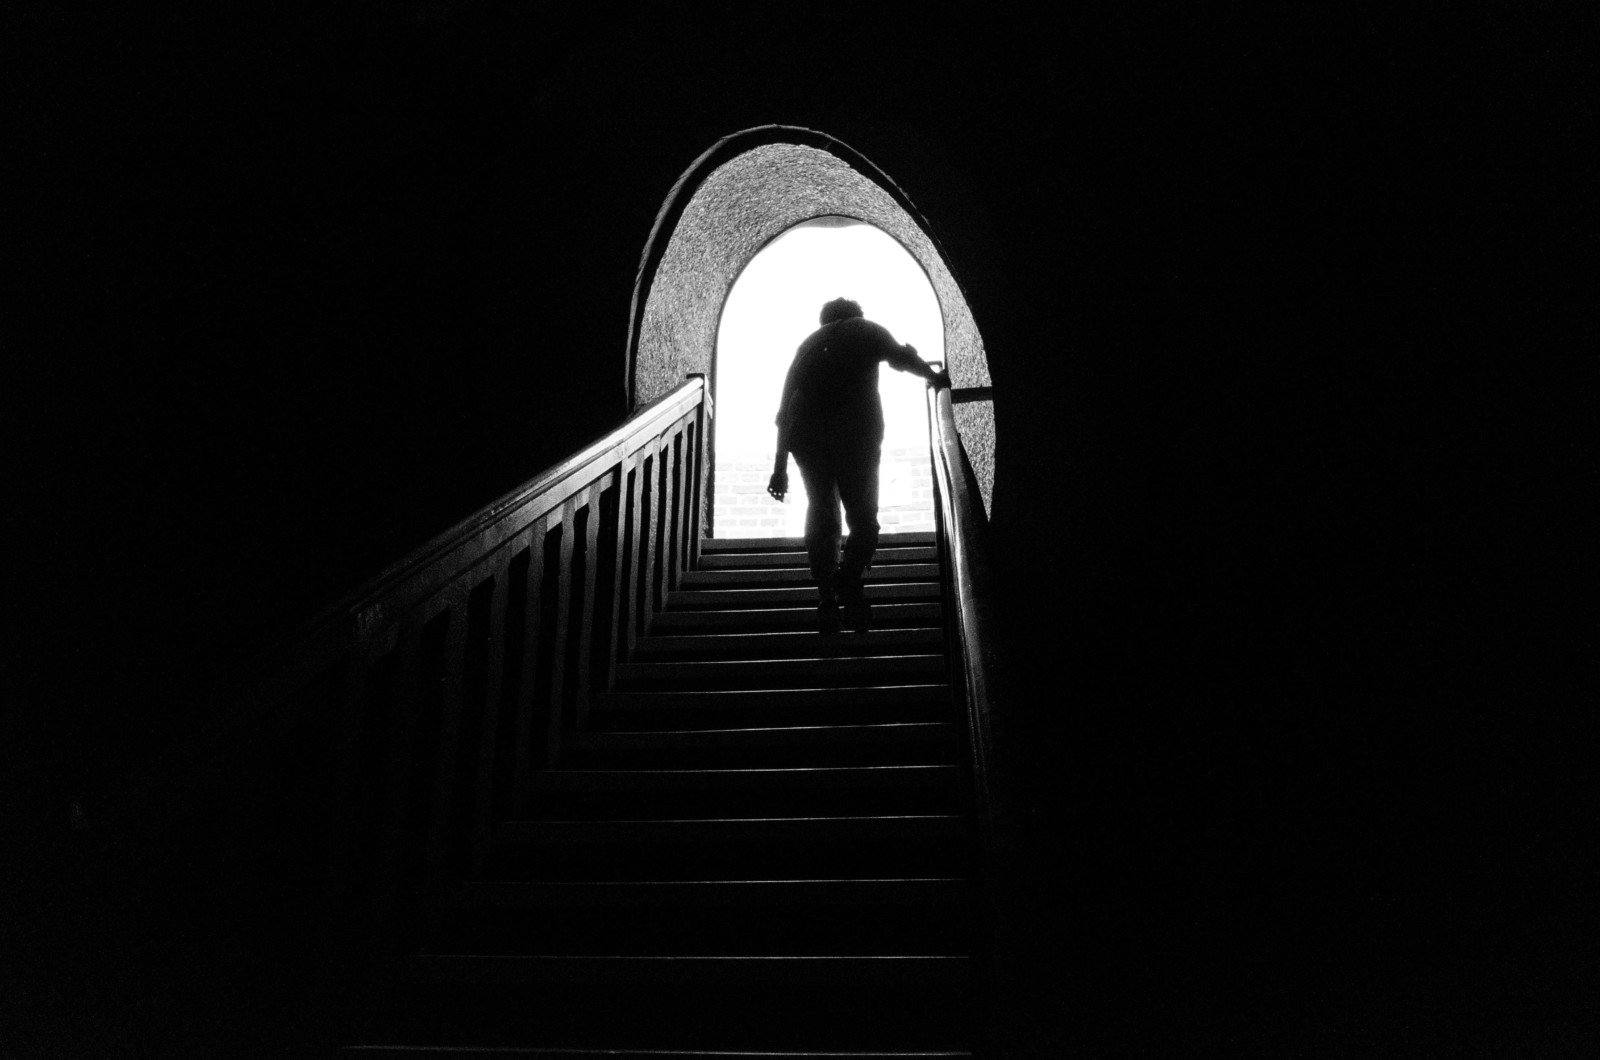
Another example of a rather “standard” silhouette from the inside of a building facing the entrance. The reason why I chose this picture as a good example of a silhouette is that there is a lot of room where the picture doesn’t work. With the restaurant on the right side and the lantern, the background could easily destroy the silhouette and its outline, but in this case, Alex waited until the person walked to the open space where the background is ideal to create the silhouette.
Those are the little details, that create the difference between a mediocre and a great image.

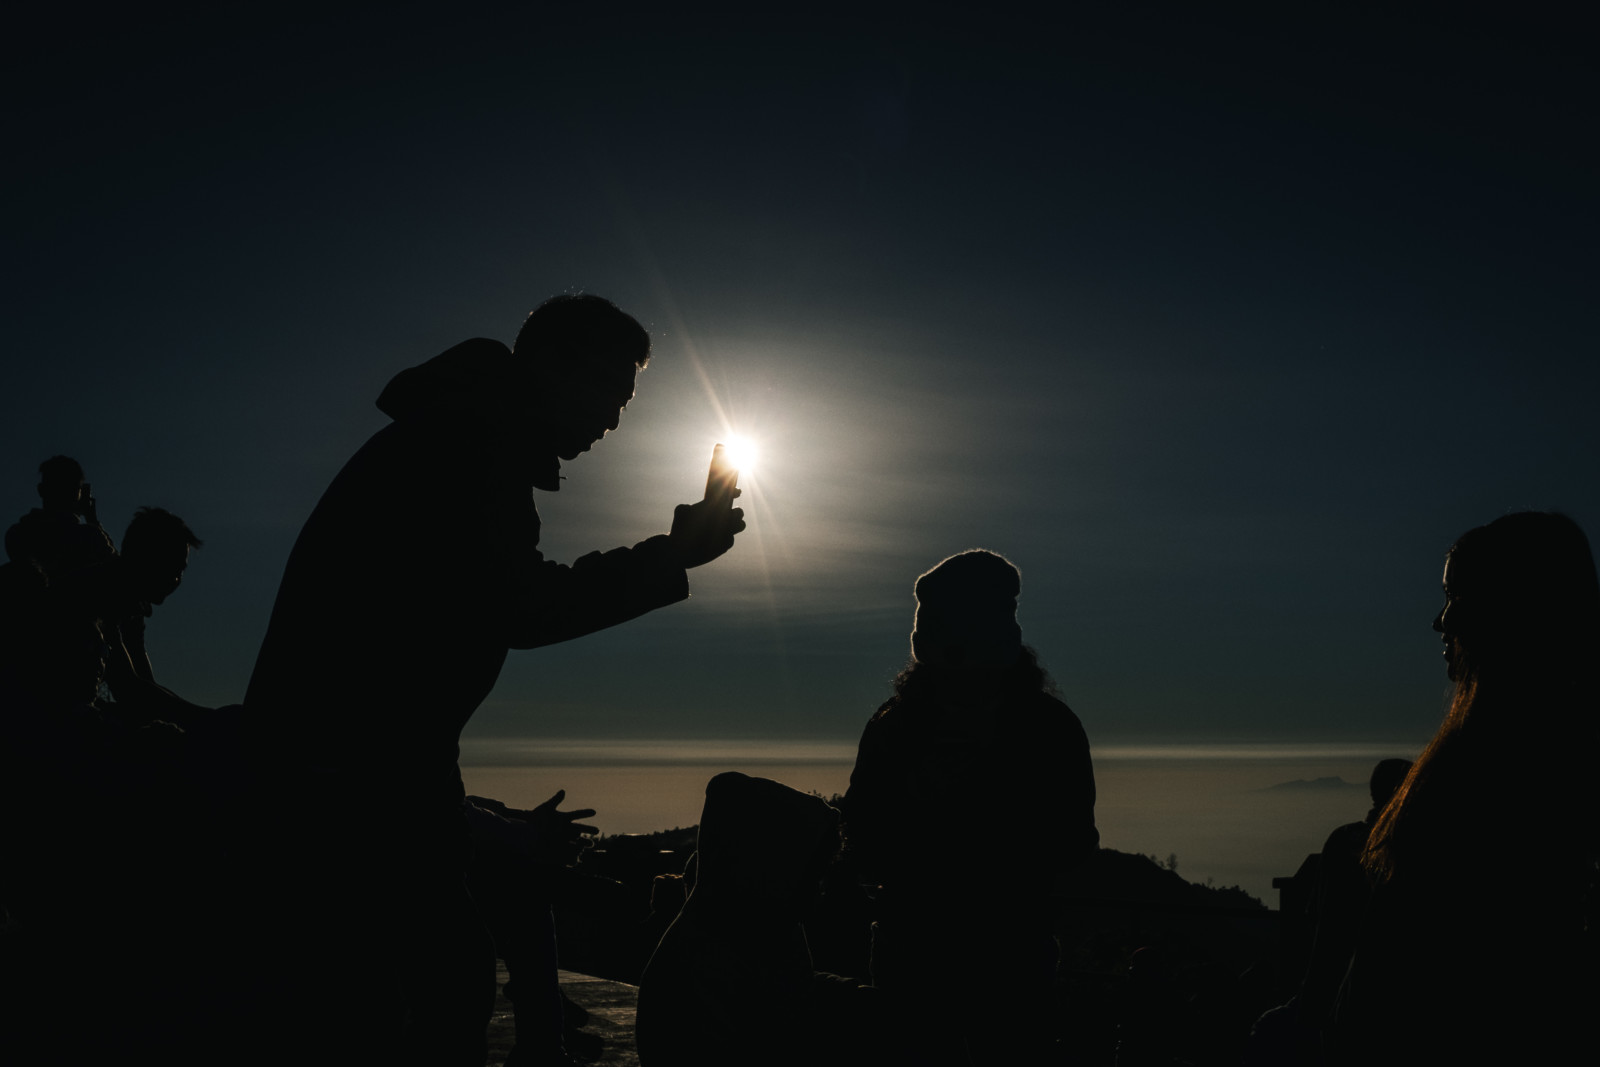
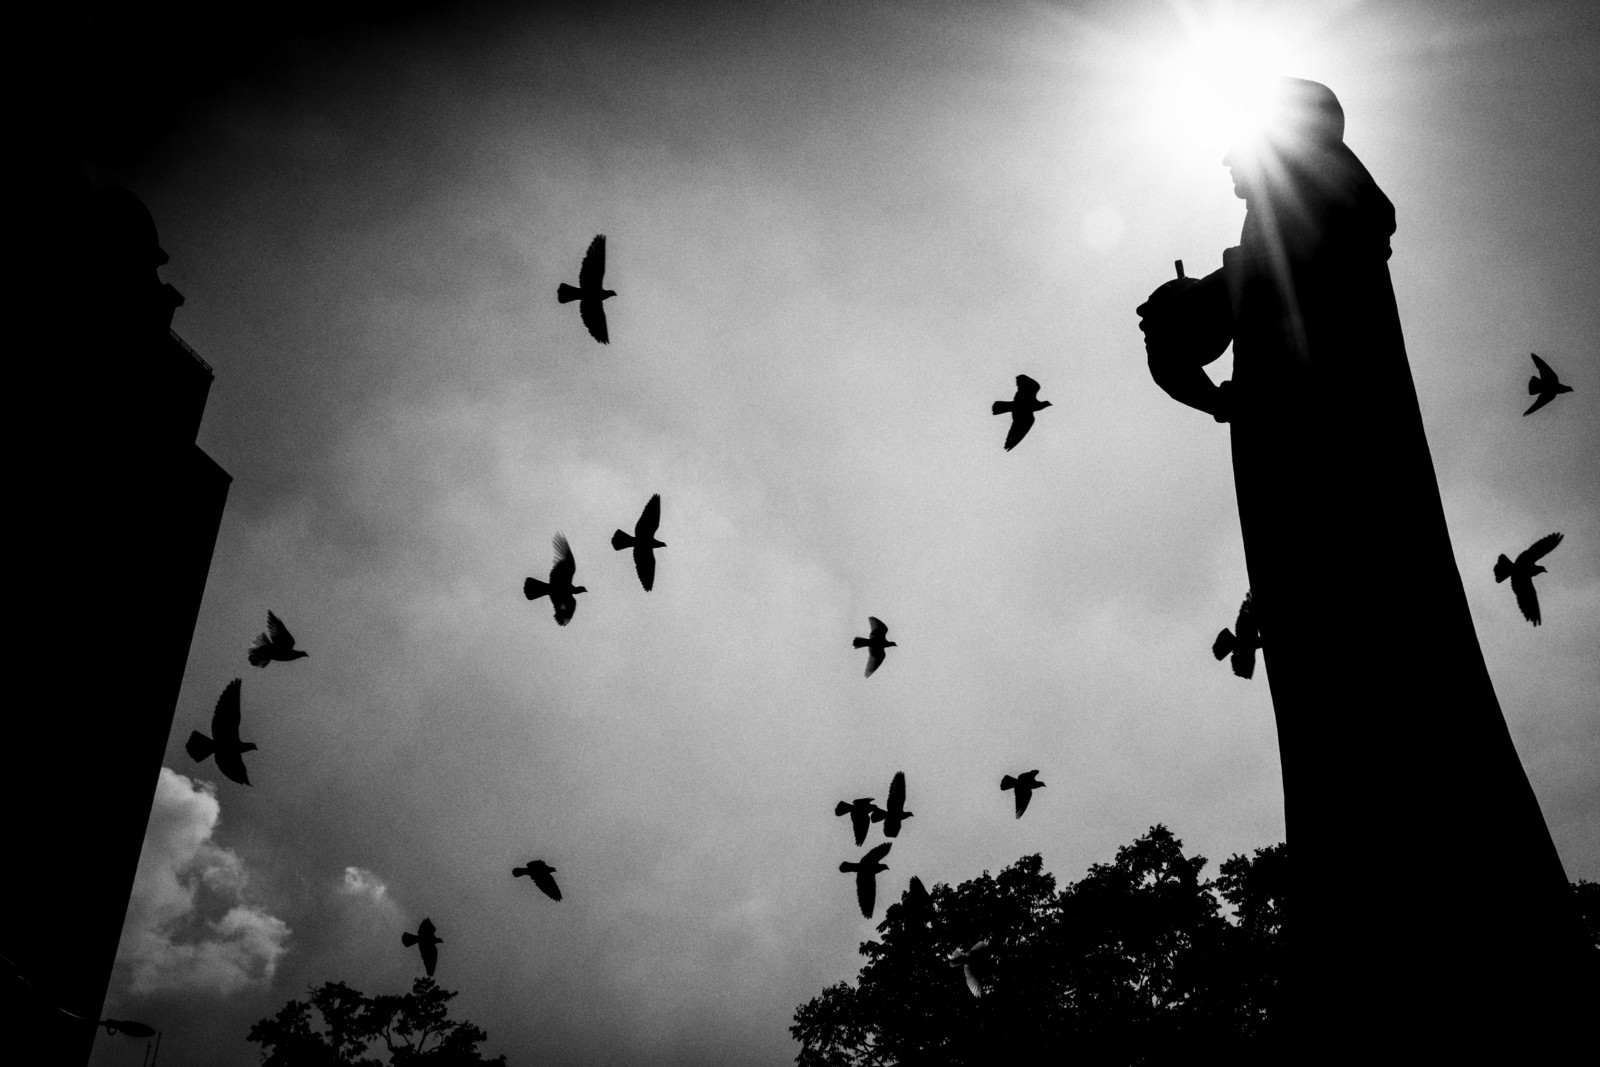
This is one example and style of silhouettes that I like myself very much. It is directly shot into the sun and while exposing to the bright light source, the subject is only visible as a silhouette.
The sun is already lower which indicates that it is also closer to the sunset. During noon, this kind of picture wouldn’t be possible, or the angle would have been from a very low point. In this particular case, the background is blurred a little bit which indicates that the shutter speed must have been very fast, to ensure that the sun is not overexposed.

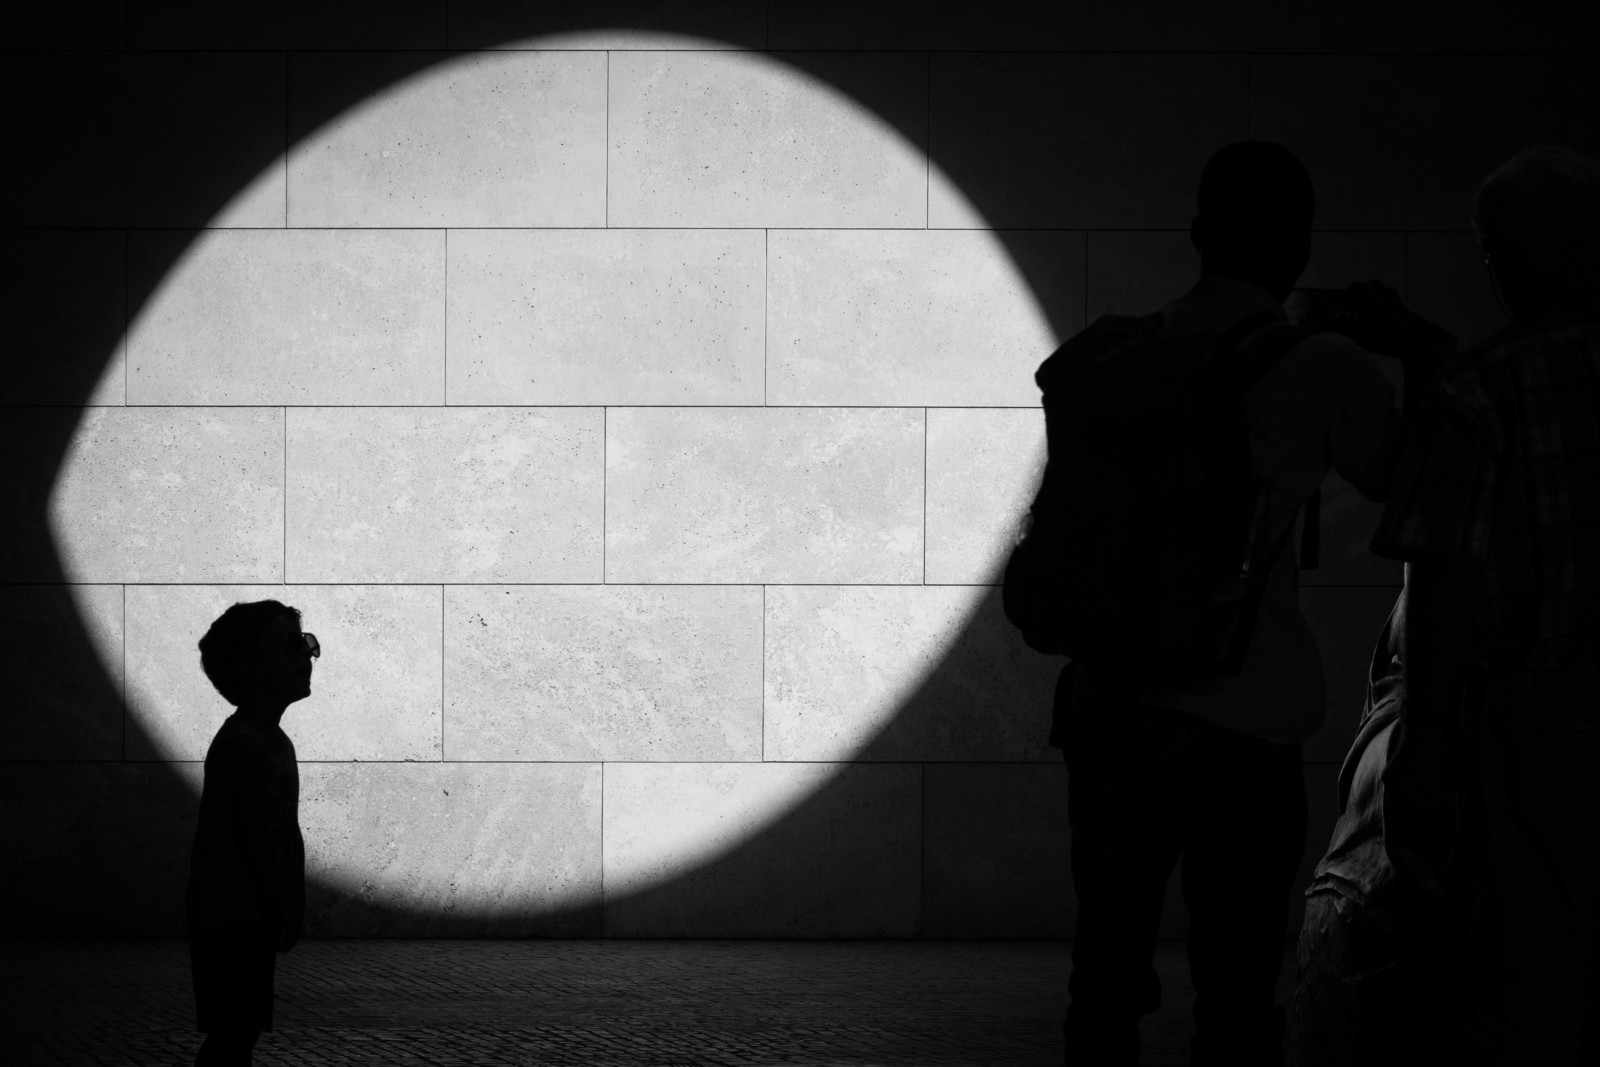
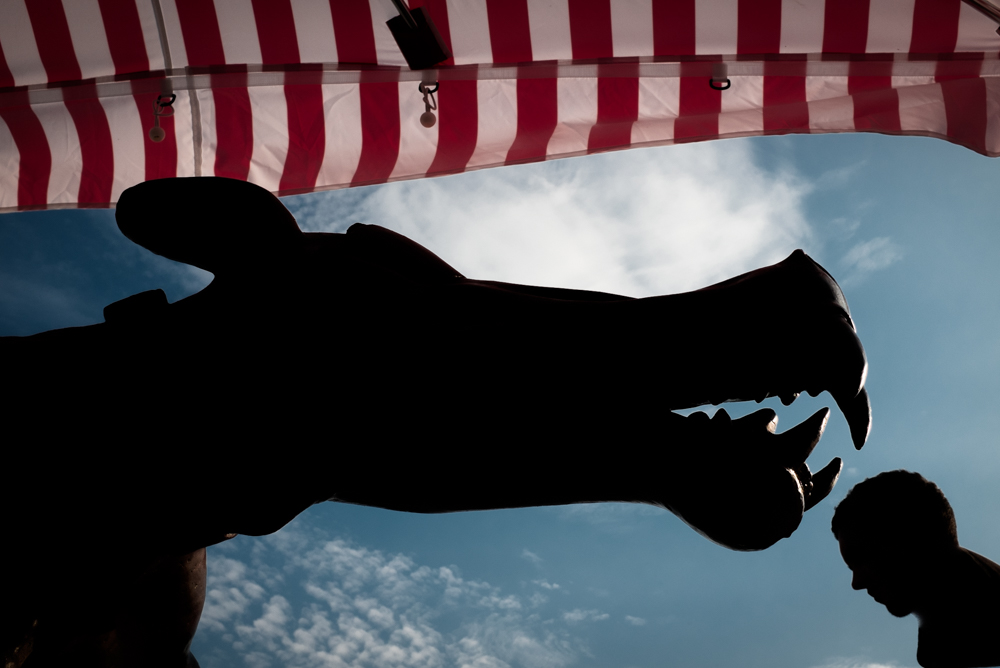
Do You need some inspiration how You can create some creative silhouettes? My friend and colleague Chris Candid shows You how You can combine a silhouette with its environment brilliantly.
The silhouette is also a great instrument to keep someone’s privacy. If You would publish a picture like this with the face completely visible, the subject may be a bit angry and would have the right to be. But photographing silhouettes is great to extend the limits, while not offend anybody. It also helps to comply with the law in some states, that are more restrictive towards Street Photography.

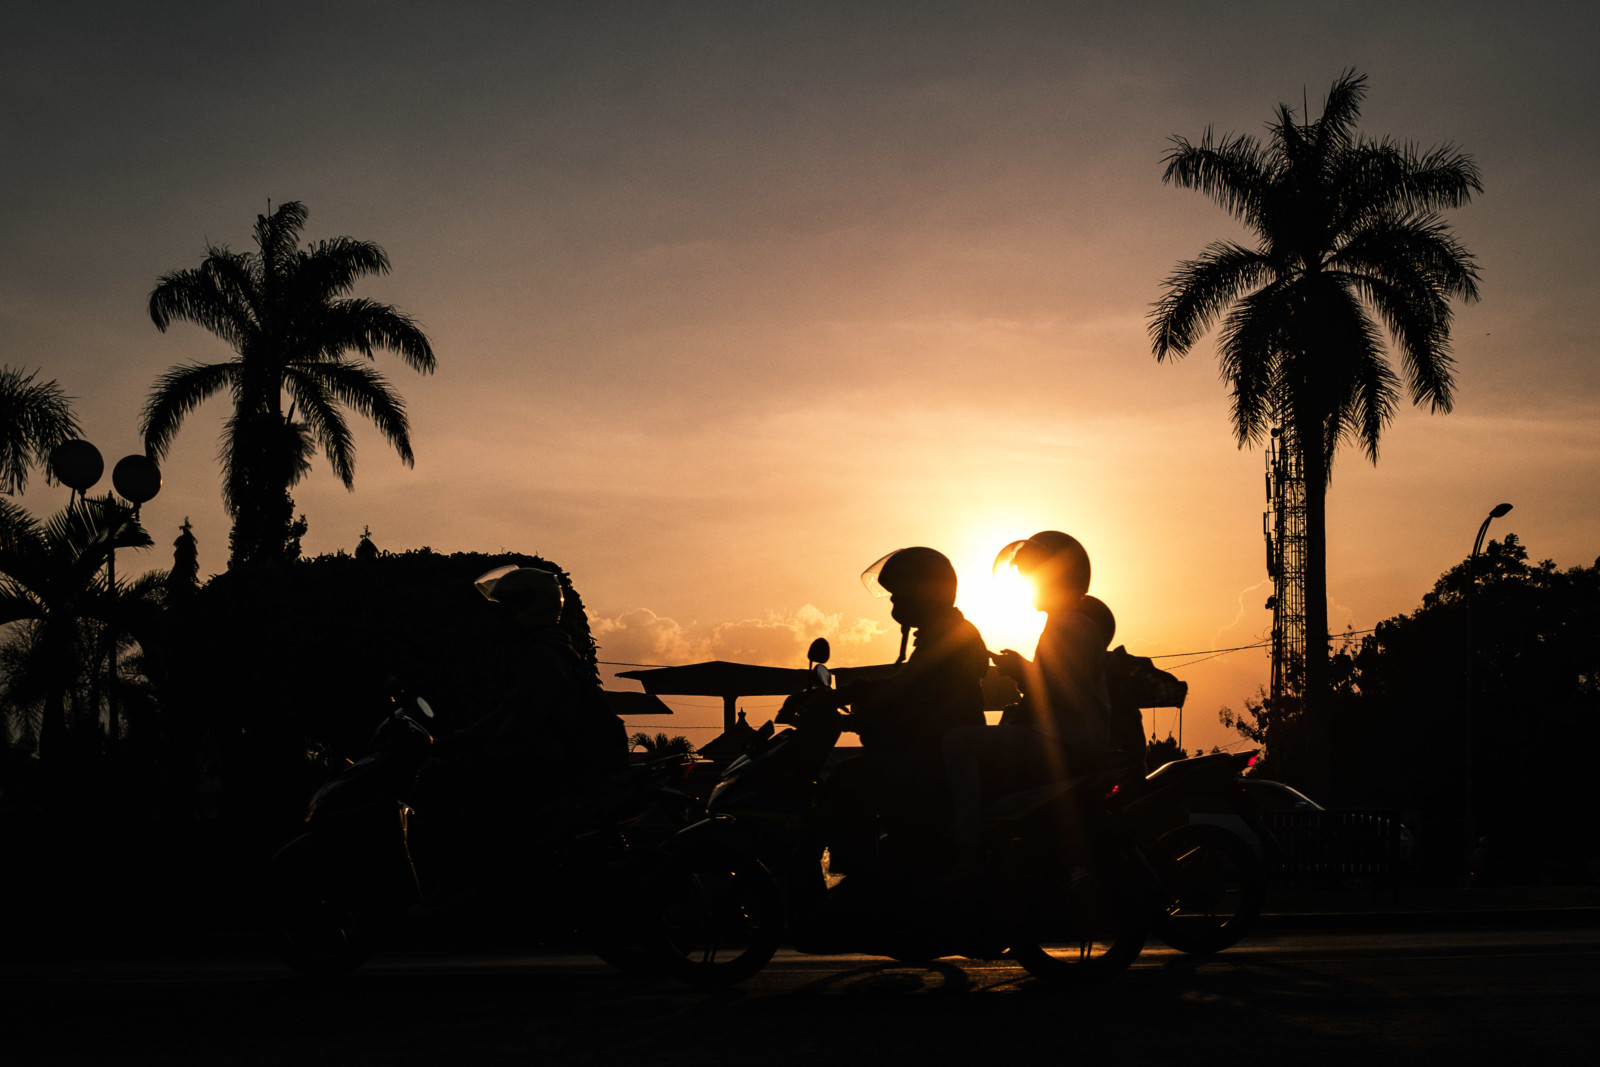
Although to create silhouettes, it is in general better to use a faster shutter speed, You can also try to stop down the aperture a more and then can use a slower shutter speed that lets You create some motion blur. This is one excellent example of a sunset with a moving silhouette. To voice some critique though, the person to the left shows how important it is that silhouettes aren’t hidden by their surrounding. It does take away from the great subject in the middle, but at the same time Street Photography is not always about perfection.
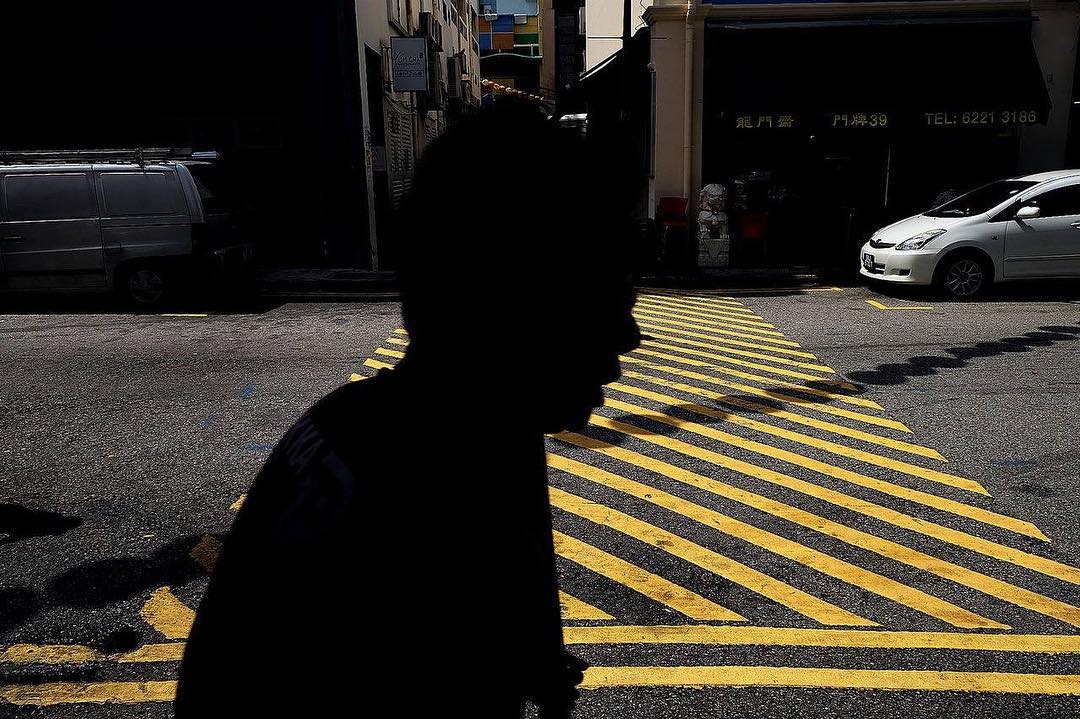
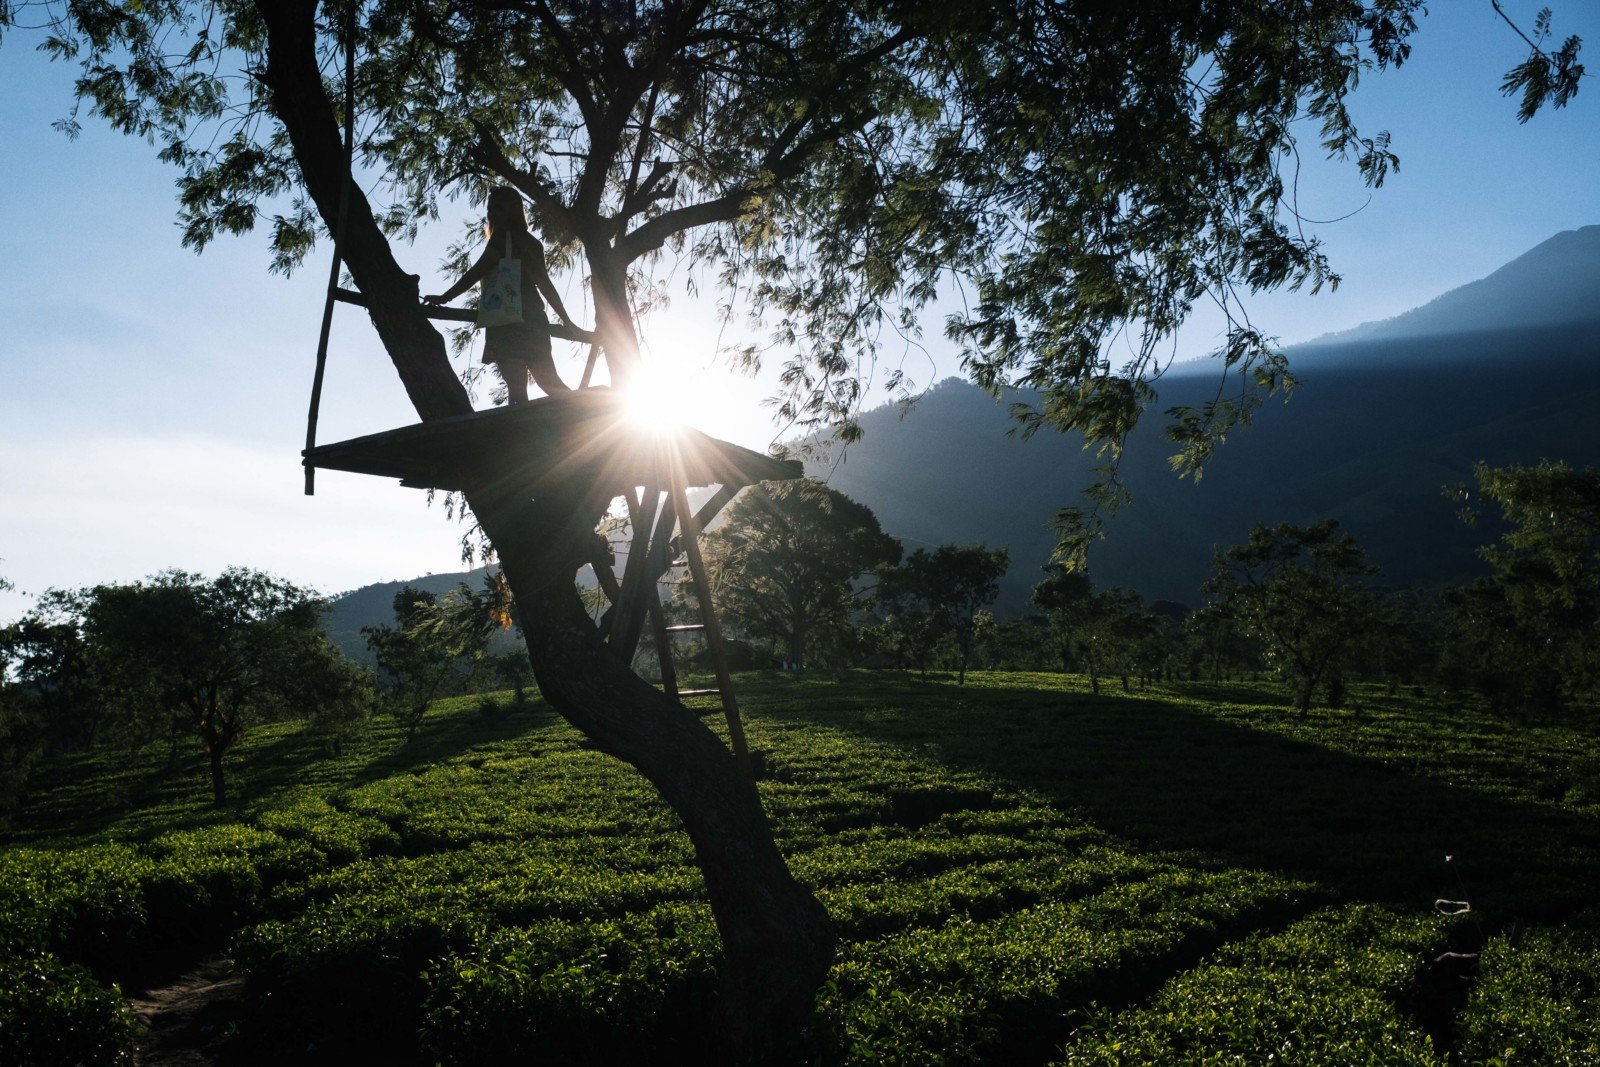
To create silhouettes, You can also a photographic style, that I have already described in my article about high-contrast photography. Both styles are very similar and both embrace the difference between bright and dark spots. If You want to learn more in-depth how You can shoot a picture like this, have a look at my guide about high-contrast photography.

Instead of shooting people directly, You can also use the most simple form of a silhouette – their shadow. Shadows are also a very simple way of shooting silhouettes. If You want to shoot shadows, the tips about the camera settings cannot really be applied here. Rather than underexposing heavily, You can simply use a normal exposure. Another difference is, that the light source is not behind the shadow, but rather in front of the “original” subject. So You can also shoot in the direct opposite direction to shoot the shadows and get their outlines, rather than photographing against the sun.
Conclusion on Silhouette Photography
Silhouettes convey some kind of mystic story. After leaving some details in the dark, the story becomes more interesting and the viewer is more engaged with the picture. This kind of photography style is also very easy to photograph with a few little tips and tricks.
Get out in the early morning, or the evening, find some open space with a pleasant background and wait for the person to enter the frame. Expose to the highlights and focus manually and You won’t have any problems to create silhouettes Yourself.
To uplift the pictures to the next level, make sure that the outlines are as much visible as possible. Keep the subject separated from the background and its environment and the outline itself will be more interesting.
So start having fun and capture silhouettes.


