


Do Your pictures look dull and uninspiring, without any extremes? Then High Contrast Photography could be a welcoming challenge for You to change Your personal style. High Contrast photographs utilize the natural light and are almost abstract in their appearance. Most of these pictures are in black&white, but they also work in color, although the colorful versions are more difficult.
Through high contrast photographs, You can learn how negative space affects the aesthetics of a picture and also learn more about how to handle extreme light. At the end of this article, You will know how to shoot high contrast photographs Yourself and how You can achieve these effects the easiest.
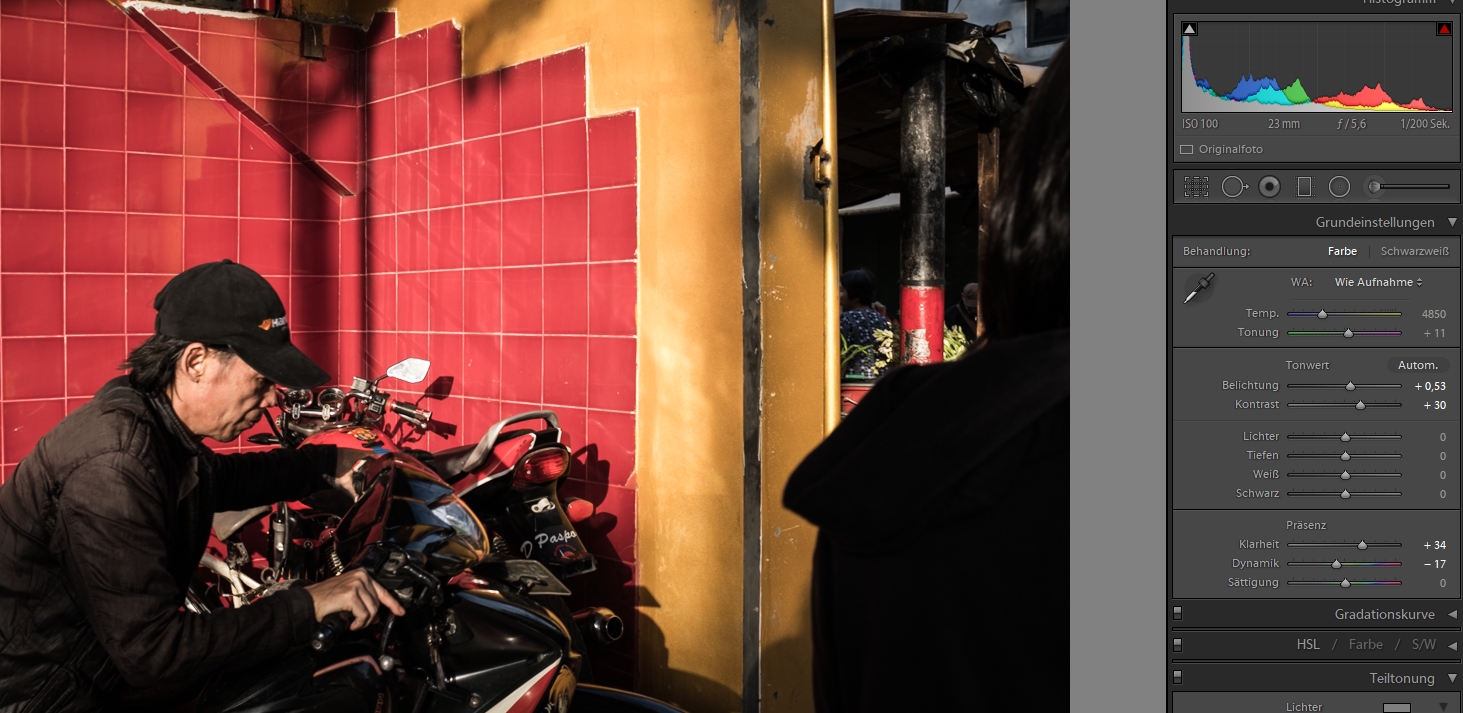
Although it does look like, that a lot of the contrast does come from post-processing in Lightroom, most of it does already happen in-camera and on the street. Without the right process, You can not achieve this effect afterward.
So instead of trying to save a photograph in post-production, get it right with this guide about high contrast photography.
Contrast Explained
At first, let me explain what high contrast in photography actually means.
The dictionary defines contrast as: “the relative difference between light and dark areas of a print or negative.”
High contrast means, that there is a very wide range of light and dark areas. Not only are is there a relatively wide gap between in bright or dark areas, High Contrast Photography usually means, that the light focuses very much on the bright and dark areas.
Thus the mid-tone range in the photograph is not very prominent.
When looking at a histogram, a normal photograph has shadows as well as highlights but covers everything and especially in the mid-range. There are not so many extremes and most are focused on the mid area of the histogram. In a high contrast photograph, the light tones are pushed from the middle to the sides creating more extremes.
To emphasize the characteristics of the histogram, have a look at this decreased contrast photograph and compare the histogram to the one with the higher contrast.

In a high contrast photo, You can see that the characteristics of the histogram are a little different.
The mid-one area is getting lower and pushed out to the sides, resulting in higher levels near the edges. This describes that the shadow and highlight areas are more prominent in the photograph, exactly what we want to achieve.
Requirements for High Contrast Photography
Although it does look very simple, creating a good high contrast photograph can be quite difficult. Especially when You live in an area like me, where bright sun is very rare.
Natural light can be very deceiving and when I tried to create my first high contrast street photographs, I thought that it would be enough to simply stand around a corner with the sun shining in the background. I found out, that the shadow created, for example by buildings, isn’t enough and that the contrast is very minimal.
To create a high contrast, I would avoid big open spaces and look for smaller alleys, or covered areas, like a bridge.
Then, of course, the second requirement besides the right spot is the sun.
Without the bright sun, You won’t be able to create a high contrast. Cloudy days are simply not made for this style and no amount of post-processing will help You in that. On those cloudy days, You can still scout for interesting spots, or do some test shots, but to get a real natural high contrast style, You need the sun as a partner.
Having bright available light is only one prerequisite for this style.
Shooting during the morning or the evening hours boosts the contrast even more. The lower angle of the sun casts longer shadows, which intensify the look of the picture more in the direction we are heading for.
The lower angle of the sun during the winter or autumn can also be used for the same effect.
In case You don’t want to rely on natural light, You can also try Your luck during the night. There You can look for street lamps or shop windows in use them to Your benefit.
To start things off, I would still recommend a bright sunny day as the best opportunity to create a high contrast.
Hight Contrast in Street Photography
All the theory in the world, won’t teach You how to create the high contrast effect properly.
Therefore I want to show some examples in Street Photography and explain how the pictures have been created.
As mentioned before, I usually like corners, bridges or smaller alleys to create high contrast photographs.
Under The Bridge
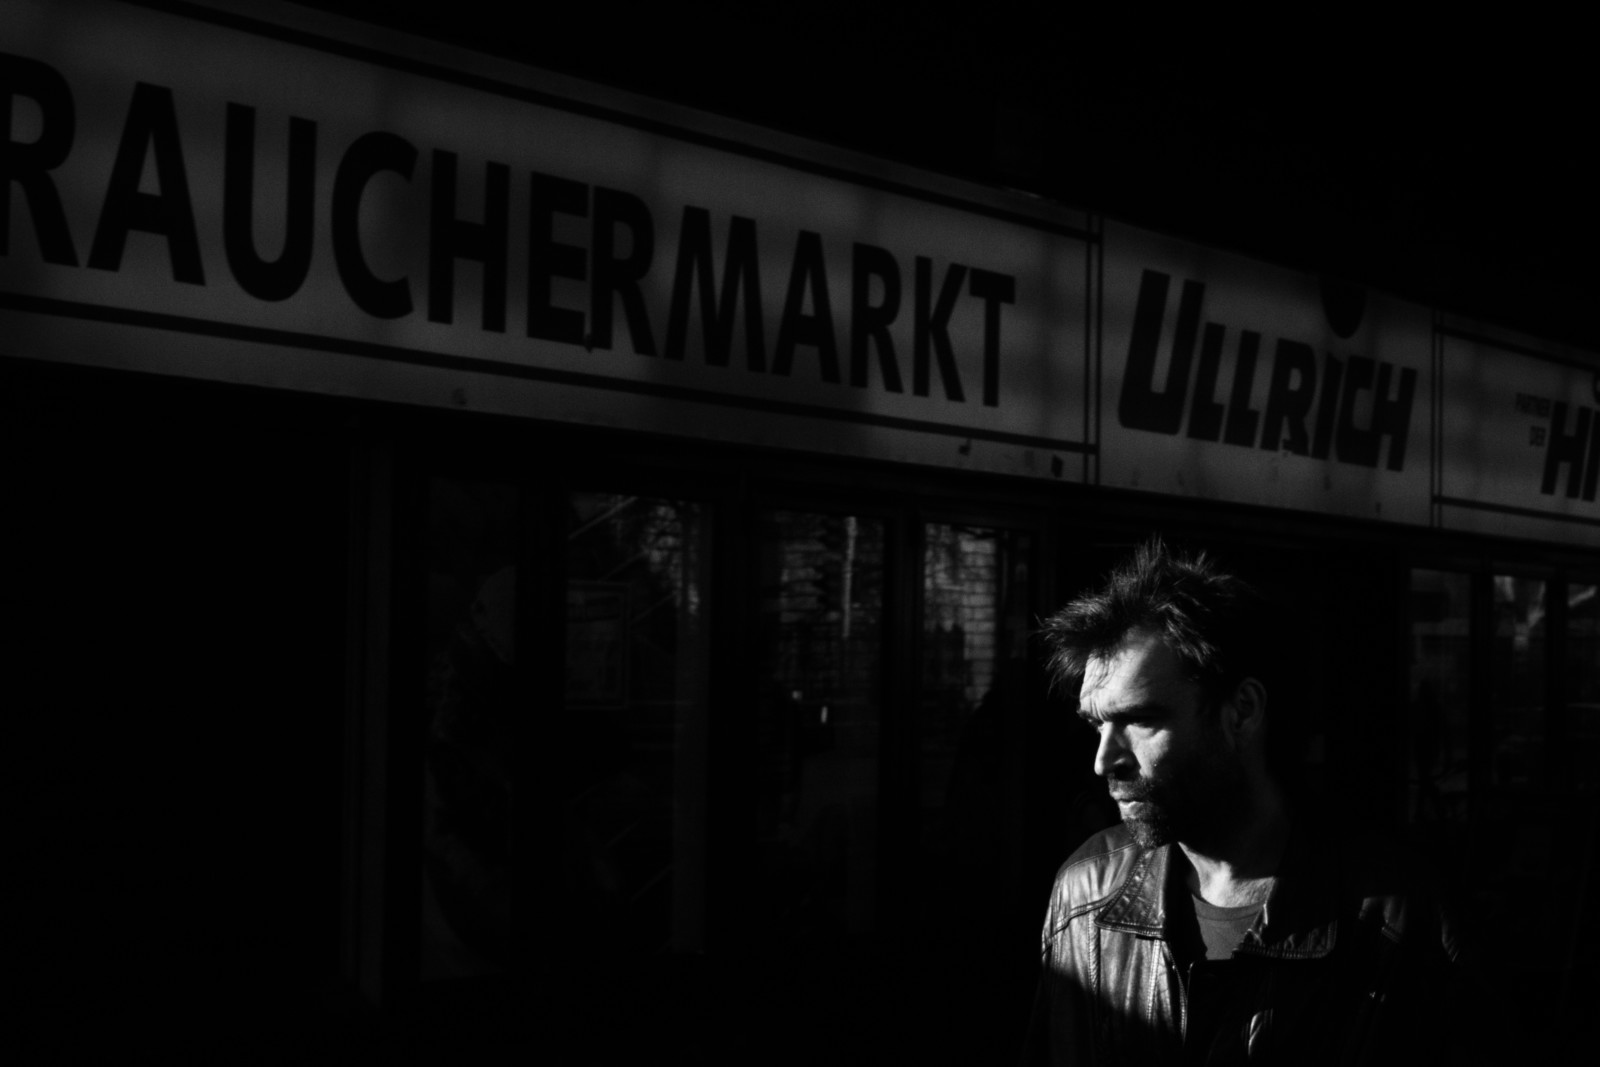
The first example has been shot under a bridge. In addition to the bridge blocking the direct sunlight from the top, there was also a fence to the side which negates the light to the side. The shadow on the jacket of the man walking under the bridge comes actually from the fence and not from the bridge.
As You can see, the contrast is very high and while there is a lot of darkness in the overall photograph, there are also some highlights.
So the photograph is not underexposed, which would create only dark areas, without leaving any highlights.
This is just one style for high contrast photographs, where You also look for very dark areas like a bridge. With this technique, You are able to isolate a single subject as if You were using a flash.
Small Alley
 Here is another example of a high contrast photograph, but this time shot in a small alley of a market in Saigon. In this picture, there are again a lot of areas that are pitch black and others might say, that the shadows are too dark, but in my opinion, this characteristic makes the photograph more appealing.
Combined with the hidden face of the person, there is a lot hidden, which leaves room for interpretation.
Small traditional markets can be ideal photography spots, as they leave some sunlight into the market, but are mostly hidden.
Entrances
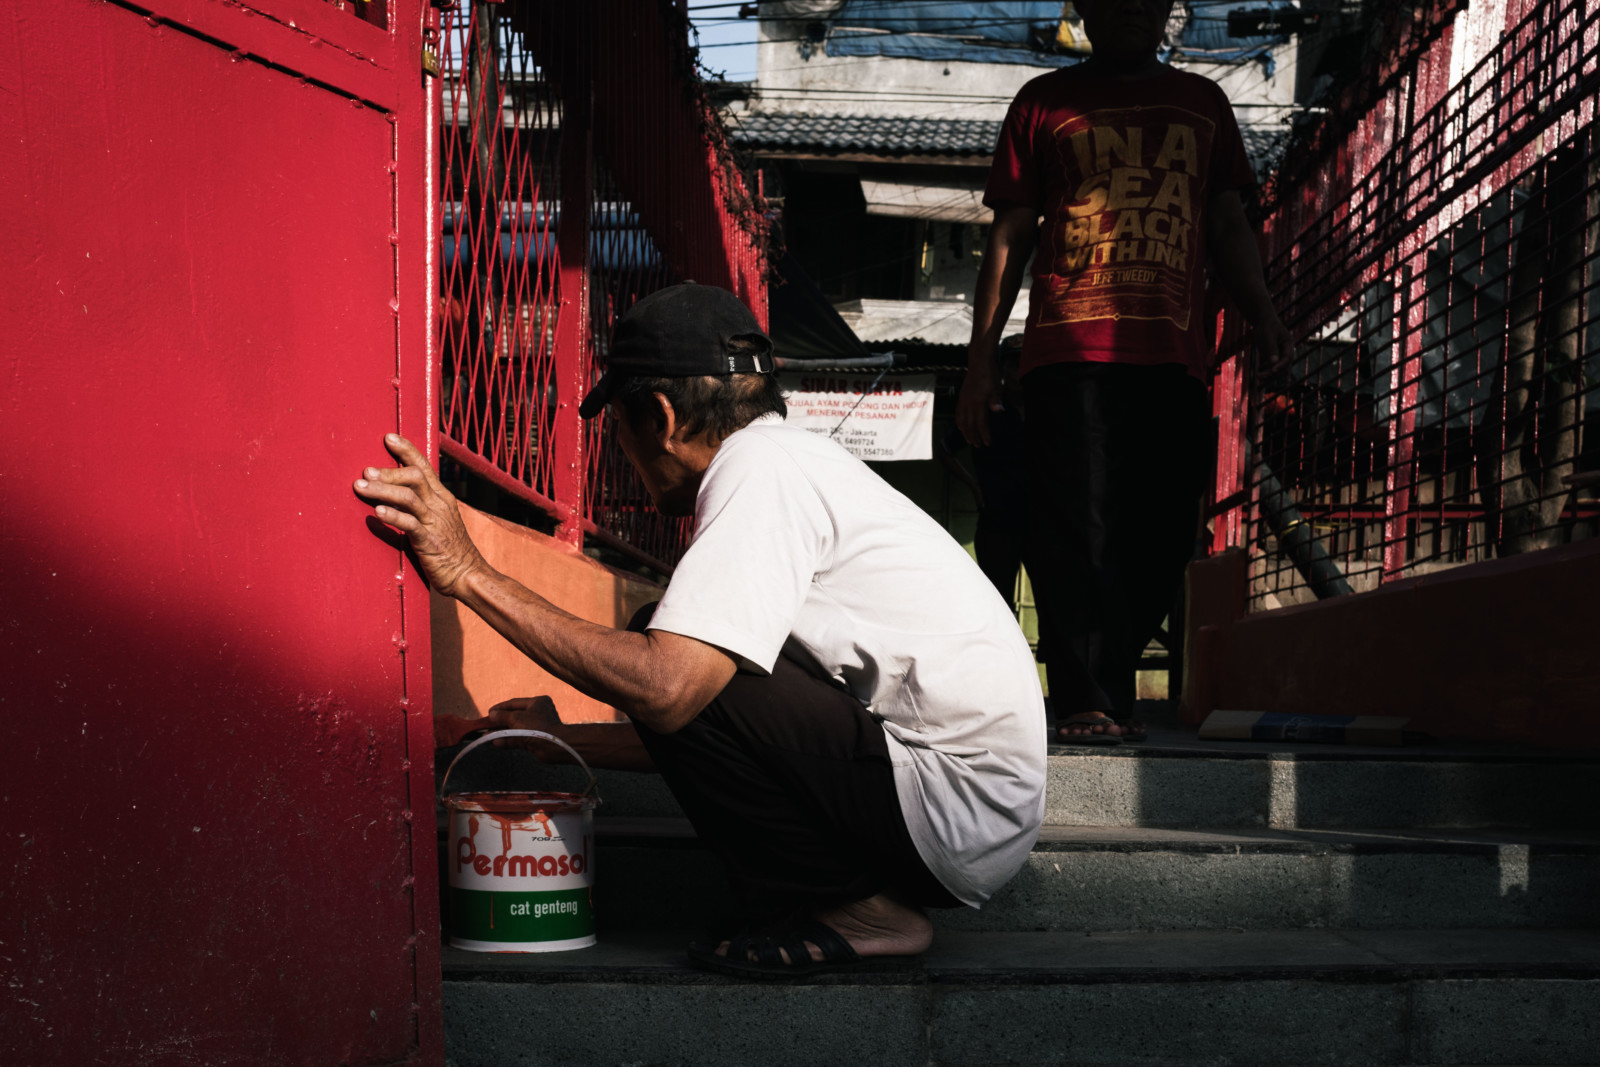
While the photographs before were mostly dark, here is a photograph where the light is more dominant than the darkness. You can see most of what happens in the photograph and only a few areas are hidden.
This picture has been taken in the doorway of a Buddhist temple and entrances like these are ideal spots for this style as well. You can have the sun behind You, stand in the direct way of the entrance and wait until people come along the way to enter the complex.
With bright striking colors, You can add additional highlights that will gain the attention of the viewer.
Against the Sun
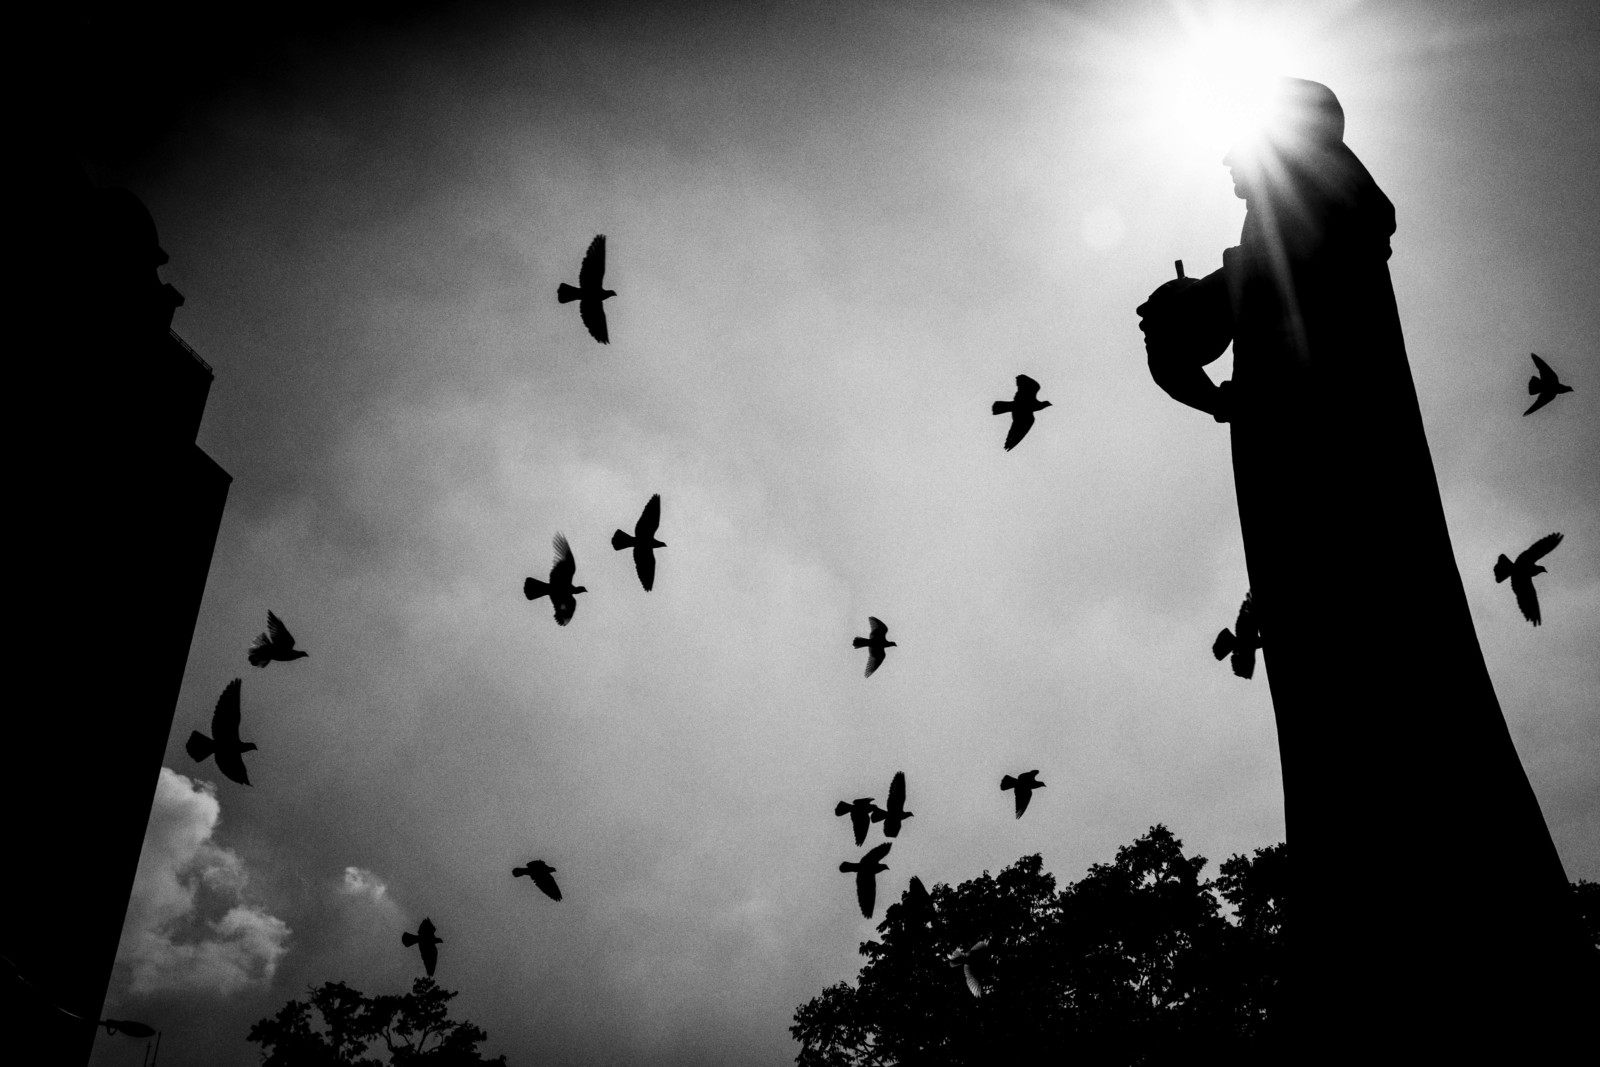
And here is a new example of the sun not being behind the camera, but in front.
To be fair, a lot of this photograph happens in post-processing, but to get an effect like this, You need to have good knowledge of Your camera and its dynamic range.
I will be getting more into detail about how You can create these shots without blowing the highlights out, but be assured that You need to either know how Your camera works or trust the automatic mode.
Photographing against the sun can be a good option when You have some details, that are happen to be in front of it. This can be buildings, although I would prefer something more dynamic.
In the past, those were, for example, a bungee jumper, or a balloon rising up in the sky.
Exposure Settings
While creating photographs that utilize a high contrast, You bring the technical specifications of Your camera to its limits.
Digital cameras have a more limited dynamic range than our eyes. Where our eyes are able to adapt to low light in the shadows, or bright light in the sun, the boundaries for digital sensors are more narrow.
This means, that there is a higher risk of blowing out highlights or losing information in the shadows.
Depending on the style You are going for, one or the other should be avoided with greater priority.
I have no problem with my photographs having no information in the shadows and prefer them, to have blown out highlights. As a tip, I would also recommend doing the same, because blown out highlights just look terrible and are very noticeable, whereas dark areas can be embedded in the image.
Those dark shadows serve as negative space which can open up the stories to more creative interpretations.
Metering Mode
In most cases, we Street Photographers use some sort of automatic mode, that leaves the metering to the camera. The automatic modes are in most cases accurate and already very advanced. They allow us to focus more on the photograph, than having to worry about the settings.
Yet, for creating a high contrast picture, the camera often decides to use settings that are disadvantageous for our goals.
For the metering, I recommend the spot metering.
Contrary to other metering modes, You are able to be more precise, which is required when we want to create a higher contrast.
Other modes, that include the averages of exposure won’t be terrible but aren’t really ideal for the highlights as well as the shadows.
So instead of taking multiple bad trade-offs, we ensure through our spot metering, that the highlights won’t be too bright.
Therefore we point our camera to the brightest spot in the picture and let the camera meter the exposure.
Exposure Compensation
Although we are metering to the highlights, no camera is safe of errors and more often than not, the highlights are too bright.
In this case, we are able to adjust the exposure as a whole.
Most cameras have the option of “Exposure Compensation” which influences the automatic modes of its choice.
For example, when setting the exposure compensation to -1, the camera will underexpose the picture by one stop. Sometimes, this one-stop can save us from blown out highlights.
When shooting directly against the sun, an exposure compensation of -3 can be needed. In more extreme situations, I would simply avoid any automatic mode altogether and underexpose the photograph manually.
Editing
My preference of underexposing images might seem a little extreme for You at first, but now in the post-processing, You will notice the benefit of this technique.
As I am underexposing my images in-camera, I often increase the exposure in the editing process. In this process, You are able to notice, that You can increase the exposure while keeping all the information in the highlights and avoiding clipping in bright areas.
Therefore I increase my exposure in Lightroom around 1/2 to 1 stop, to make up the exposure compensation beforehand.
Since we already have chosen ideal places for greater contrast, we don’t need to amp the contrast until its upper limit, but I find something between +30 to +50 to work just fine.
When doing color Street Photography, You have to make additional adjustments, because, with the added contrast, the colors will look very unnatural.
Desaturating the photograph works very well in combination with the added contrast. The colors will appear more natural while preserving the increased contrast.
Other than that, You can post-process the photograph just like any other style.
With these tips, You should be able to create some high contrast photography Yourself. Hopefully, the sun is on Your side and helps You out on this task.


