


In the last article, I claimed that the staged pictures of Steve McCurry don’t have any educational value because they are artificial and scripted. While the content themselves doesn’t have much to learn about, there is still a lesson behind his photo manipulation. If a photographer of his reputation composites images in Photoshop, he must have a good reason to do so. The reason he manipulated some of his photos is often, that he tried to distinguish the subjects from the background. In photo composition, this is called: figure to ground and in this article, I want to explain why this aspect of photography is so important, that someone like Steve McCurry used Photoshop to alter his pictures just to create a better Figure to Ground in Photography.
Figure to Ground – a Description
The figure to ground in Photography describes the contrast between the foreground and the background. When subjects are separated and clearly visible it is easier for the viewer to comprehend the scene. The way books have mostly white pages with black letters, we as photographers can arrange a scene that it becomes easier to observe.
Examples of Figure To Ground
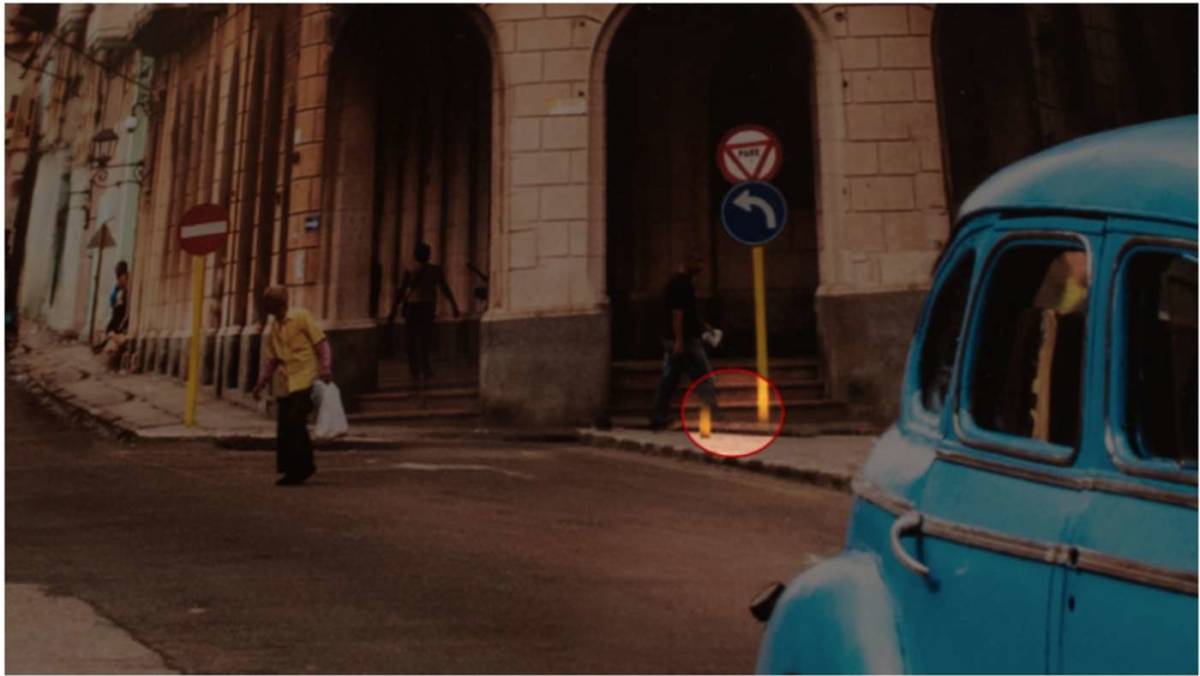
This is the first example of Steve McCurry’s way of distinguishing the background with the subject through figure to ground. In this case, we have a man walking in front of the yellow pole, which should be avoided because we have two very prominent objects that overlap. To rescue his image he, or his employee, tried to compose the picture in post-production by placing the man further to left. In addition to the improved figure to ground, we now have a more visible triangle between the two street signs.


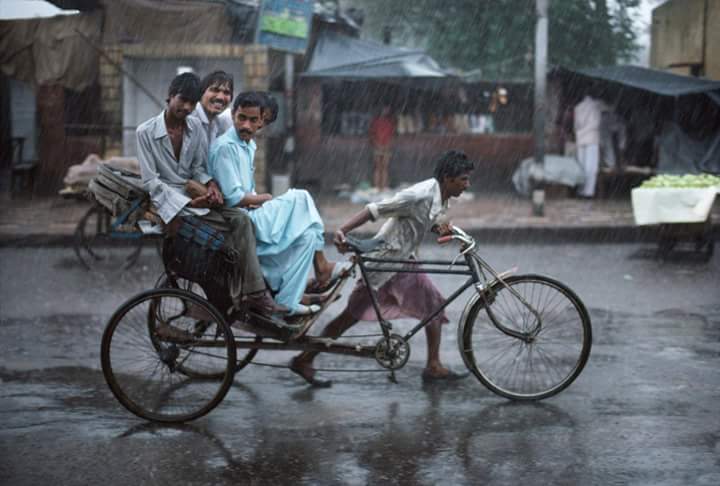
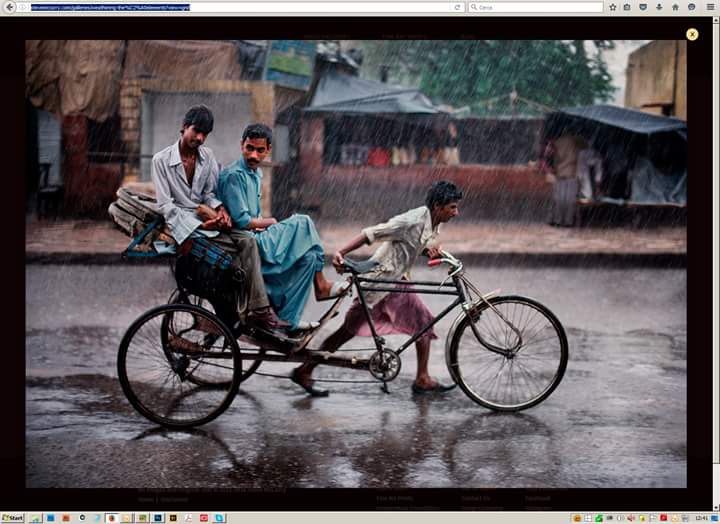
The picture on the top is the original, whereas the image on the bottom is the manipulated version. Once again we deal with people as main subjects and see them overlapping. Having the arms cutting across the bodies isn’t a big deal and makes the picture more natural and dynamic. What is more impacting the picture in a negative way is the boy in the background making it difficult for the young man in front of him to distinguish himself from the background. Both blend into each other which lead to the decision to erase him in the post-processing.
As we can see in the after-picture the image profits from the subjects being more distinguishable and we have natural lines from the background to the foreground that are easy to follow.
Another Example of McCurry’s Figure to Ground
In addition to the removal of persons, the background, in general, has been processed to look a lot cleaner. Behind the backs of the persons, a tricycle got deleted and the store on the right side looks a lot tidier. This has been done to be less distracting and with the post-processing, the subjects in the foreground don’t overlap. The figure to ground has been improved tremendously and the visual appeal rises. Once again it shows how important the background is and that every subject should be standing out without meshing together as a big mess.
Improving the Figure To Ground without Photoshop
Less is more – If you are trying to photograph a lot of subjects it is inevitable that they will overlap and some are more visible than others, creating a rather chaotic and not so well composed scene. If you want to shoot candid it is easier to focus on fewer subjects. As a rule of thumb 3, 5 or 7 persons are usually an amount you can handle and work the scene to get a shot that is satisfying.
Pay attention to the background – There is a reason why a lot of Street Photographers while walking on the street, shoot with the street in their back and the terrace front ahead of them. A background of building walls is easier to manage than an open street. If you are shooting in an open place, where you have no natural boundaries that you can use as easy backdrops, you can either open your aperture to narrow the depth of field or shoot closer so that the subject fills the frame completely with only little of the background remaining visible.
Shoot against the sun – This is more an exercise than a tip how you should compose every one of your photos, but the sun is the brightest light source we can work with. By placing your subject between your camera and the sun you create silhouettes with a high natural contrast. If the contour of your subject is still clearly visible you have a good figure-to-ground ratio and separated them well. If the person blends in with the dark background or objects in front of them, this is something you might have handled better in hindsight.
Stay Curious
Sebastian Jacobitz


