


The aperture is one-third of the holy trinity that is described in the exposure triangle as a factor to influence the amount of light that hits the sensor. As such, understanding the aperture is important in becoming a better photographer and leaving the automatic modes. If You want to create images that truly represent Your vision, then You need to understand how the aperture works.
In this article, I will explain how the aperture works, what the meaning of the different f-stops is and how the aperture works best for Street Photography.
What is Aperture
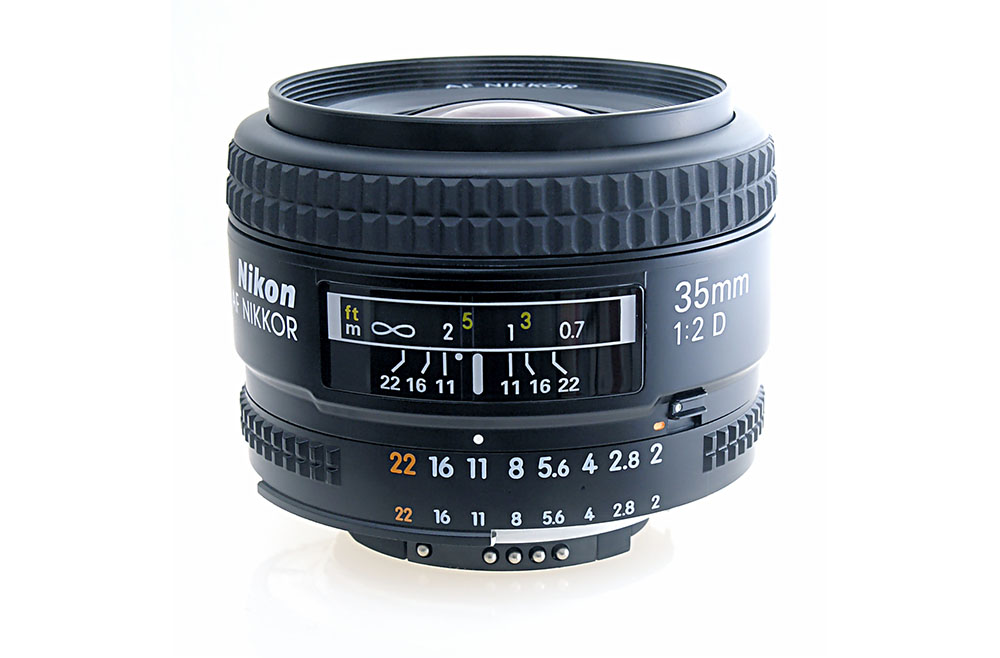
The aperture is a technical part of the lens and therefore not identical for every lens. Depending on the manufacturer and its design, the aperture can look a little bit different and have characteristics. Nonetheless, there are some standards of aperture design, for example, the f-stops that I will describe in the next headline.
With the aperture, a photographer can increase or decrease the amount of light that hits the sensor for a set duration (by the shutter speed). The aperture can be imagined like an opening at the front end of the lens. The more open the lens is, the more light can enter, which results in a brighter picture. Closing the aperture has the contrary effect and does decrease the brightness of a picture.
Furthermore, the aperture has also an influence when it comes to the depth of field and how sharp an image will look like. This characteristic is also described further in this article in the subheading of the depth of field.
The F-Stops explained
Describing the aperture as “open” or “not so open” isn’t very specific. But photography and the exposure are a craft where we need to work very precisely in order to get well-exposed images and the photographs we desire.
Therefore, there is an international standard that describes the “openness” of the aperture in f-stops.
The F-Stops are described for example as f/8 or f/2.8.
As You might already assume, the f-stop is a ratio. To be more specific, the ratio of the focal length and the diameter of the entrance pupil, where the f describes the focal length.
As an example, a 50mm focal length at f/2 has an entrance pupil diameter of 25mm.
In our everyday photography, we don’t need to have that technical background, but I guess it is good to know where the number we are working with on a daily basis are coming from.
More relevant for our work is the fact, that a lens at f/2 lets a considerable amount more light enter, than a lens at f/8.
But how much more exactly?
The answer to this question is relevant when You are changing settings but want to keep the same exposure.
For Shutter speed, the answer is easy as the exposure steps are linear. An exposure at 1/50s lets in double the amount of light as 1/100s.
For the aperture, the steps aren’t linear. We can’t say f/8 lets in double the amount of light as f/16. The amount that enters the lens and hits the sensor is described by a circular area and the area and a square-function.
In order to know which aperture setting lets in exactly double the amount of light, is best by memorizing the single f-stops.
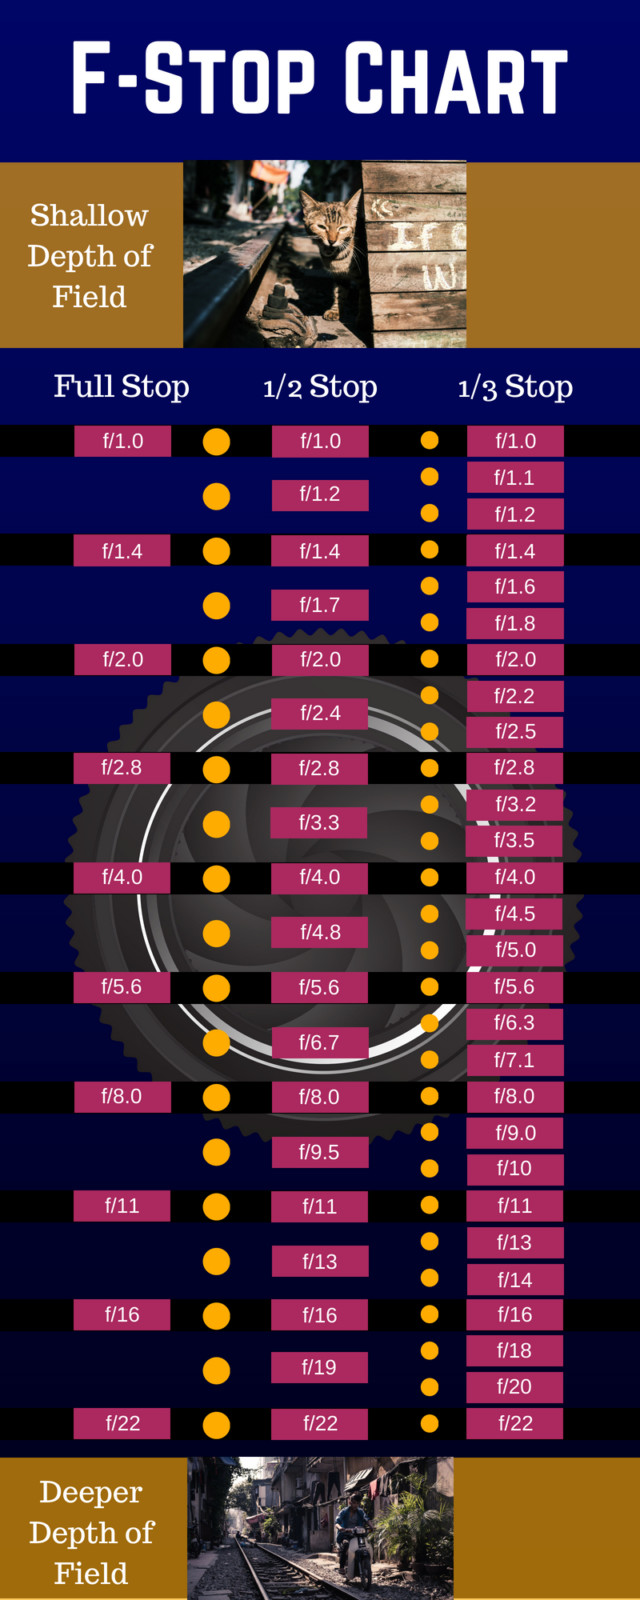
Following is a chart, that shows the f-stops.
F-Stop Chart
Below is the overview showing the full – 1/2 & 1/3 stops. Realistically, You would only to memorize the Full Stops that are in Your usual range that You use. The other stops are nice to know but aren’t needed very often.
Both pictures in this chart show the difference between a shallow & deep depth of field that depends on the f-stop.
Depth of Field
To mention that the aperture is responsible for the exposure is only one half of the truth of its influence on the photographs. Besides the exposure, the aperture also increases or decreases the depth of field. You probably have heard the term “Bokeh” before, which describes the out of focus area in the background. The Bokeh can be created by narrowing down the depth of field and decreasing the area that is sharp and in-focus.
The Depth of field is the definition of area that is sharp to the eye. Depending on the used f-stop, this area increases or decreases. The more open the camera and aperture is, the more shallow is the depth of field.
With a shallow depth of field, You have to focus more accurate and have a greater risk of missing the focus. To avoid photographs where the focus doesn’t exactly hits where You want it to be, You can close down the aperture of Your camera to increase the depth of field.
For a more detailed explanation of the depth of field in context with the aperture and focusing, You can also read my article on zone-focusing.

Setting The F-Stop
So far I have talked about the f-stop, but how do we actually set the f-stop?
Although it sounds trivial, it depends on the manufacturer, the camera and the lens where You can set the f-stop.
When I did start photography, I went out for the first few days and didn’t even know where I could change the settings, so if You haven’t figured it out yet, here are a few ways to change the f-stop on Your camera.
On my Canon 1100D, I am able to adjust the f-stop via the settings and only there. As far as I know, the buttons cannot be configured to change the f-stop and working with my very basic zoom-kit lens didn’t make life easier.
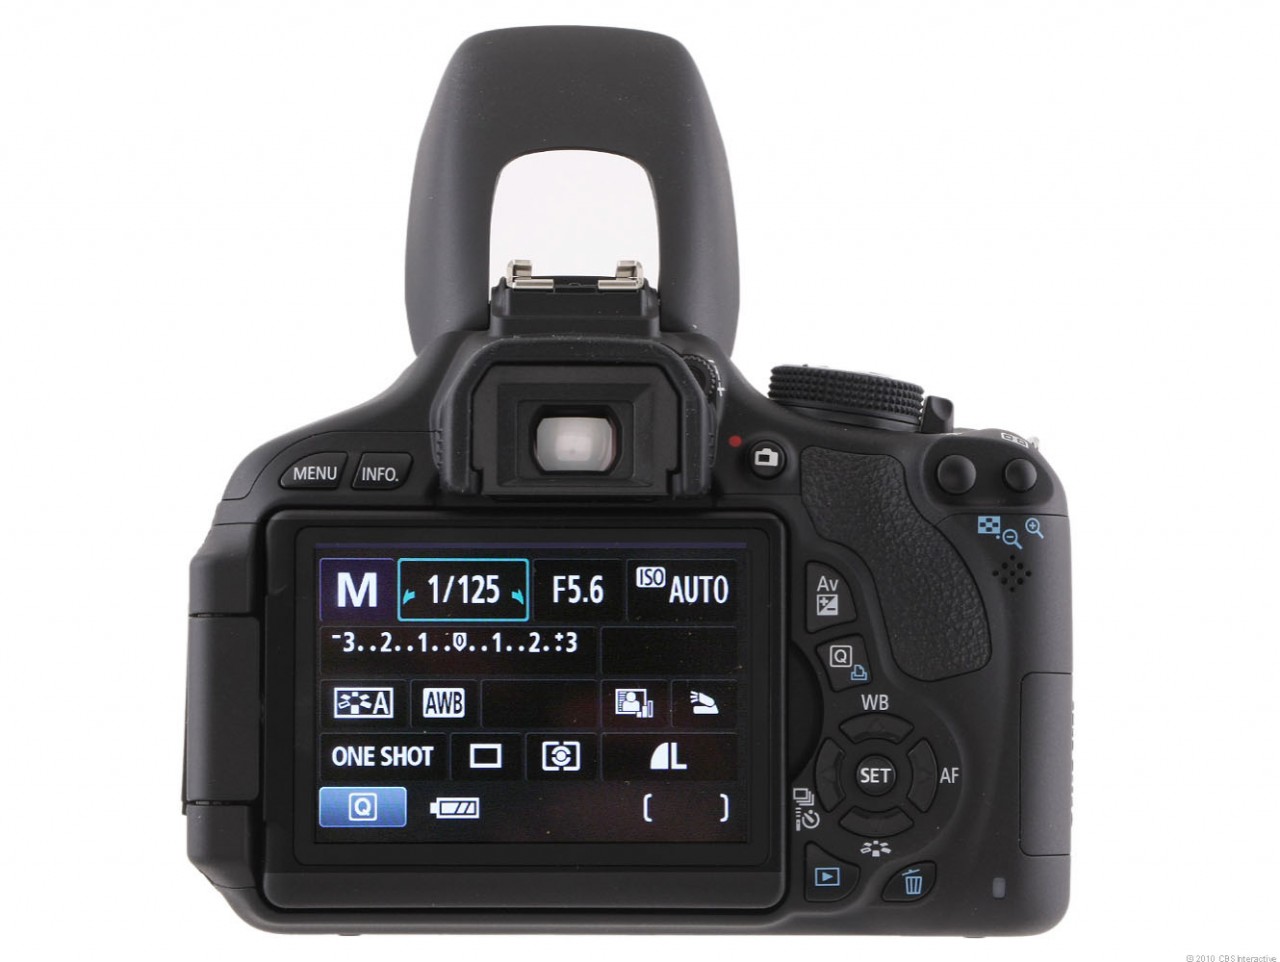
To my confusion, the f-stop varied depending on the focal length I used. Now I know that this often the case when using zoom lenses and I will describe zoom lenses and the aperture further below.
The Ricoh GR II is a lot easier to handle and the f-stop can be adjusted by one of the wheels on the right-hand side next to the shutter button. The Ricoh has also the advantage, that You can see the depth of field in real-time and can directly see how it varies upon changing the aperture.
My FujiX100F presents a third way to change the aperture, which is by twisting the wheel on the lens directly. Most lenses that have two wheels – one for the focus and one for the aperture – feature a small handle for the aperture wheel, so You can’t confuse both.
Maximum Aperture
When You are interested in buying a new photography lens, You are seeing a lot of descriptions for lenses looking like this “Canon EF 50mm 1:1.8 STM”. In this short description of the lens, there are already a lot of information and one of it is the maximum aperture of this lens.

Maybe You would think that it shouldn’t be any problem to have a lens where the aperture can be fully open, but in fact, the technical design is very complex and therefore most camera lenses offer a maxium aperture of f/1.4 or f/1.8.
In the description of the Canon above You can see that the maximum aperture is at f/1.8. This means that You can not use an aperture of f/1.4, which may limit Your ability to create a very shallow depth of field.
The very same lens is also available with an aperture of f/1.4 but comes at more than double the cost.
You have to consider for Yourself if You really need a lens that features an aperture of f/1.4.
Genres that benefit from a better maximum aperture are for example portrait photography or genres that are often done in darker environments. But even when it comes to portrait photography, I would argue that f/1.8 is already great for a more shallow depth of field and the step to f/1.4 doesn’t really make a difference. So when purchasing a new lens, rather than eyeballing only on the aperture, take a look at the overall quality and think for Yourself if it does justify the increased costs.
As some added information, there are also lenses available that come with a maximum f-stop of f/0,85. So f/1 isn’t a natural limit as one might think, but You can actually go further below.
Aperture on Zoom Lenses
The aforementioned were stated for prime lenses. The design of zoom lenses is a lot more difficult and involves multiple moving parts which do limit the ability for a more open maximum aperture.
Especially on entry-level kit lenses, You will often see something like 1:3.5-5.6. At first, this was very confusing for me as well when I tried to figure out how my camera worked and I wanted to have a grasp at all of its functions.
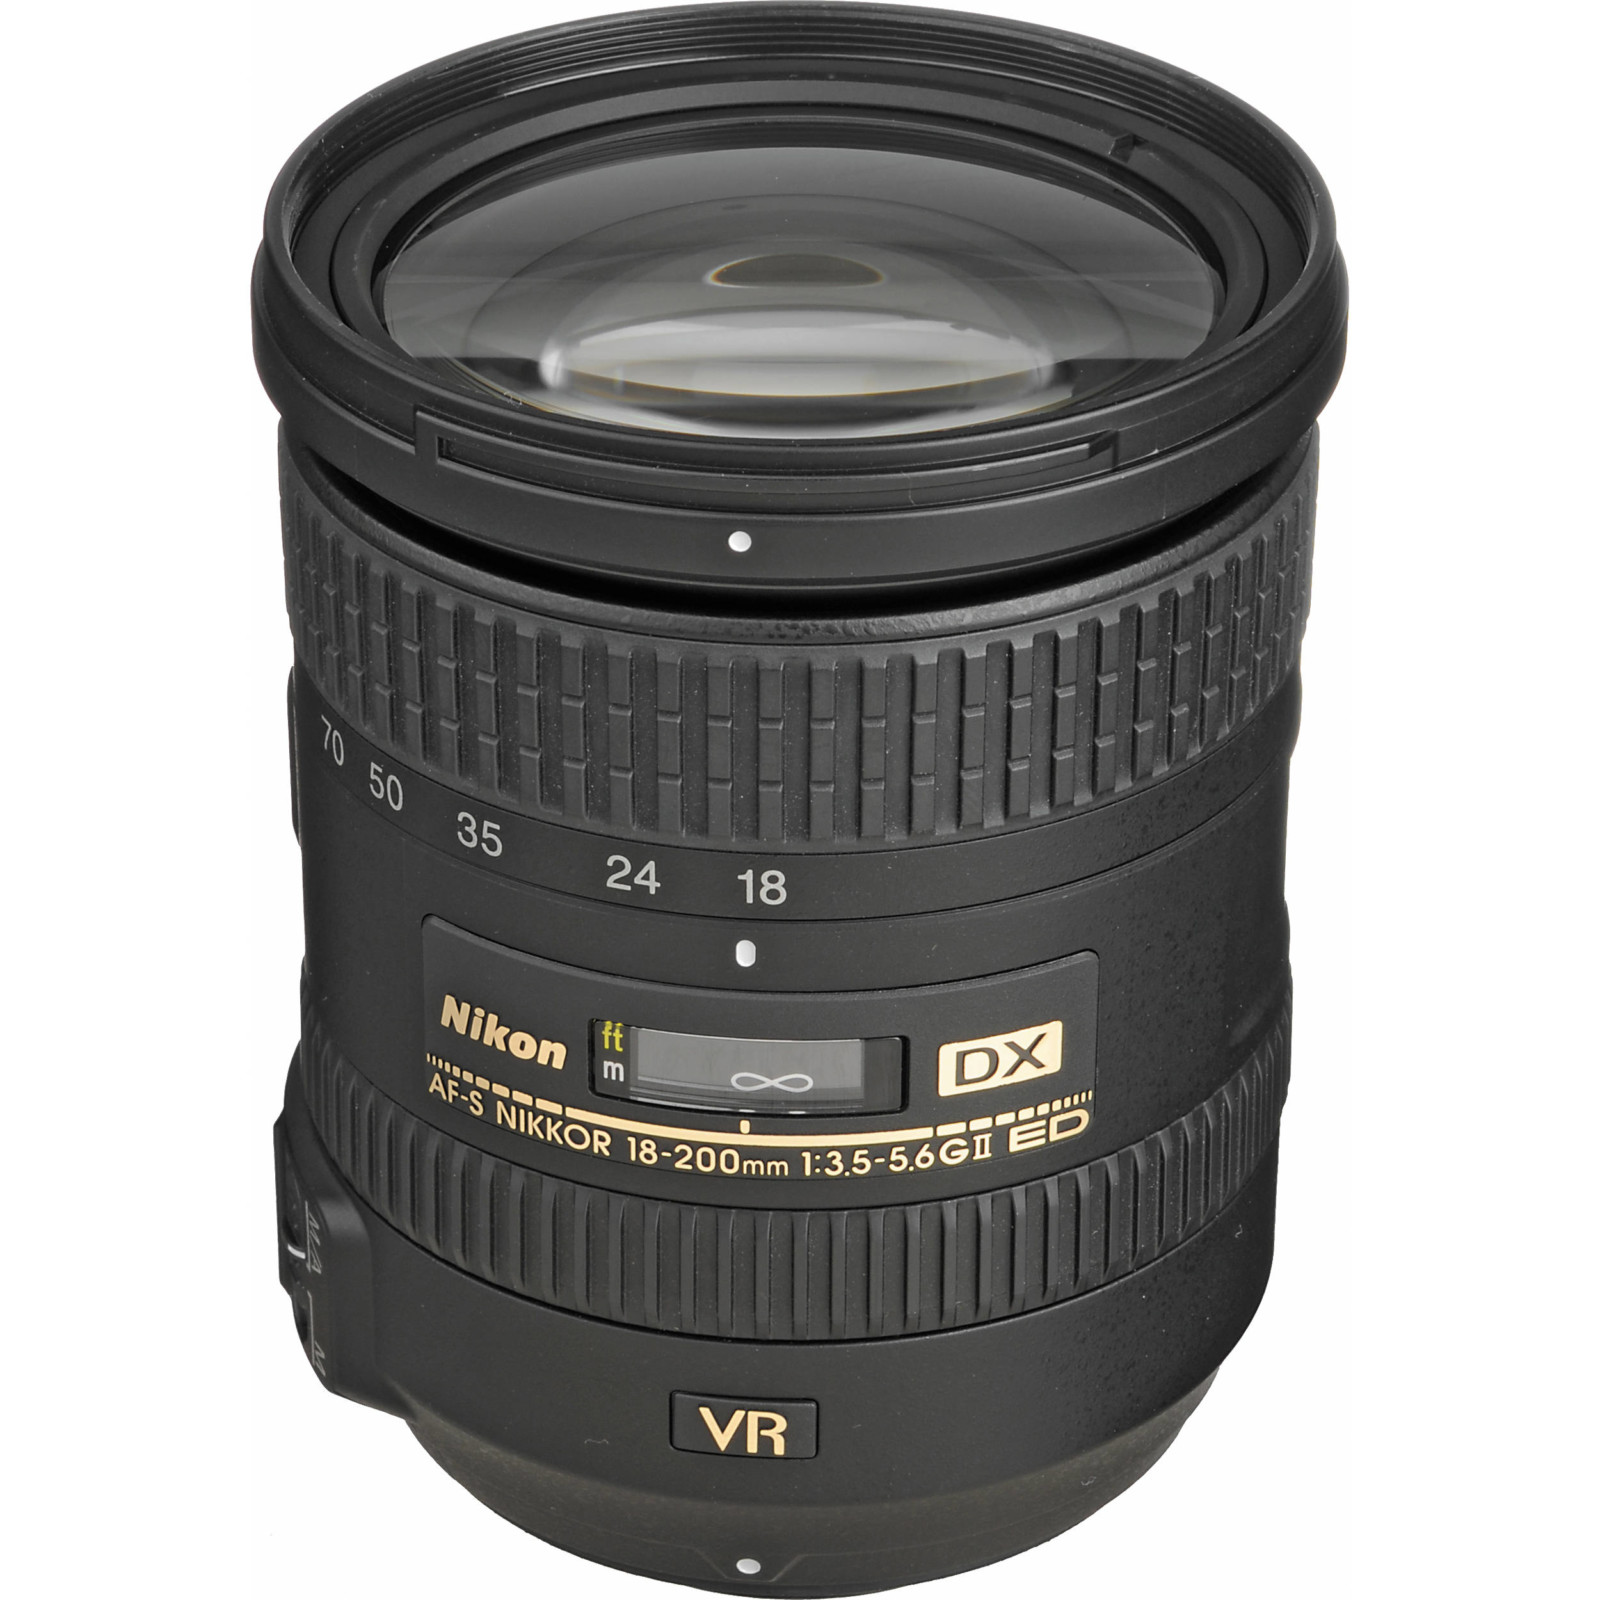
Then I learned that for zoom lenses the f-stop varies, depending on the focal length You are using.
As an example, the 18-55 kit lens from Canon as the 1:3.5-5.6 aperture. This means, at 18mm the maximum aperture is f/3.5 while going all the way down to f/5.6 when using the focal length of 55mm.
There are also zoom lenses available that come with a steady maximum aperture along all of its focal length. For example, the Sigma 70-200mm features a maximum aperture of f/2.8. Keep in mind though that these lenses are much more expensive and weigh a lot more than the standard entry level kit lens.
The Aperture in Street Photography
Since I am a Street Photographer, I also want to demonstrate how a different f-stop can change the scene, or which influence the aperture has in Street Photography.
First, I want to mention that I mostly use an aperture of around f/5.6 to f/11 for my day-to-day Street Photography at my FujiX100F. At this setting, I get a good amount of light, the pictures turn out well exposed and the depth of field is not too shallow.
In Street Photography, I want to show the actions and person in context to their environment, therefore I am not using the maximum aperture of f/2 very often and instead keep my f-stop in the range of f/8.
You can also have a look at my camera settings that I use for Street Photography.
However, there are a few exceptions where I like to play with a much more open aperture and used the maximum aperture of my X100F.
During my travel through Southeast Asia, I liked to experiment with a more shallow depth of field and changed the style a little bit.
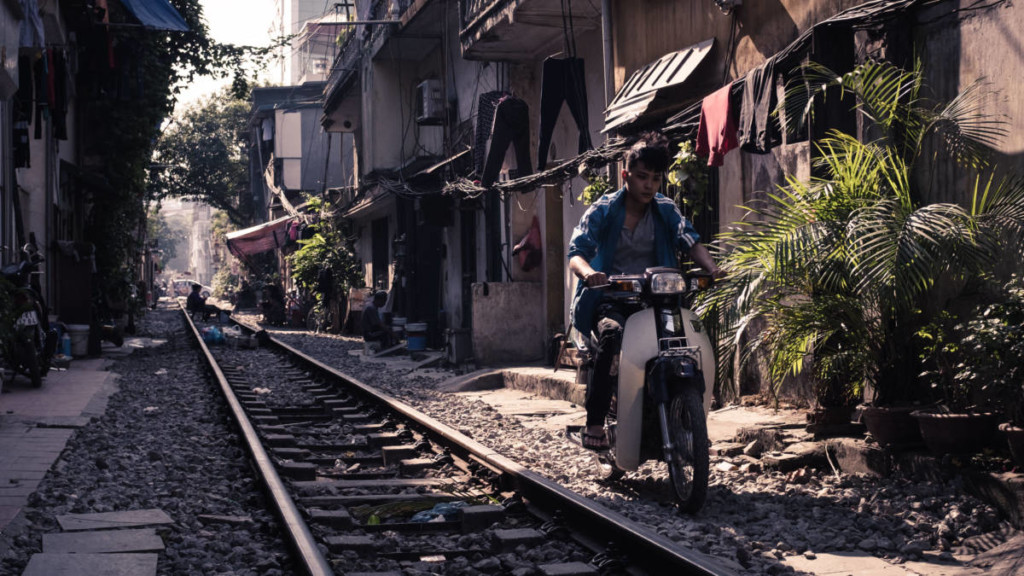
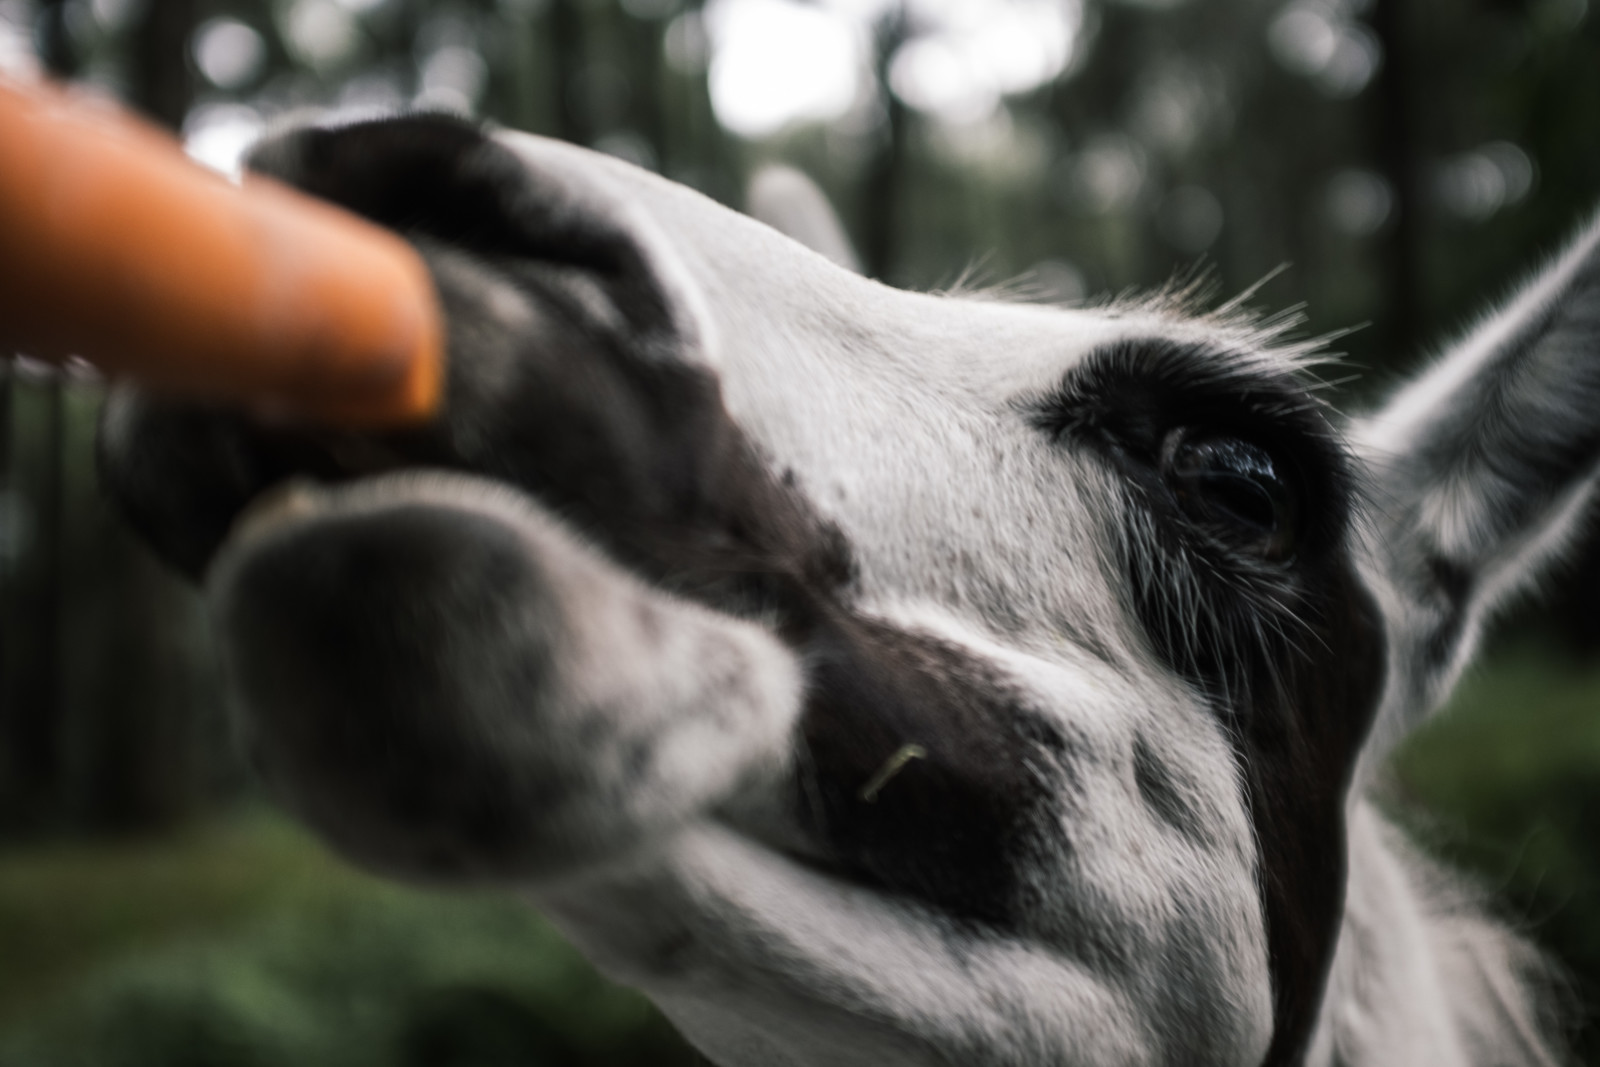
Below You can see both results of a picture of a cat with an open aperture and very short focusing distance, and the very same railroad track taken with a more conservative aperture and a far focusing distance.

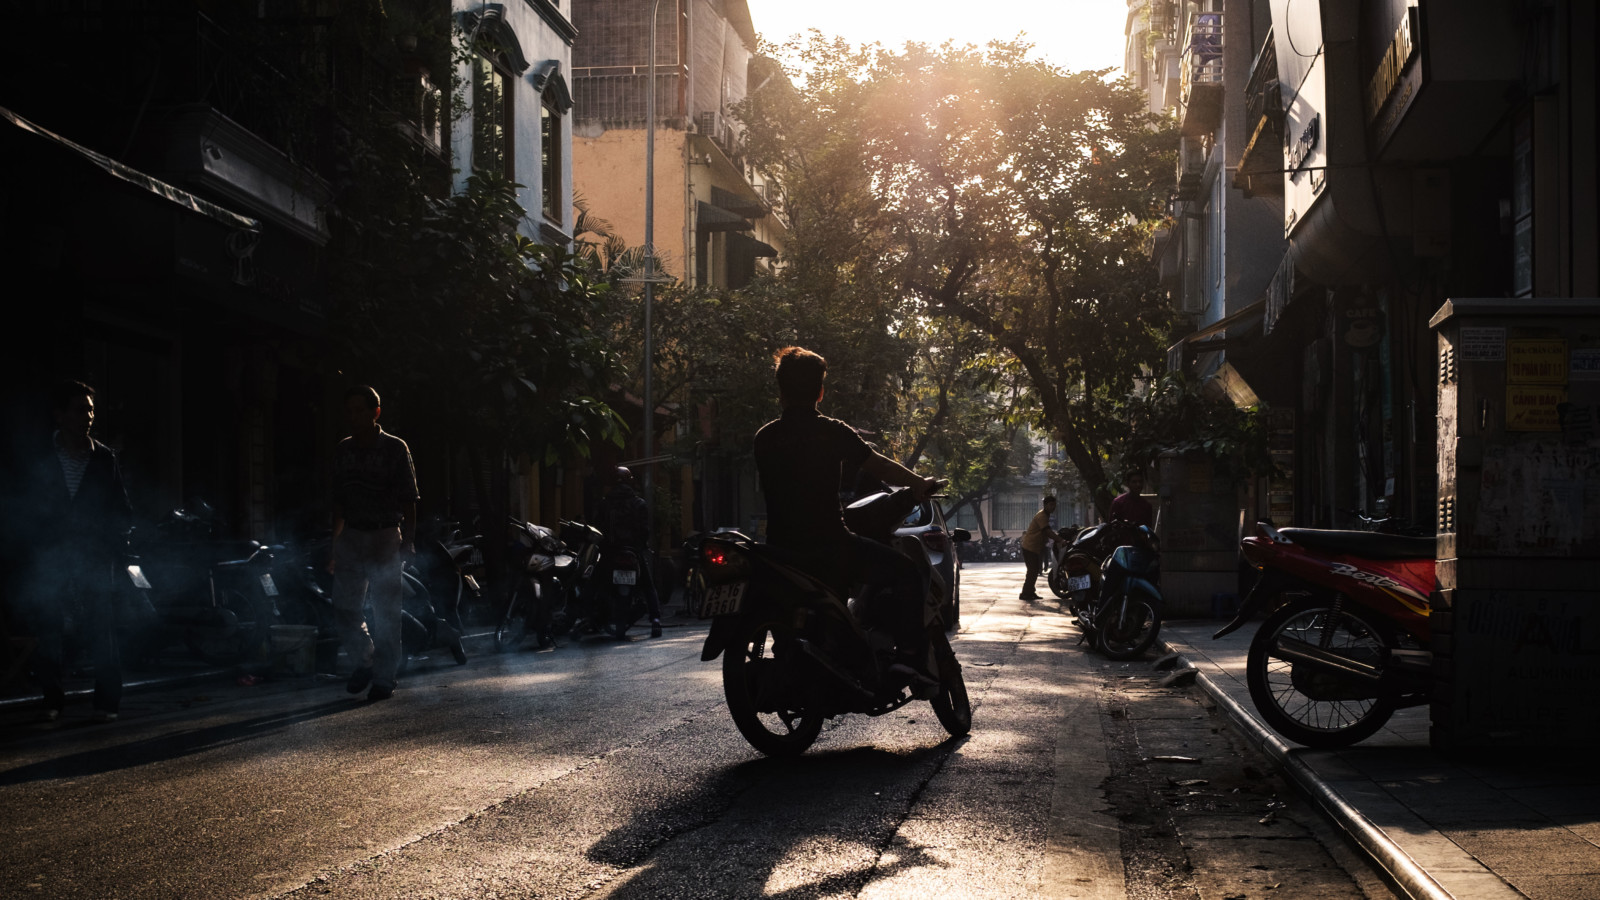
As You can see, when taking a picture with at a high f-stop such as f/2 in this picture, the background will be blurred out and only a tiny fraction of the picture will in focus.
On the other hand, if I want to show more of the scenery and where the picture has been taken, then the f-stop of f/8 does allow me to do so.
The Aperture in other Photography Genres
I have already slightly touched the aperture for portrait photography, but I also want to give a rule of thumbs when it comes to other genres than Street Photography.
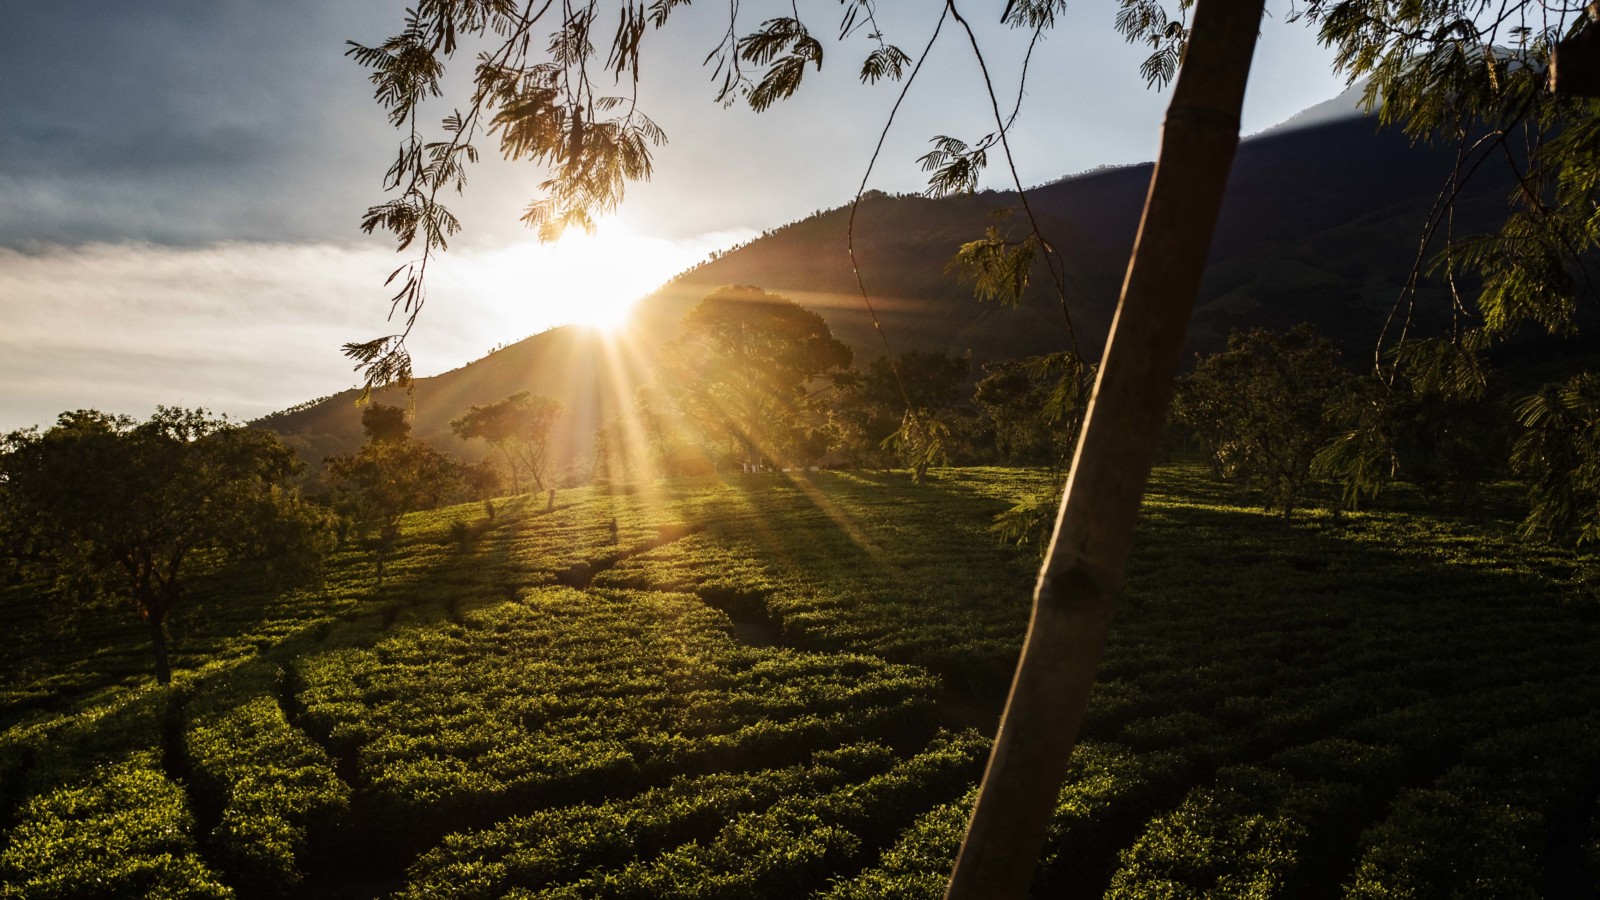
Landscape Photography
F/11 to F/22
When photographing landscapes, we usually want to have a sharp picture from the foreground to the middle ground. Lenses have their “sweet spot” at around f/11 where they reach their best quality in terms of sharpness. This, however, can also depend on the lens You are using, so it is best You look at reviews of the lens as well.
Another advantage of a low f-stop in landscape photography is that You are able to soften the motion of water for example without using an ND-filter. So if You want to have a slow shutter speed in combination with a tripod and don’t have an ND-Filter at hand, setting the aperture to f/22 is the way to go.
Portrait Photography
F/2.8 to F/8
Which f-stop You want to use for Your portrait photography depends heavily on the style You are going for. Using the maximum aperture is not really recommended since the overall sharpness and image quality does fall off when the lens is brought to this limitation. If You are using a longer focal length like 85mm for portraits, then the aperture doesn’t even need to be lower than f/5.6 to create some bokeh but retaining the sharpness of the lens.
Night Time Photography
F/1.8 to F/2.8
An area where we really benefit from a better maximum aperture is night time photography. During the night we want to try to capture as much available light as possible and therefore should use the maximum aperture of any given lens. The sharpness might not be perfect, but the alternative would be to increase the ISO, which in return increases the digital noise.


